
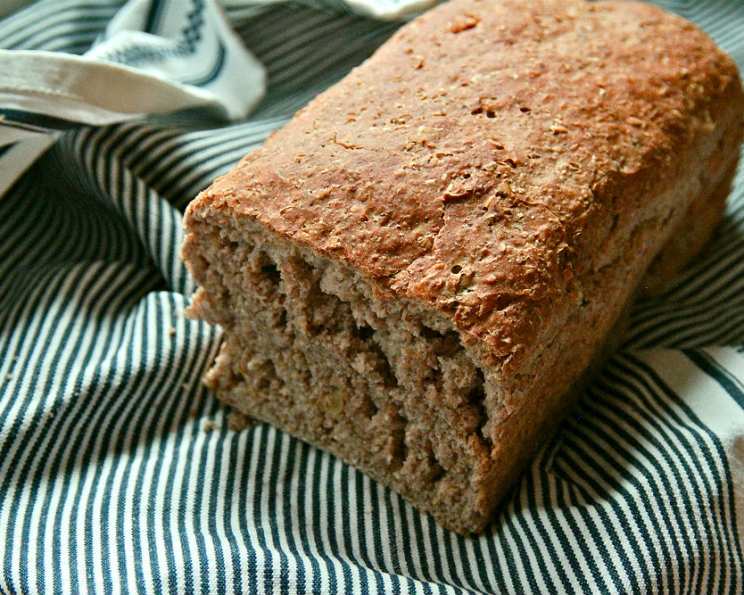
Honey Walnut Bread: A Taste of Home
There’s nothing quite like the scent of freshly baked bread wafting through the house. It’s a memory trigger, instantly transporting me back to my grandmother’s kitchen. I remember standing on a stool, mesmerized as she kneaded dough with practiced ease, her hands dusted with flour. Her honey walnut bread was legendary – a warm, comforting hug in every slice, and this recipe aims to capture that same magic.
Recipe Overview
- Prep Time: 1 hour 10 minutes
- Cook Time: 20 minutes
- Total Time: 2 hours 20 minutes
- Yields: 4 loaves
- Serves: 16
- Dietary Type: Vegetarian
Ingredients
- 30 g fresh yeast
- 4 cups lukewarm water
- 1⁄2 cup vegetable oil
- 3 tablespoons honey
- 1 teaspoon salt
- 1 cup walnuts
- 6 -7 cups all-purpose flour
- 1 -2 cups whole wheat flour
- 1 cup rye flour
- 1 cup rolled oats
Equipment Needed
- Stand mixer (optional, but highly recommended)
- Large mixing bowl
- Measuring cups and spoons
- Four bread pans
- Clean kitchen towel
- Lightly floured surface
Instructions
- Begin by activating the fresh yeast. Crumble the yeast and dissolve it in one cup of the lukewarm water. Temperature is crucial here! The water should be warm to the touch, like bathwater. If it’s too cold, the bread won’t rise properly; if it’s too hot, you’ll kill the yeast.
- Once the yeast is completely dissolved (it should be foamy after a few minutes), add the remaining 3 cups of water, the honey, vegetable oil, salt, and walnuts to the mixture. Stir to combine.
- Now for the flour. If you have a stand mixer, this is where it becomes invaluable. If not, get ready for a good arm workout! With the mixer running on low speed, gradually add 4 cups of the all-purpose flour, followed by the whole wheat flour, rye flour, and rolled oats.
- Continue to add more all-purpose flour, a little at a time, until the dough starts to pull away from the sides of the bowl. Be cautious not to add too much flour; the dough should still be quite sticky. A slightly sticky dough results in a softer, more tender loaf.
- Once the dough has come together, increase the mixer speed to medium and let it knead for about 10 minutes. This develops the gluten, giving the bread its structure. If kneading by hand, turn the dough out onto a lightly floured surface and knead for 12-15 minutes.
- Place the dough in a lightly oiled bowl, turning to coat. Cover the bowl with a clean kitchen towel and let it rise in a warm place until it has doubled in size, about 45 minutes to an hour. The warmer the environment, the faster it will rise.
- After the first rise, punch the dough down to release the air. Let it rest for an additional 10 minutes. This helps to relax the gluten and makes it easier to shape.
- Preheat your oven to 420 degrees F (215 degrees C). While the oven is heating, lightly grease four bread pans with vegetable oil.
- Turn the dough out onto a lightly floured surface and knead it briefly to remove any remaining air bubbles. Add a touch more flour if needed to prevent sticking.
- Divide the dough into four equal pieces. Shape each piece into a loaf and place it in a prepared bread pan.
- Cover the bread pans with a towel and let the loaves rise for another 30-60 minutes, or until they have nearly doubled in size. This second rise is crucial for a light and airy texture.
- Bake the loaves in the preheated oven for 20 minutes, or until they are golden brown and sound hollow when tapped on the bottom.
- Let the bread cool completely in the pans before removing. Cooling completely prevents the bread from becoming gummy.
Expert Tips & Tricks
- Yeast Proofing: Always proof your yeast before starting the recipe. This ensures that the yeast is active and will allow your bread to rise properly. Simply mix the yeast with a little warm water and sugar (or honey in this case) and let it sit for 5-10 minutes. If it foams up, the yeast is good to go.
- Sticky Dough: Don’t be afraid of a slightly sticky dough. It will result in a softer bread. Resist the urge to add too much flour.
- Oven Temperature: Oven temperatures can vary. Keep a close eye on your bread while it’s baking and adjust the temperature if necessary. If the bread is browning too quickly, lower the temperature by 25 degrees F.
- Kneading Time: Proper kneading is essential for developing the gluten, which gives the bread its structure. Use a stand mixer or knead by hand for the recommended time.
- Adding Flavor: Feel free to experiment with other additions, such as dried fruit, seeds, or spices. A touch of cinnamon or nutmeg would complement the honey and walnuts beautifully.
Serving & Storage Suggestions
This Honey Walnut Bread is delicious served warm with a pat of butter or a drizzle of honey. It also makes excellent toast or sandwiches. To store, wrap the cooled loaves tightly in plastic wrap or place them in an airtight container.
- Room Temperature: Bread will stay fresh at room temperature for 2-3 days.
- Refrigerator: For longer storage, refrigerate for up to a week.
- Freezer: To freeze, wrap the loaves tightly in plastic wrap and then in foil. Freeze for up to 2-3 months. Thaw completely before serving. Reheat in a preheated oven at 350 degrees F (175 degrees C) for 10-15 minutes to refresh.
Nutritional Information
| Nutrient | Amount per Serving | % Daily Value |
|---|---|---|
| Calories | 362 kcal | 18% |
| Total Fat | 12.7g | 19% |
| Saturated Fat | 1.5g | 8% |
| Cholesterol | 0mg | 0% |
| Sodium | 150mg | 6% |
| Total Carbohydrate | 54.3g | 18% |
| Dietary Fiber | 4.1g | 16% |
| Sugars | 3.7g | – |
| Protein | 8.6g | 17% |
Note: Nutritional information is an estimate and may vary based on specific ingredients and portion sizes.
Variations & Substitutions
- Gluten-Free: While this recipe uses wheat flours, you could experiment with gluten-free flour blends. Be aware that the texture will be different, and you may need to adjust the liquid content.
- Nut Alternatives: If you have a walnut allergy, try substituting other nuts, such as pecans or almonds.
- Sweetener: Maple syrup can be used in place of honey for a slightly different flavor profile.
- Spice it up: Add a pinch of cinnamon, nutmeg, or cardamom to the dough for extra warmth and flavor.
FAQs (Frequently Asked Questions)
Q: Can I use active dry yeast instead of fresh yeast?
A: Yes, you can. Use about 10g of active dry yeast. You’ll still need to proof it in warm water before adding it to the other ingredients.
Q: Why is my bread dense and not rising properly?
A: This could be due to several factors, including using old or inactive yeast, not kneading the dough enough, or not letting it rise for long enough.
Q: Can I make this recipe without a stand mixer?
A: Absolutely! You’ll just need to knead the dough by hand for a longer period (12-15 minutes) to develop the gluten.
Q: How can I tell if my bread is done baking?
A: The bread should be golden brown and sound hollow when tapped on the bottom. You can also use a thermometer to check the internal temperature, which should be around 200-210 degrees F (93-99 degrees C).
Q: What’s the best way to store the bread to keep it fresh?
A: Once cooled, wrap the bread tightly in plastic wrap or store it in an airtight container. Freezing is also a great option for longer storage.
Final Thoughts
I hope this recipe inspires you to create your own warm memories in the kitchen. Baking bread is a truly rewarding experience, and this Honey Walnut Bread is a perfect place to start. Don’t be intimidated by the steps; take your time, enjoy the process, and let the aroma of freshly baked bread fill your home. Share your creations with loved ones and savor the simple joy of a homemade treat. I’d love to hear your feedback and see your baking triumphs – happy baking!