
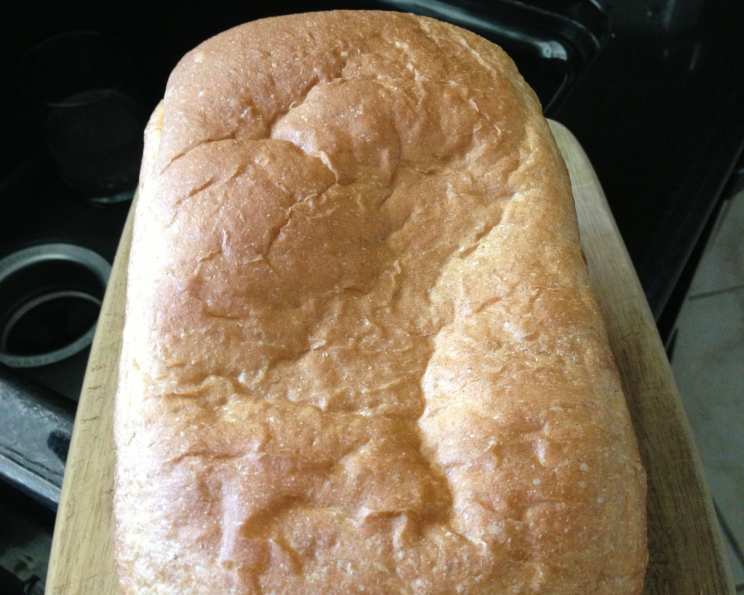
The Ultimate Honey Wheat Bread: A Zojirushi Bread Machine Masterpiece
There’s a scent that instantly transports me back to my grandmother’s sun-drenched kitchen – the sweet, earthy aroma of freshly baked honey wheat bread. I remember standing on a stool, mesmerized as she kneaded the dough with flour-dusted hands, a symphony of gentle thuds and sighs filling the air. Years later, while I cherish those memories of old-fashioned baking, I’ve embraced the convenience of my Zojirushi bread machine to recreate that very taste and texture. The warm, comforting slices that emerge from the machine are nearly identical to her version, and equally loved by my own family.
Recipe Overview
- Prep Time: 15 minutes
- Cook Time: 2 hours 48 minutes (approximate, varies with cycle)
- Total Time: 3 hours 3 minutes
- Yield: 1 loaf
- Dietary Type: Vegetarian
Ingredients
- 2 5/8 cups bread flour
- 7/8 cup wheat flour
- 1 1/3 cups water
- 5 1/4 tablespoons honey
- 1 3/4 teaspoons salt
- 1 3/4 tablespoons dry milk
- 2 5/8 tablespoons unsalted butter
- 1 3/4 teaspoons fast rising yeast
Equipment Needed
- Zojirushi Bread Machine
- Measuring cups and spoons
- Thermometer
- Rubber spatula
- Cooling rack
- Electric knife (optional, for slicing)
Instructions
- Begin by gathering and measuring all of your ingredients with precision. This will streamline the process and ensure consistent results.
- Warm the water to approximately 105 degrees Fahrenheit. Using a thermometer is highly recommended to avoid overheating, which can kill the yeast.
- Gently warm the honey to between 80 and 90 degrees Fahrenheit. This will help it mix more easily and enhance the bread’s flavor.
- Ensure the butter is softened to room temperature. This allows it to incorporate smoothly into the dough and contribute to a tender crumb.
- In a separate bowl, thoroughly mix the bread flour and wheat flour together. This ensures even distribution of the wheat flour throughout the loaf.
- Pour the warmed water and honey into the bread pan of your Zojirushi machine. Then, carefully add the mixed flours, ensuring that all of the liquid is covered. Use a rubber spatula to level off the flour if needed.
- Create a small well in the center of the flour, taking care not to dig too deep. This well is where you’ll place the fast rising yeast.
Important Reminder: The yeast should not come into contact with any wet ingredients until the mixing cycle begins. - On one side of the bread pan, atop the flour, add the salt and half of the softened butter.
- On the opposite side of the bread pan, also on top of the flour, add the dry milk and the remaining half of the softened butter.
- Carefully place the fast rising yeast into the well you created in the flour.
- Now, gently place the bread pan inside your Zojirushi bread machine and close the lid securely.
- Select the desired cooking cycle. While the quick bread cycle can be used, I recommend the Home Made Cycle for optimal results. The following settings are recommended:
- 5 minutes Pre-Heat
- 28 minutes Kneading
- 20 minutes First Rise
- 40 minutes Second Rise
- 60 minutes Bake Time
- Set the baking setting to light for a less crusty loaf. However, you can adjust the baking time to achieve your preferred level of crustiness. More time = more crust.
- Once the baking cycle is complete, and you desire a softer crust, remove the bread pan from the bread machine and let the bread cool inside the pan for 10 to 15 minutes. The longer it sits in the pan, the softer the crust will become, but be cautious of excessive moisture buildup, which can lead to a soggy bottom.
- After the initial cooling period, carefully remove the bread from the pan and place it on a cooling rack to continue cooling for another 15 to 20 minutes, totaling around 30 minutes of cooling.
- Slice the bread and serve. For clean, even slices, I recommend using an electric knife.
- Though the Zojirushi bread machine includes a preheating phase, warming some of the ingredients (especially the water and honey) beforehand can improve the bread’s texture and rise.
- Be mindful that water and flour quantities may require adjustments based on your local climate (temperature, humidity, and altitude). Start with the recommended amounts, and then adjust as needed in future batches. If the dough seems too wet, add a tablespoon of flour at a time. If it seems too dry, add a tablespoon of water at a time.
Expert Tips & Tricks
- The Secret to a Perfect Rise: Make sure your yeast is fresh! Expired yeast won’t give you the desired lift. Store your yeast in an airtight container in the refrigerator.
- Preventing a Sticky Dough: Properly measuring ingredients is key. Use measuring cups and spoons specifically designed for baking.
- Enhancing the Flavor: A touch of molasses (about 1 teaspoon) can add a deeper, richer flavor to the honey wheat bread.
- Even Baking: Rotating the bread pan halfway through the baking cycle (if possible with your machine) can ensure even browning.
- Troubleshooting a Dense Loaf: If your bread is consistently dense, check your yeast, adjust the water quantity, and ensure you’re not using old flour.
- Crisp crust: Brush the loaf with melted butter or an egg wash before baking for a glossy, flavorful crust.
Serving & Storage Suggestions
This honey wheat bread is wonderful served warm with a pat of butter or a drizzle of honey. It’s also excellent for sandwiches, toast, or as an accompaniment to soups and salads.
To store, allow the bread to cool completely before placing it in a sealed plastic bag or bread box. At room temperature, it will stay fresh for about 2-3 days. For longer storage, you can refrigerate it for up to a week, or freeze it for up to 2-3 months.
To reheat frozen bread, thaw it completely before slicing and toasting. Alternatively, you can wrap the frozen loaf in foil and reheat it in a 350°F oven for 15-20 minutes.
Nutritional Information
(Please note that these values are estimates and may vary based on specific ingredients and serving size.)
| Nutrient | Amount per Serving | % Daily Value |
|---|---|---|
| Calories | 170 kcal | 8% |
| Total Fat | 4g | 5% |
| Saturated Fat | 2g | 10% |
| Cholesterol | 10mg | 3% |
| Sodium | 300mg | 13% |
| Total Carbohydrate | 30g | 11% |
| Dietary Fiber | 2g | 7% |
| Sugars | 5g | N/A |
| Protein | 5g | 10% |
Variations & Substitutions
- Vegan Honey Wheat Bread: Substitute the dry milk with a plant-based milk powder or omit it altogether. Use a plant-based butter alternative. Ensure that your honey substitute is truly vegan if desired.
- Spiced Honey Wheat Bread: Add 1 teaspoon of ground cinnamon and 1/2 teaspoon of ground nutmeg to the dry ingredients for a warm, spiced flavor.
- Nutty Honey Wheat Bread: Incorporate 1/2 cup of chopped walnuts, pecans, or other nuts into the dough for added texture and flavor.
- Seeded Honey Wheat Bread: Sprinkle the top of the loaf with sesame seeds, poppy seeds, or sunflower seeds before baking for a decorative and nutritious touch.
- Sweetened with Maple Syrup: Replace honey with equal amount of maple syrup for subtle change in flavor.
FAQs (Frequently Asked Questions)
Q: Can I use all-purpose flour instead of bread flour?
A: While you can, bread flour has a higher protein content, which results in a chewier and more structured loaf. If using all-purpose flour, the bread may be slightly less chewy.
Q: What if my bread machine doesn’t have a “Home Made” cycle?
A: Look for a cycle with similar settings for preheating, kneading, rising, and baking times. Experiment to find the best cycle for your machine.
Q: How can I tell if the bread is fully baked?
A: The bread should be golden brown and sound hollow when tapped on the bottom. An internal temperature of 200-210°F confirms doneness.
Q: My bread is sinking in the middle. What went wrong?
A: This can be due to too much liquid, too much yeast, or not enough gluten development. Adjust the water or yeast quantity in future batches, and ensure proper kneading.
Q: Can I add fruit to this recipe?
A: Yes, you can add up to 1 cup of dried fruits like raisins, cranberries, or chopped dates during the kneading cycle.
Final Thoughts
I truly hope this honey wheat bread recipe brings as much joy to your kitchen as it has to mine. The simple act of baking a loaf of bread can be incredibly therapeutic, and the reward of a warm, fragrant slice is simply unparalleled. So, gather your ingredients, preheat your bread machine (or maybe not!), and embark on this culinary adventure. Don’t hesitate to share your feedback and any variations you discover along the way – I’d love to hear about your baking successes! And if you happen to have some homemade soup simmering on the stove, this honey wheat bread would be the perfect accompaniment.