
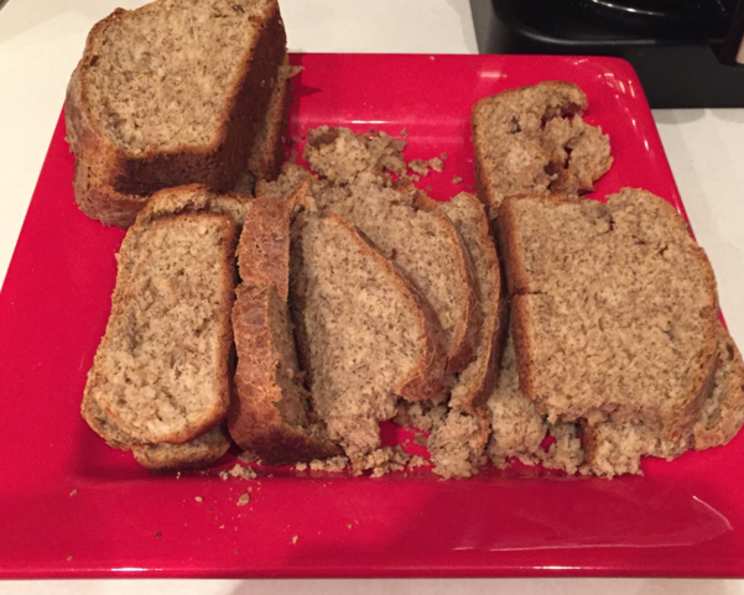
Honey Wheat Bread With Chia and Flax
I remember the first time I made this bread. It was a blustery autumn afternoon, the kind where the wind howls and sends leaves swirling against the windows. The aroma of baking bread, sweetened with honey, filled the kitchen, chasing away the chill and creating a feeling of cozy contentment. Each slice, slathered with butter and a drizzle of honey, was a comforting reminder of simpler times and the simple joys of homemade goodness.
Recipe Overview
- Prep Time: 3 hours 10 minutes
- Ingredients: 10
- Yields: 24 slices
- Dietary Type: Vegetarian
Ingredients
- 1 cup milk, room temperature
- 3 tablespoons honey
- 2 tablespoons butter
- 1 teaspoon chia seeds, soaked in
- 2 tablespoons water (see note)
- 1 1⁄2 teaspoons salt
- 1⁄2 cup flax seed meal
- 1 cup whole wheat flour
- 2 cups white bread flour
- 2 teaspoons active dry yeast
Note: It is important to pre-soak the chia seeds to create a gel. This helps add moisture and structure to the bread. You can prepare the chia gel in advance and store it in the refrigerator.
Equipment Needed
- Bread machine
- Greased bread pan
Instructions
-
Begin by preparing your ingredients. Ensure the milk is at room temperature for optimal yeast activity. If you don’t have a bread machine, you can also do this recipe in a large mixing bowl, with a dough hook attachment for a stand mixer.
-
Soak the chia seeds: In a small bowl, combine the chia seeds with 2 tablespoons of water. Let this mixture sit for at least 15 minutes, or until the chia seeds have absorbed the water and formed a gel. This chia gel acts as a natural binder and adds moisture to the bread.
-
Add ingredients to the bread machine: Place all the ingredients into the bread machine in the order listed: milk, honey, butter, chia gel, salt, flax seed meal, whole wheat flour, white bread flour, and active dry yeast.
-
Select the dough cycle: Close the lid of the bread machine and select the “dough” cycle. This cycle will mix the ingredients, knead the dough, and allow it to rise. The exact time of the dough cycle will vary depending on your bread machine model, but it typically lasts around 1 1/2 to 2 hours.
-
Punch down the dough: Once the dough cycle is complete, carefully remove the dough from the bread machine. Gently punch it down to release any excess air. This helps to create a more even texture in the final loaf.
-
Shape the loaf: On a lightly floured surface, roll the dough into a rectangular shape, approximately 9×13 inches. Then, roll the dough tightly into a sandwich loaf.
-
Prepare the bread pan: Grease a bread pan thoroughly with butter, cooking spray, or shortening. This will prevent the bread from sticking and ensure easy removal after baking.
-
Place the dough in the pan: Carefully transfer the shaped loaf into the prepared bread pan.
-
Allow the dough to rise: Cover the bread pan with a clean kitchen towel or plastic wrap and place it in a warm location. Let the dough rise for approximately 45-60 minutes, or until it has nearly doubled in size. The ideal temperature for rising is around 75-80°F (24-27°C). A warm oven (turned off) or a sunny spot can help to create a favorable environment.
-
Preheat the oven: While the dough is rising, preheat the oven to 375°F (190°C). Make sure the oven rack is positioned in the center.
-
Bake the bread: Once the dough has risen sufficiently, carefully place the bread pan in the preheated oven. Bake for 40 minutes, or until the bread is golden brown and sounds hollow when tapped on the bottom.
-
Optional glaze: For a richer color and slightly sweeter crust, brush the top of the dough with milk or egg wash prior to baking. Egg wash is made by whisking one egg with a tablespoon of water.
-
Cool the bread: After baking, remove the bread from the oven and let it cool in the pan for 5-10 minutes. Then, carefully transfer the bread to a wire rack to cool completely before slicing and serving. This prevents the bread from becoming soggy.
Expert Tips & Tricks
- For a slightly sweeter flavor, you can increase the amount of honey to 4 tablespoons.
- If you want a softer crust, you can cover the bread with foil during the last 15 minutes of baking.
- To test for doneness, insert a wooden skewer into the center of the bread. If it comes out clean, the bread is done.
- If your oven tends to bake unevenly, rotate the bread pan halfway through baking.
- For a more pronounced wheat flavor, substitute up to 1 1/2 cups of the white bread flour with additional whole wheat flour. Just be mindful as this may affect the texture (the more whole wheat used, the denser the loaf will be).
Serving & Storage Suggestions
Serve this Honey Wheat Bread with Chia and Flax warm or at room temperature. It’s fantastic as a sandwich bread, perfect for toast, or even enjoyed on its own with a smear of butter or a drizzle of honey. The nutty flavor of the flax seeds and the subtle sweetness of the honey make it a versatile choice for both savory and sweet pairings.
Storage: Store leftover bread in an airtight container at room temperature for up to 3 days. For longer storage, wrap the bread tightly in plastic wrap and freeze it for up to 2 months. Thaw the bread at room temperature before serving. You can also slice the bread before freezing for individual portions. To refresh the bread, lightly toast it or warm it in the oven.
Nutritional Information
| Nutrient | Amount per Serving | % Daily Value |
|---|---|---|
| Calories | 91.4 kcal | N/A |
| Calories from Fat | N/A | N/A |
| Total Fat | 2.6 g | 3% |
| Saturated Fat | 1 g | 4% |
| Cholesterol | 4 mg | 1% |
| Sodium | 160.1 mg | 6% |
| Total Carbohydrate | 15 g | 5% |
| Dietary Fiber | 1.6 g | 6% |
| Sugars | 2.2 g | N/A |
| Protein | 2.6 g | 5% |
Note: Nutritional information is an estimate and may vary based on specific ingredients and portion sizes.
Variations & Substitutions
- Vegan: Substitute the butter with vegan butter or coconut oil, and use a plant-based milk alternative such as almond, soy, or oat milk.
- Nut-Free: Ensure your milk substitute is nut-free if needed.
- Seed Variety: Experiment with other seeds such as sunflower seeds or pumpkin seeds for added texture and nutrition.
- Spice it up: Add a teaspoon of cinnamon or other warm spices to the dough for a spiced bread variation.
- Herb Infusion: Incorporate finely chopped fresh herbs like rosemary or thyme into the dough for a savory twist.
FAQs (Frequently Asked Questions)
Q: Can I make this bread without a bread machine?
A: Yes, you can make this bread using a stand mixer with a dough hook attachment or by hand. Simply combine the ingredients in a large bowl, knead the dough until smooth and elastic, and then follow the remaining instructions for rising and baking.
Q: Why is it important to soak the chia seeds?
A: Soaking the chia seeds creates a gel that adds moisture and acts as a natural binder in the bread. This helps improve the texture and prevents the bread from becoming dry.
Q: Can I use different types of flour?
A: While this recipe calls for whole wheat and white bread flour, you can experiment with other types of flour, such as spelt or rye. Keep in mind that different flours may affect the texture and rising time of the bread.
Q: How do I know when the bread is done baking?
A: The bread is done when it is golden brown and sounds hollow when tapped on the bottom. You can also insert a wooden skewer into the center of the bread. If it comes out clean, the bread is done.
Q: Can I freeze this bread?
A: Yes, this bread freezes well. Wrap the bread tightly in plastic wrap and then place it in a freezer-safe bag or container. Freeze for up to 2 months. Thaw the bread at room temperature before serving.
Final Thoughts
This Honey Wheat Bread with Chia and Flax is more than just a recipe; it’s an invitation to create something nourishing and comforting in your own kitchen. The aroma of baking bread filling your home is a reward in itself, and the taste of each slice, a testament to the simple pleasures of homemade goodness. Don’t hesitate to experiment with variations and make it your own. Share your creations with loved ones, and savor the joy of baking.