
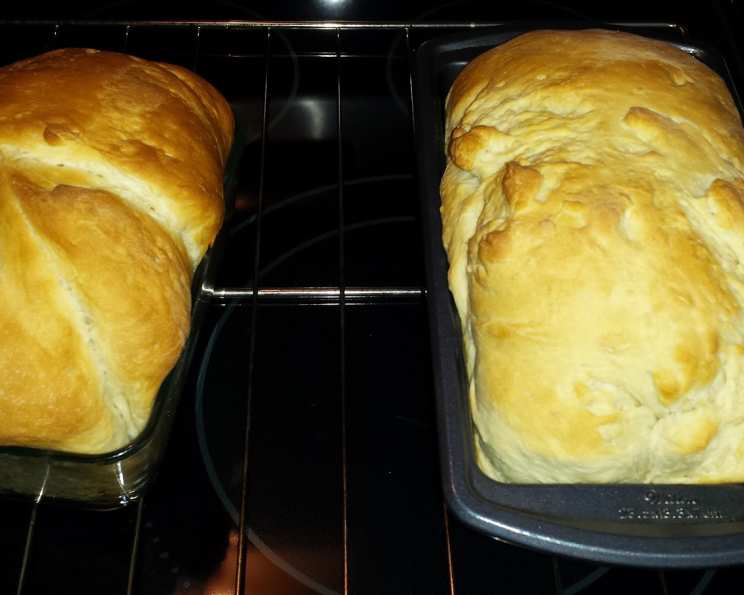
Honey White Bread: A Sweet Slice of Home
The smell of warm bread baking is, for me, the very essence of home. I remember standing on a stool next to my grandmother, watching her flour-dusted hands work magic with dough. The anticipation as the aroma filled the kitchen was almost unbearable, and the taste of that first, warm slice slathered with butter is a memory I cherish. This Honey White Bread evokes that same comforting feeling, with its subtle sweetness and soft, pillowy texture. It’s a simple recipe, but one that yields a loaf that’s anything but ordinary.
Recipe Overview
- Prep Time: 30 minutes
- Rise Time: 1 hour 30 minutes
- Cook Time: 30-35 minutes
- Total Time: 2 hours 30 minutes
- Servings: 10-12
- Yield: 2 loaves
- Dietary Type: Vegetarian
Ingredients
- 2 cups warm water (I boil mine first in the electric kettle and then let it cool off a bit.)
- 2⁄3 cup honey (Local and Raw if you can get it.)
- 1 3⁄4 tablespoons active dry yeast (I use the kind in the jar and store in the frig.)
- 1 1⁄2 teaspoons salt
- 6 cups bread flour
Equipment Needed
- Large mixing bowl
- Whisk
- Wooden spoon or silicone spatula
- Towel
- Two lightly-greased loaf pans
- Oven
Instructions
-
In a large mixing bowl, whisk together warm water and honey until the honey is completely dissolved. The water should be warm to the touch, but not hot enough to kill the yeast.
-
Add the active dry yeast to the honey-water mixture, and cover the bowl with a towel. Allow the mixture to sit for about 10-20 minutes, or until it becomes frothy. This step is crucial as it confirms that your yeast is alive and active.
-
After the yeast mixture has proofed and is delightfully frothy, mix in the salt. Then, add the bread flour one cup at a time. For the first three cups, I find a whisk works best to incorporate the flour smoothly.
-
As the dough thickens, switch to a wooden spoon or silicone spatula for the last three cups of flour. For the very last cup, I often find it easiest to simply incorporate it with my hands. Don’t overmix at this stage; you just want the flour to be mostly incorporated.
-
Now for the fun part – kneading! Lightly flour your hands. The dough will be sticky. Knead the dough for about 5 minutes. I like to knead the dough right in the large mixing bowl to minimize mess, but feel free to use a lightly floured surface if you prefer. The dough should become smoother and more elastic as you knead.
-
Place the kneaded dough in a large, greased bowl, turning to coat all sides. Cover the bowl with a towel and let the dough rise in a warm place for about an hour.
-
After an hour, your dough should have risen significantly, roughly doubling in size.
-
Punch down the dough to release the air (don’t hold back—get out all your frustration!). Then, knead the dough again for a couple of minutes.
-
Divide the dough into two equal portions and shape each portion into a loaf. Place each loaf into a lightly-greased loaf pan.
-
Cover the loaf pans with a towel and allow the dough to rise again for 30 minutes in a warm place.
-
While the dough is rising for the second time, preheat your oven to 325°F (163°C).
-
After allowing the dough to rise for 30 minutes in the loaf pans, bake in the preheated oven at 325°F (163°C) for 30-35 minutes. In my oven, 33 minutes is the sweet spot. The loaves are done when they are golden brown on top and sound hollow when tapped.
-
Once baked, remove the loaves from the oven and let them cool in the pans for a few minutes before transferring them to a wire rack to cool completely. This prevents the bottom crust from becoming soggy.
Expert Tips & Tricks
- Use a thermometer to ensure your water is the right temperature. Too hot, and you’ll kill the yeast; too cold, and it won’t activate properly. Aim for around 110°F (43°C).
- Don’t skip the kneading! This step develops the gluten, which gives the bread its structure and chewiness.
- If your kitchen is cold, you can create a warm environment for rising dough by placing the bowl in a slightly warmed oven (turn it on briefly and then off) or a microwave with a cup of hot water.
- For a richer flavor, try using melted butter or olive oil to grease the bowl and loaf pans instead of cooking spray.
Serving & Storage Suggestions
This Honey White Bread is delicious served warm with butter, jam, or honey. It’s also excellent for sandwiches, toast, or even grilled cheese.
To store, wrap the cooled loaves tightly in plastic wrap or place them in an airtight container. At room temperature, the bread will stay fresh for 2-3 days. In the refrigerator, it will last for up to a week. For longer storage, you can freeze the bread for up to 2-3 months. Thaw it completely before serving or toasting. To refresh slightly stale bread, sprinkle it lightly with water and reheat it in a warm oven for a few minutes.
Nutritional Information
(Estimated per slice, based on 12 slices per loaf)
| Nutrient | Amount per Serving | % Daily Value |
|---|---|---|
| Calories | 203 kcal | 10% |
| Total Fat | 1.0g | 1% |
| Saturated Fat | 0.1g | 0% |
| Cholesterol | 0mg | 0% |
| Sodium | 177mg | 7% |
| Total Carbohydrate | 38.3g | 13% |
| Dietary Fiber | 1.3g | 5% |
| Sugars | 9.4g | |
| Protein | 4.3g | 9% |
Variations & Substitutions
- Whole Wheat Honey Bread: Substitute up to 3 cups of the bread flour with whole wheat flour for a nuttier flavor and increased fiber.
- Cinnamon Raisin Honey Bread: Add 1 teaspoon of ground cinnamon and 1 cup of raisins to the dough before the first rise.
- Honey Oat Bread: Add 1/2 cup of rolled oats to the dough before the first rise. You can also sprinkle some oats on top of the loaves before baking for a rustic look.
- Vegan Honey Bread: Replace the honey with maple syrup or agave nectar. While technically not honey anymore, the recipe still works well with these substitutes.
- Gluten-Free Honey Bread: Replace the bread flour with a gluten-free bread flour blend. You may need to adjust the amount of liquid depending on the blend you use.
FAQs (Frequently Asked Questions)
Q: Why is my bread dense and not rising properly?
A: This could be due to several factors, including using expired yeast, not kneading enough, or not allowing the dough to rise in a warm enough place. Make sure your yeast is active, knead the dough for the full 5 minutes, and find a warm spot for the dough to rise.
Q: Can I use all-purpose flour instead of bread flour?
A: While you can use all-purpose flour, bread flour is recommended for its higher protein content, which results in a chewier and more structured loaf. If using all-purpose flour, the bread may be slightly softer and less chewy.
Q: How do I know when the bread is fully baked?
A: The bread is done when it is golden brown on top and sounds hollow when tapped on the bottom. You can also use a thermometer; the internal temperature should be around 200-210°F (93-99°C).
Q: Can I make this dough in a bread machine?
A: Yes, you can use the dough setting on your bread machine. Add the ingredients in the order recommended by your machine’s manufacturer. After the dough cycle is complete, shape the dough into loaves and bake as directed.
Q: My bread is browning too quickly. What should I do?
A: If your bread is browning too quickly, tent it loosely with aluminum foil for the last 10-15 minutes of baking. This will help prevent the top from burning while allowing the inside to cook through.
Final Thoughts
This Honey White Bread is more than just a recipe; it’s an invitation to create a little bit of happiness in your own kitchen. The simple act of baking bread can be incredibly therapeutic, and the resulting aroma and flavor are truly rewarding. So, gather your ingredients, put on your apron, and experience the joy of baking this comforting loaf. Don’t be afraid to experiment with variations and make it your own. And most importantly, share your creation with those you love. The warmth of homemade bread is best enjoyed in good company.