
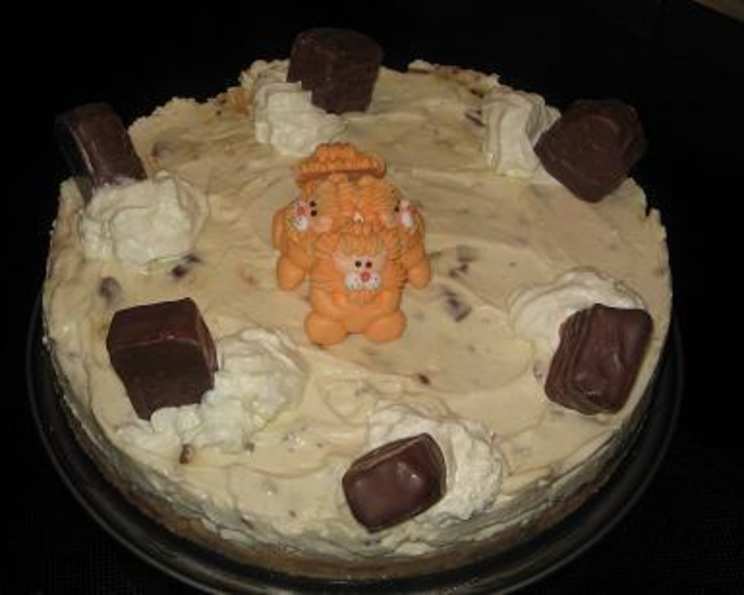
Honeycomb Cheesecake: A Symphony of Crunch and Cream
The first time I tasted a proper honeycomb cheesecake, I was at a tiny cafe tucked away in a Melbourne laneway. The aroma of freshly brewed coffee mingled with something sweetly irresistible. One bite of that creamy, crunchy confection, and I was transported. The combination of textures – the smooth cheesecake against the shattering honeycomb – was pure magic. From that moment, I was determined to recreate that experience in my own kitchen, and after many trials (and delicious errors), I think I’ve finally cracked it.
Recipe Overview
- Prep Time: 20 minutes
- Cook Time: 0 minutes
- Total Time: 20 minutes + refrigeration
- Servings: 10
- Yield: 1 cheesecake
- Dietary Type: Not specified
Ingredients
- 1 (250g) packet honey snap biscuits
- 90g butter
- 3 teaspoons gelatin
- 1/4 cup water
- 375g cream cheese
- 1/2 cup caster sugar
- 1 teaspoon vanilla essence
- 300ml thickened cream
- 2 violet crumble chocolate candy bars (chocolate covered honeycomb bars)
Equipment Needed
- 22cm springform tin
- Mixing bowl
- Electric mixer
- Small bowl
- Microwave
- Spatula
- Refrigerate
Instructions
- Begin by preparing the crust. Melt the butter in a microwave-safe bowl or saucepan. Be careful not to overheat it; you want it just melted, not bubbling.
- Crush the honey snap biscuits into fine crumbs. You can use a food processor for this, or simply place the biscuits in a zip-top bag and crush them with a rolling pin.
- In a mixing bowl, combine the melted butter and biscuit crumbs. Mix thoroughly until the crumbs are evenly moistened.
- Press the biscuit mixture firmly into the base of a 22cm springform tin. Ensure an even layer to create a stable crust.
- Refrigerate the crust while you prepare the cheesecake filling. This will help it set and prevent it from crumbling when you add the filling.
- Now, prepare the gelatin. Place the water in a small bowl. Sprinkle the gelatin evenly over the water. Let it sit for a few minutes to bloom (soften).
- Heat the gelatin mixture in the microwave on medium power for 30-40 seconds. Be extremely careful not to boil the gelatin, as this can affect its setting properties. The gelatin should be completely dissolved and clear.
- In a mixing bowl, place the cream cheese. Add the caster sugar and vanilla essence.
- Using an electric mixer, beat the cream cheese mixture until smooth and creamy. This will ensure a lump-free cheesecake.
- In a separate bowl, beat the thickened cream until soft peaks form. Be careful not to overwhip the cream, as it can become grainy.
- Stir the melted gelatin mixture into the cream cheese mixture. Mix well to ensure the gelatin is evenly distributed.
- Add the whipped cream to the cream cheese mixture. Gently fold it in using a spatula, being careful not to deflate the cream.
- Crush the violet crumble chocolate candy bars into small pieces. You can do this by placing them in a zip-top bag and crushing them with a rolling pin, or by chopping them with a knife.
- Add the crushed honeycomb bars to the cream cheese mixture. Mix well to evenly distribute the honeycomb pieces throughout the filling.
- Pour the cheesecake filling into the prepared biscuit crust.
- Refrigerate the cheesecake for at least 4-6 hours, or preferably overnight, to allow it to set completely.
Expert Tips & Tricks
- For an extra smooth cheesecake, ensure your cream cheese is at room temperature before beating it.
- If you don’t have violet crumble bars readily available, you can use any chocolate-covered honeycomb candy bar. Alternatively, you can make your own honeycomb and chop it up.
- To prevent the crust from sticking to the springform tin, lightly grease the base with butter or cooking spray before pressing in the biscuit mixture.
- If you find that the top of the cheesecake is browning too quickly in the fridge, you can loosely cover it with foil.
- For a cleaner slice, run a hot knife under warm water and wipe it dry before each cut.
Serving & Storage Suggestions
Serve the honeycomb cheesecake chilled, straight from the refrigerator. A dusting of cocoa powder or an extra sprinkle of crushed honeycomb on top can elevate the presentation. This cheesecake is best enjoyed within 3-4 days of making it, stored in an airtight container in the refrigerator. Freezing is not recommended as it can affect the texture of the cheesecake.
Nutritional Information
| Nutrient | Amount per Serving | % Daily Value |
|---|---|---|
| Calories | 373.7 kcal | N/A |
| Calories from Fat | 291g | 78% |
| Total Fat | 32.4 g | 49% |
| Saturated Fat | 20 g | 100% |
| Cholesterol | 96.5 mg | 32% |
| Sodium | 181.4 mg | 7% |
| Total Carbohydrate | 17.2 g | 5% |
| Dietary Fiber | 0.3 g | 1% |
| Sugars | 14.7 g | 58% |
| Protein | 4.8 g | 9% |
Note: Nutritional information is an estimate and may vary based on specific ingredients and serving sizes.
Variations & Substitutions
- Gluten-Free: Use gluten-free honey snap biscuits for the crust.
- Lighter Version: Substitute the regular cream cheese with light cream cheese and use a lower-fat thickened cream.
- Alternative Flavors: Add a swirl of caramel sauce or a layer of chocolate ganache to the cheesecake for extra indulgence. You can also experiment with other flavor extracts, such as almond or peppermint.
- Different Crust: Try using graham crackers or digestive biscuits for a different crust flavor.
FAQs (Frequently Asked Questions)
Q: Can I use a different size springform tin?
A: Yes, but you may need to adjust the baking time and filling quantities accordingly. A smaller tin will result in a thicker cheesecake, while a larger tin will result in a thinner one.
Q: Why did my cheesecake crack?
A: Cheesecake cracking can be caused by a few factors, including overbaking, rapid temperature changes, or overmixing the batter. Ensure that you follow the recipe instructions carefully and avoid opening the oven door too often during baking.
Q: Can I make this cheesecake ahead of time?
A: Absolutely! In fact, cheesecake is often better when made a day or two in advance, as it allows the flavors to meld together and the texture to fully set.
Q: What can I do if my gelatin doesn’t dissolve properly?
A: If your gelatin is lumpy or doesn’t dissolve completely, try heating it for a few more seconds in the microwave, being careful not to boil it. You can also strain the gelatin mixture through a fine-mesh sieve to remove any lumps.
Q: Can I use a no-bake crust for this recipe?
A: Yes, the provided crust is a no-bake crust. It’s designed to set in the refrigerator.
Final Thoughts
This Honeycomb Cheesecake is a delightful treat that’s sure to impress. The combination of the creamy cheesecake, crunchy honeycomb, and buttery biscuit base is simply irresistible. Don’t be intimidated – it’s surprisingly easy to make, and the results are well worth the effort. So, gather your ingredients, follow the steps, and prepare to indulge in a slice of pure bliss. I encourage you to try this recipe and share your creations. Pair it with a cup of strong coffee or a glass of dessert wine for the ultimate indulgence. Happy baking!