
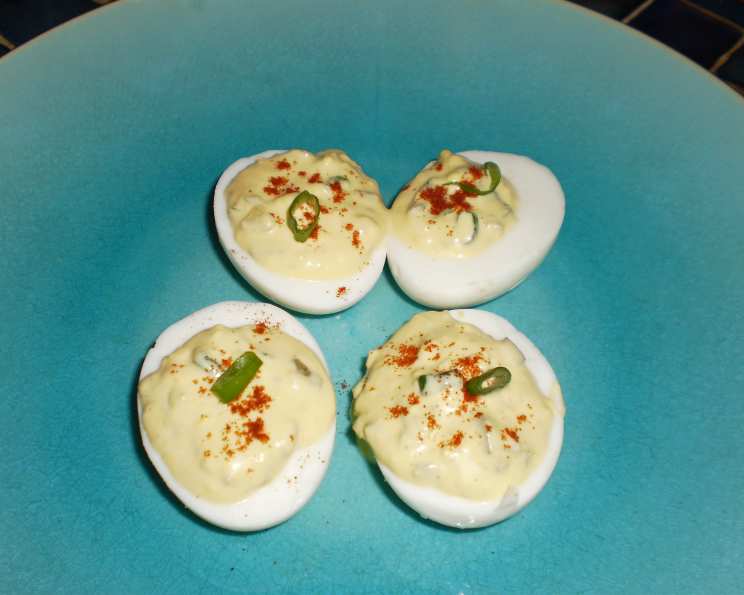
Horsey Deviled Eggs: A Zesty Twist on a Classic
I can still picture my grandmother’s kitchen, the linoleum cool beneath my bare feet on a hot summer day. Her deviled eggs were always the star of every family picnic, but one year, she added a secret ingredient. I remember the initial surprise, that little kick of heat mingling with the creamy yolk filling. It was horseradish, and it transformed the ordinary into something extraordinary. These “Horsey Deviled Eggs,” as we affectionately called them, became a family favorite, a testament to her playful spirit and culinary creativity.
Recipe Overview
- Prep Time: 2 hours
- Cook Time: 15 minutes
- Total Time: 2 hours 15 minutes
- Servings: 6
- Yield: 12 egg halves
- Dietary Type: Gluten-Free
Ingredients
- 6 large eggs
- 2 tablespoons mayonnaise
- 1 tablespoon horseradish sauce
- 1 teaspoon pickle juice
- 1 tablespoon diced hamburger dill pickle
- 1 tablespoon diced green onion
- Paprika (optional)
Equipment Needed
- Saucepan
- Small bowl
- Fork
- Spoon
- Plate
- Plastic wrap
Instructions
-
To achieve perfectly cooked eggs, gently place the eggs in a saucepan and cover them completely with cold water. Ensuring all eggs are submerged is crucial for even cooking.
-
Position the saucepan over medium-high heat and bring the water/eggs to a rolling boil. Keep a close watch to prevent the eggs from cracking due to rapid boiling.
-
The moment the water reaches a boil, immediately turn off the burner. This step is vital. The residual heat will gently cook the eggs without overcooking them.
-
Allow the pan of eggs to sit on the turned-off burner for exactly 15 minutes. Do not remove or disturb the pan during this time. This allows for consistent and complete cooking of the egg yolks.
-
After the 15-minute steeping period, carefully remove the saucepan from the burner and drain all the water. Prompt draining prevents further cooking.
-
Cover the eggs generously with ice cubes. Then, add more water until all the eggs are fully submerged in the ice bath. The ice bath is essential for quickly cooling the eggs, stopping the cooking process, and making them easier to peel.
-
Let the pan sit in the sink with the ice water until the eggs are cold enough to handle comfortably and peel. This usually takes about 10-15 minutes.
-
Once cooled, carefully peel the eggs, ensuring to remove all shell fragments. Rinse the peeled eggs off with cold water to remove any lingering shell pieces.
-
Cut each egg in half lengthwise. Place the halved eggs neatly on a plate.
-
Gently remove the yolks from each half and transfer them to a small bowl. Be careful not to damage the egg whites during this process.
-
Using a fork, thoroughly mash the egg yolks until they are smooth and free of lumps. A smooth base is key to a creamy deviled egg filling.
-
To the mashed egg yolks, add the mayonnaise, horseradish sauce, and pickle juice. These ingredients provide the classic deviled egg flavor with a zesty twist.
-
Mix all the ingredients well with a spoon or fork until they are fully combined and the mixture is creamy. Taste and adjust seasonings if desired.
-
Incorporate the diced pickles and onions into the egg yolk mixture. These add texture and a burst of fresh flavor.
-
Mix thoroughly until the diced pickles and onions are evenly distributed throughout the filling.
-
Using a spoon, scoop approximately 1 teaspoon of the egg yolk mixture into each egg white half. Ensure each half is generously filled.
-
If desired, sprinkle a pinch of paprika on top of each filled egg for a touch of color and a hint of smoky flavor.
-
Cover the plate of deviled eggs tightly with plastic wrap.
-
Refrigerate the deviled eggs for at least one hour before serving. This allows the flavors to meld together and intensifies the taste. Chilling also helps the eggs set, making them easier to handle and more enjoyable to eat.
Expert Tips & Tricks
- Perfectly Cooked Eggs: The key to great deviled eggs is perfectly cooked yolks. Avoid the dreaded green ring around the yolk by following the precise timing in the instructions. The resting period after boiling is crucial.
- Creamy Filling: For an extra smooth filling, consider using an immersion blender or food processor to combine the yolks and other ingredients.
- Horseradish Intensity: Horseradish sauce varies in potency. Start with 1 tablespoon and adjust to your preference. If you prefer a milder flavor, use cream-style horseradish.
- Make-Ahead Marvel: Deviled eggs can be made a day in advance. Store the filled eggs in a tightly sealed container in the refrigerator to prevent them from drying out.
- Presentation Points: For a professional look, pipe the filling into the egg whites using a piping bag or a resealable plastic bag with the corner snipped off.
Serving & Storage Suggestions
Serve these Horsey Deviled Eggs chilled as an appetizer, side dish, or snack. They are perfect for picnics, potlucks, parties, and holiday gatherings.
- Serving: Arrange the deviled eggs attractively on a platter, garnished with fresh herbs like dill or parsley.
- Storage: Store leftover deviled eggs in an airtight container in the refrigerator for up to 3 days.
- Room Temperature: Do not leave deviled eggs at room temperature for more than 2 hours, as this can increase the risk of bacterial growth.
- Freezing: Freezing is not recommended as it can alter the texture and flavor of the eggs.
Nutritional Information
| Nutrient | Amount per Serving | % Daily Value |
|---|---|---|
| Calories | 47.2 kcal | N/A |
| Calories from Fat | 29 kcal | N/A |
| Total Fat | 3.3 g | 5% |
| Saturated Fat | 0.9 g | 4% |
| Cholesterol | 106.4 mg | 35% |
| Sodium | 66.4 mg | 2% |
| Total Carbohydrate | 1 g | 0% |
| Dietary Fiber | 0.1 g | 0% |
| Sugars | 0.5 g | 1% |
| Protein | 3.2 g | 6% |
Note: Nutritional information is an estimate and may vary based on specific ingredients and preparation methods.
Variations & Substitutions
- Spicy Kick: Add a pinch of cayenne pepper or a dash of hot sauce to the yolk mixture for an extra spicy kick.
- Smoked Salmon Deviled Eggs: Top the filled eggs with a small piece of smoked salmon for a luxurious and flavorful variation.
- Bacon Deviled Eggs: Crumble crispy bacon over the filled eggs for a smoky and savory twist.
- Avocado Deviled Eggs: Substitute some of the mayonnaise with mashed avocado for a healthier and creamier version.
- Vegan Deviled Eggs: Use a vegan mayonnaise alternative and replace the egg yolks with a mixture of mashed potatoes, nutritional yeast, and spices for a vegan-friendly option.
FAQs (Frequently Asked Questions)
Q: Can I use a different type of pickle?
A: Absolutely! Feel free to experiment with different types of pickles, such as sweet pickles or bread and butter pickles, to customize the flavor to your liking.
Q: Can I make these ahead of time?
A: Yes, deviled eggs can be made a day in advance. Just store them in an airtight container in the refrigerator until ready to serve.
Q: How long will these last in the refrigerator?
A: Deviled eggs will last for up to 3 days in the refrigerator. Be sure to store them in an airtight container to maintain their freshness.
Q: Can I freeze deviled eggs?
A: Freezing is not recommended as it can alter the texture and flavor of the eggs, making them watery and less appealing.
Q: What if I don’t like horseradish?
A: If you don’t care for horseradish, you can simply omit it from the recipe. The deviled eggs will still be delicious with the other ingredients. Alternatively, you could substitute it with a small amount of Dijon mustard for a similar tangy flavor.
Final Thoughts
I hope you’ll try these Horsey Deviled Eggs. They’re a fantastic way to elevate a classic dish with a simple yet impactful twist. Don’t hesitate to adjust the recipe to your taste preferences and share your creations with loved ones. I’m confident this unique take on deviled eggs will become a cherished addition to your culinary repertoire!