
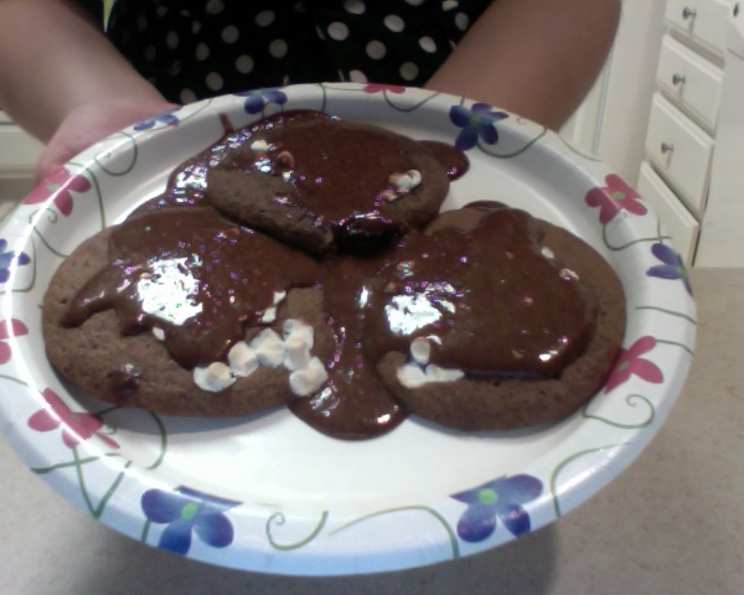
Hot Chocolate Cookies: A Warm Embrace in Every Bite
The first time I truly understood the power of a simple cookie was during a particularly harsh winter. Snow was piled high outside the bakery window, and the wind howled relentlessly. Inside, the air was thick with the comforting aroma of cocoa and vanilla. A steaming mug of hot chocolate sat beside a plate of freshly baked cookies – soft, chocolatey disks topped with a swirl of glossy glaze. That first bite was like a warm hug, chasing away the chill and replacing it with pure, unadulterated joy. These Hot Chocolate Cookies capture that same feeling, bringing warmth and happiness with every mouthful.
Recipe Overview
- Prep Time: 20 minutes
- Cook Time: 9-10 minutes
- Total Time: 30 minutes
- Servings: 24 cookies
- Yield: 24 cookies
- Dietary Type: Vegetarian
Ingredients
For the Cookies:
- 1 3/4 cups all-purpose flour
- 1 cup instant hot chocolate powdered cocoa mix
- 1 teaspoon baking soda
- 1/2 teaspoon salt
- 12 tablespoons (1 1/2 sticks) unsalted butter, softened
- 1/2 cup granulated sugar
- 2 large eggs
- 1/4 cup low-fat milk
- 1 teaspoon vanilla
- 24 large marshmallows, cut in half crosswise
For the Glaze:
- 1 3/4 cups confectioners’ sugar
- 6 tablespoons unsalted butter
- 1/4 cup low-fat milk
- 2 tablespoons Dutch-processed cocoa powder
Equipment Needed
- Medium bowl
- Large mixing bowl
- Teaspoon cookie scoop
- Parchment paper
- Baking sheets
- Wire rack
- Small saucepan
Instructions
-
Begin by preheating your oven to 350°F (175°C). Line your baking sheets with parchment paper for easy cleanup and to prevent the cookies from sticking.
-
In a medium bowl, whisk together the dry ingredients: all-purpose flour, instant hot chocolate powdered cocoa mix, baking soda, and salt. Make sure everything is well combined to ensure even distribution in the cookies.
-
In a large mixing bowl, cream together the softened butter and granulated sugar until the mixture is light and fluffy. This step is crucial for achieving the right texture. Use an electric mixer for best results, and scrape down the sides of the bowl occasionally to ensure everything is evenly incorporated.
-
Add the eggs one at a time to the butter-sugar mixture, mixing until combined after each addition. This helps emulsify the mixture and creates a smooth batter.
-
Mix in the low-fat milk and vanilla extract. The milk adds moisture to the dough, while the vanilla enhances the overall flavor.
-
Gradually add the dry ingredients to the wet ingredients, mixing just until combined. Be careful not to overmix the dough, as this can lead to tough cookies. A few streaks of flour are okay at this stage.
-
Using a teaspoon cookie scoop, drop rounded spoonfuls of dough onto the prepared baking sheets, leaving some space between each cookie to allow for spreading.
-
Bake for about 8 minutes, or until the cookies are set. They should be slightly firm to the touch and lightly golden around the edges.
-
Remove the baking sheets from the oven and carefully place a marshmallow half, cut side down, in the center of each cookie. This is where the magic happens!
-
Return the baking sheets to the oven and continue baking for 1 to 2 minutes, or until the marshmallows begin to look puffy. Watch them closely to prevent burning.
-
Remove the baking sheets from the oven and let the cookies sit on the baking sheets for 1 minute before transferring them to a wire rack to cool completely. This allows them to firm up slightly and prevents them from breaking.
-
While the cookies are cooling, prepare the glaze. Place the confectioners’ sugar in a medium bowl.
-
In a small saucepan, add the butter, low-fat milk, and Dutch-processed cocoa powder. Cook over medium heat until the mixture comes to a boil, stirring constantly to prevent scorching. Let it cook for 1 minute.
-
Remove the saucepan from the heat and let it cool for 5 minutes. This allows the glaze to thicken slightly.
-
Pour the butter-cocoa mixture into the bowl of confectioners’ sugar and beat until the glaze is smooth and creamy.
-
Immediately spoon a little of the glaze over each of the cooled cookies. The glaze will set quickly, so work efficiently.
Expert Tips & Tricks
- For extra chocolatey cookies, add 1/4 cup of mini chocolate chips to the dough along with the dry ingredients.
- Don’t overbake the cookies! They should be soft and chewy in the center.
- For a richer glaze, use heavy cream instead of low-fat milk.
- If the glaze becomes too thick, add a teaspoon of milk at a time until it reaches the desired consistency.
- To prevent the marshmallows from spreading too much, chill the cookie dough for 30 minutes before baking.
Serving & Storage Suggestions
Serve these Hot Chocolate Cookies warm or at room temperature with a steaming mug of hot chocolate or a glass of cold milk. They’re perfect for a cozy night in or as a sweet treat for guests.
Store the cookies in an airtight container at room temperature for up to 3 days. For longer storage, freeze them for up to 2 months. To freeze, place the cookies in a single layer on a baking sheet and freeze until solid. Then, transfer them to a freezer bag or container. Thaw the cookies at room temperature before serving. Reheating them briefly in a warm oven can revive their soft texture.
Nutritional Information
| Nutrient | Amount per Serving | % Daily Value* |
|---|---|---|
| Calories | 132.9 kcal | N/A |
| Calories from Fat | N/A | 34% |
| Total Fat | 5 g | 7% |
| Saturated Fat | 3.1 g | 15% |
| Cholesterol | 19.3 mg | 6% |
| Sodium | 105.2 mg | 4% |
| Total Carbohydrate | 20.9 g | 6% |
| Dietary Fiber | 0.6 g | 2% |
| Sugars | 14.7 g | N/A |
| Protein | 1.6 g | 3% |
*Percent Daily Values are based on a 2,000 calorie diet. Your daily values may be higher or lower depending on your calorie needs.
Variations & Substitutions
- Peppermint Hot Chocolate Cookies: Use peppermint hot chocolate mix and add a few drops of peppermint extract to the glaze. Sprinkle crushed peppermint candies on top.
- Mexican Hot Chocolate Cookies: Use Mexican hot chocolate mix with cinnamon and chili powder. Add a pinch of cayenne pepper to the glaze for a subtle kick.
- Vegan Hot Chocolate Cookies: Substitute the butter with vegan butter, the eggs with flax eggs (1 tablespoon ground flaxseed mixed with 3 tablespoons water per egg), and the low-fat milk with your favorite plant-based milk. Ensure your hot chocolate mix is also vegan-friendly.
FAQs (Frequently Asked Questions)
Q: Can I use a different type of flour?
A: While all-purpose flour is recommended for the best texture, you can substitute with a 1:1 gluten-free flour blend for a gluten-free version.
Q: Can I make the dough ahead of time?
A: Yes, you can prepare the dough and store it in the refrigerator for up to 24 hours. Let it come to room temperature slightly before scooping and baking.
Q: Can I freeze the baked cookies?
A: Absolutely! Freeze the baked and glazed cookies in an airtight container for up to 2 months.
Q: My glaze is too thick. What should I do?
A: Add a teaspoon of low-fat milk at a time until it reaches the desired consistency.
Q: Can I use mini marshmallows instead of large marshmallows?
A: Yes, you can use mini marshmallows. Just place a small handful of mini marshmallows on top of each cookie before the final minute of baking.
Final Thoughts
These Hot Chocolate Cookies are more than just a recipe; they’re a warm invitation to slow down, savor the moment, and share a little sweetness with those you love. Whether you’re curled up with a book on a chilly evening or hosting a festive gathering, these cookies are sure to bring a smile to everyone’s face. I encourage you to try this recipe and make it your own. Feel free to experiment with different flavors, toppings, and variations to create a cookie that’s uniquely yours. And don’t forget to share your creations and feedback! Happy baking!