
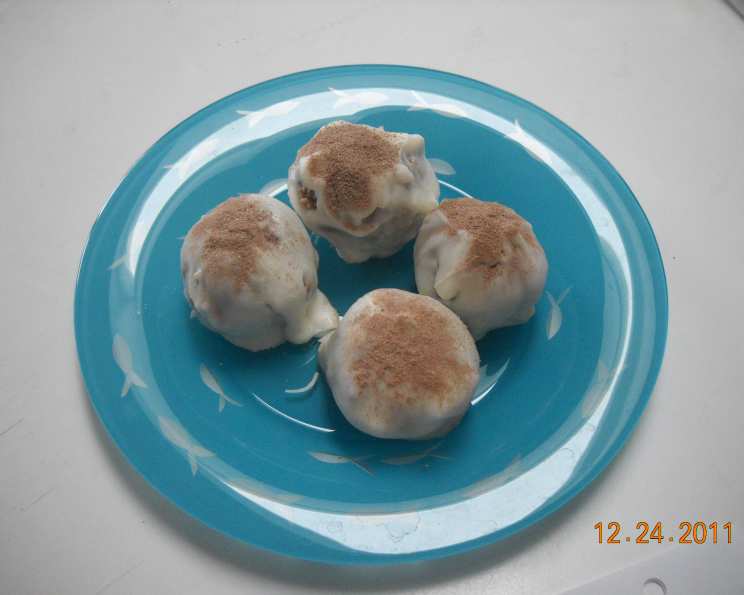
Hot Cocoa Cake Balls: A Sweet Holiday Treat
I remember being a kid, huddled by the fireplace on Christmas Eve, the scent of pine needles and cinnamon filling the air. My grandma would always make the most incredible hot cocoa – rich, chocolatey, and topped with an obscene amount of marshmallows. These Hot Cocoa Cake Balls remind me of those cozy moments, encapsulating the warmth and joy of the holidays in every single bite. They’re a fun, festive treat that’s surprisingly easy to make, even if your decorating skills aren’t quite professional-grade (mine certainly aren’t!).
Recipe Overview
- Prep Time: 30 minutes
- Cook Time: According to cake mix instructions
- Total Time: 1 hour 30 minutes (including cooling and setting time)
- Yields: 24 balls
- Serves: 24
- Dietary Type: Not specified, but can be modified to be gluten-free with gluten-free cake mix and candy coating.
Ingredients
- 1 (18 ounce) box white cake mix
- 2 (1 ounce) packages hot cocoa mix
- 1 (16 ounce) container vanilla frosting
- 1 (16 ounce) package white candy coating
Equipment Needed
- Baking pan (size as directed on cake mix box)
- Large mixing bowl
- Fork
- Wax paper or parchment paper
- Microwave-safe bowl or double boiler
Instructions
- Prepare the Cake: Follow the directions on the white cake mix box to make the cake. Incorporate two packages of hot cocoa mix into the batter before baking. This infuses the cake with that delicious hot cocoa flavor.
- Bake the Cake: Bake the cake according to the directions on the cake mix box. Ovens vary, so check for doneness a few minutes before the recommended time. A toothpick inserted into the center should come out clean.
- Cool Completely: Allow the cake to cool completely before moving on to the next step. This is crucial for proper crumbling and prevents the frosting from melting.
- Crumble and Mix: Once cooled, crumble the cake into a large bowl. Make sure it’s finely crumbled, with no large chunks remaining. Add vanilla frosting. You likely won’t need the entire container; start with about 2/3 of it and add more until the cake crumbs stick together and form a dough-like consistency.
- Shape into Balls: Roll the cake and frosting mixture into small balls, about 1-inch in diameter. Avoid making them too big, as they will be easier to coat and eat.
- Freeze: Place the shaped cake balls in the freezer for about 30 minutes. This helps them firm up and makes them easier to handle during the dipping process.
- Melt Candy Coating: Melt the white candy coating according to the directions on the package. You can use a microwave-safe bowl, heating in short intervals and stirring frequently to prevent burning, or a double boiler for more precise temperature control.
- Dip and Coat: Drop a frozen cake ball into the melted candy coating and gently toss with a fork to completely cover it. Lift the ball out of the coating with the fork, allowing excess coating to drip off.
- Place and Decorate: Place the coated cake ball on wax paper or parchment paper. If there’s a fork mark, gently dab some of the melted candy coating on top to smooth it out.
- Sprinkle with Hot Cocoa: Immediately after dipping 2-3 balls, sprinkle them with additional hot cocoa mix while the coating is still wet. Repeat this process until all the balls are coated and sprinkled.
- Set: Allow the candy coating to set completely until dried. This will take about 30 minutes at room temperature, or you can speed up the process by placing them in the refrigerator for about 15 minutes.
Expert Tips & Tricks
- Prevent Cake Sticking: Line your baking pan with parchment paper for easy cake removal.
- Achieving the Right Consistency: When mixing the frosting into the crumbled cake, add it gradually. You want the mixture to be moist enough to hold its shape, but not so wet that it becomes sticky.
- Melting Chocolate Perfectly: For the candy coating, microwave in 30-second intervals, stirring in between, to prevent burning. Alternatively, a double boiler provides gentle, even heat.
- Smooth Coating: To get a smooth finish, tap the fork against the side of the bowl to remove excess candy coating before placing the cake ball on the wax paper.
- Easy Dipping: Use dipping tools designed for candy making to make the process even easier and cleaner. These tools often have prongs or loops that allow you to easily submerge and lift the cake balls.
- Quick Thaw: If the cake balls get too hard in the freezer, let them sit at room temperature for a few minutes before dipping.
- Colorful Decoration: Instead of just using cocoa powder, try sprinkles, crushed peppermint candies, or drizzled melted chocolate for added flair.
Serving & Storage Suggestions
These Hot Cocoa Cake Balls are best served at room temperature, allowing the candy coating to have a pleasant snap. They are perfect for holiday gatherings, potlucks, or as a sweet treat alongside a warm cup of cocoa.
Storage: Store the cake balls in an airtight container at room temperature for up to 3 days, or in the refrigerator for up to a week. For longer storage, freeze them for up to 2 months. Thaw in the refrigerator before serving.
Nutritional Information
Please note that the following nutritional information is an estimate and may vary depending on the specific brands and ingredients used.
| Nutrient | Amount per Serving | % Daily Value |
|---|---|---|
| Calories | 286 kcal | 14% |
| Total Fat | 12 g | 15% |
| Saturated Fat | 5 g | 25% |
| Cholesterol | 4 mg | 1% |
| Sodium | 212 mg | 9% |
| Total Carbohydrate | 44 g | 15% |
| Dietary Fiber | 0 g | 0% |
| Sugars | 37 g | 74% |
| Protein | 2 g | 4% |
Variations & Substitutions
- Chocolate Cake Balls: Use chocolate cake mix instead of white cake mix for an even richer chocolate flavor.
- Peppermint Hot Cocoa: Add peppermint extract to the cake batter or sprinkle crushed peppermint candies on the coated cake balls.
- Espresso Cake Balls: Incorporate a teaspoon of instant espresso powder into the cake batter for a mocha-inspired twist.
- Dairy-Free: Use a dairy-free cake mix, dairy-free frosting, and dairy-free candy coating.
- Different Frosting: Experiment with different frosting flavors, such as chocolate, cream cheese, or salted caramel.
- Candy Coating Alternatives: Use melted chocolate chips or almond bark instead of candy coating.
FAQs (Frequently Asked Questions)
Q: Can I use a different type of cake mix?
A: Absolutely! While the recipe calls for white cake mix, you can use chocolate, yellow, or any flavor you prefer. Just remember that it will alter the overall taste of the cake balls.
Q: How do I prevent the cake balls from falling apart when dipping them?
A: Freezing the cake balls for at least 30 minutes before dipping helps them firm up and prevents them from crumbling in the melted candy coating.
Q: What if my candy coating is too thick?
A: Add a teaspoon of vegetable oil or shortening to the melted candy coating to thin it out and make it easier to work with.
Q: Can I make these ahead of time?
A: Yes! These cake balls can be made a day or two in advance. Store them in an airtight container in the refrigerator until ready to serve.
Q: How do I prevent the hot cocoa mix from clumping when sprinkling it on?
A: Use a fine-mesh sieve to lightly dust the hot cocoa mix over the wet candy coating. This will ensure an even coating without any clumps.
Final Thoughts
These Hot Cocoa Cake Balls are more than just a dessert; they’re a little piece of holiday magic. The combination of rich chocolate, creamy frosting, and a crisp candy coating is simply irresistible. Don’t be afraid to get creative with the decorations and make them your own. Gather your friends and family, put on some festive music, and enjoy the process of creating these delightful treats together. I hope you and yours love them as much as my family does! Happy baking!