
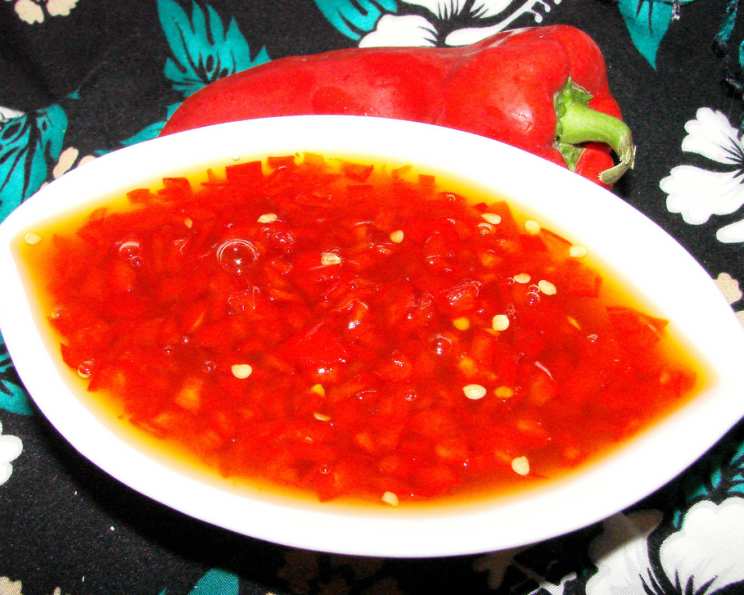
Fiery Fusion: Bread Machine Hot Pepper Jam
My grandmother, bless her heart, wasn’t known for her adventurous palate. Beige was a color she embraced not only in her wardrobe but also in her cooking. But every Christmas, a small, unassuming jar of jewel-toned hot pepper jam would appear on her table, a gift from a friend. It was the one brightly flavored and colored item she wholeheartedly embraced, slathering it on crackers with cream cheese. It was a delicious anomaly that sparked my own culinary curiosity, leading me down a path of experimenting with sweet heat. This bread machine hot pepper jam is a testament to that early fascination.
Recipe Overview
- Prep Time: 20 minutes
- Cook Time: 1 hour 30 minutes
- Total Time: 1 hour 50 minutes
- Yields: 2 cups
- Serves: 10
- Dietary Type: Vegetarian, Gluten-Free
Ingredients
- 1/3 cup sugar
- 2 teaspoons low-sugar dry pectin
- 1 1/4 cups red bell peppers, diced
- 1 cup green bell pepper, diced
- 2 jalapeño peppers, about 1/3 cup, diced
- 2 teaspoons white vinegar
Equipment Needed
- Bread machine
- Rubber gloves
- Cutting board
- Knife
- Measuring cups and spoons
- Rubber spatula
- Glass or plastic container with lid
Instructions
- Begin by thoroughly washing all the peppers. This is a crucial step for food safety.
- Cut off the stems from the bell peppers and jalapeños.
- Remove the membranes and seeds from the bell peppers. Dice the bell peppers into small pieces, approximately 1/8-inch. Remember that the chunks will retain their size even after the jam cycle, so uniform dicing is key. You should have about 2 1/4 cups of diced bell peppers.
- Protect your hands by wearing rubber gloves while handling the jalapeño peppers. This will prevent any burning sensations. The level of spiciness in the final jam can be adjusted by controlling the amount of seeds left in the jalapeños. For a spicier jam, leave the seeds in. For a milder jam, remove most or all of them. If you prefer a moderate spice level, a good approach is to cut both jalapeños in half, leave the seeds in 1/4 of the pepper, and remove the seeds from the remaining 3/4. Dice the jalapeño peppers into small pieces, also about 1/8-inch.
- Attach the kneading blade in the bread pan. This is essential for even distribution of the ingredients during the jam-making process.
- Place the ingredients into the bread pan in the following order: sugar, pectin, red bell peppers, green bell pepper, jalapeño peppers, and white vinegar. Layering the ingredients in this way can help prevent the pectin from clumping.
- Carefully insert the bread pan into the bread machine, close the lid, and press the Menu button until the “Jam” program is selected. Then, press Start. Each bread machine is different, so consult your machine’s user manual for specific instructions.
- When the Jam cycle is complete, carefully open the lid and, using oven mitts (the pan will be hot!), remove the bread pan.
- Let the jam cool slightly in the pan. This will allow it to thicken a bit before transferring it.
- Using oven mitts to hold the pan securely, use a rubber spatula to pour the jam into a clean glass or plastic container. A rubber spatula will help you scrape every last bit of jam from the pan.
- Cover the container and refrigerate the jam to set completely, which usually takes about 24 hours. The refrigeration process allows the pectin to fully gel, resulting in the desired jam consistency.
Expert Tips & Tricks
- Spice Level Adjustment: The heat from jalapeños can vary. Taste a small piece (carefully!) before dicing to gauge its intensity. Adjust the amount used or the number of seeds retained accordingly. Consider adding a pinch of red pepper flakes for an extra kick, or a small piece of habanero (use extreme caution!).
- Pectin Quality: Using high-quality, low-sugar pectin is crucial for the jam to set properly, especially since this recipe uses a lower amount of sugar.
- Preventing Burning: Monitor the jam-making process, especially towards the end of the cycle. If you notice any burning smell, stop the machine and transfer the jam to a saucepan to finish cooking on the stovetop over low heat, stirring constantly.
- Testing for Set: Place a small spoonful of the hot jam onto a chilled plate. After a minute, push it with your finger. If it wrinkles, it’s set. If it remains runny, cook it longer, either in the bread machine or on the stovetop.
- Adding Garlic (Experiment!): As the original author wondered, adding garlic might create an excellent flavor profile. If trying, use 1-2 cloves of minced garlic, adding it to the pan along with the other ingredients.
Serving & Storage Suggestions
This hot pepper jam is incredibly versatile. Serve it with cream cheese and crackers as a classic appetizer. It’s also fantastic as a glaze for grilled meats like chicken or pork. Try it on sandwiches, in wraps, or as a topping for baked brie.
Store the finished jam in the refrigerator in an airtight container. It will keep for up to 2 weeks. For longer storage, the jam can be frozen for up to 3 months. Thaw it in the refrigerator overnight before using. While technically you could process this recipe using proper canning techniques for shelf-stable storage, it is not recommended for bread-machine recipes since pectin levels can be unreliable and safety is paramount.
Nutritional Information
| Nutrient | Amount per Serving | % Daily Value |
|---|---|---|
| Calories | 35.5 kcal | N/A |
| Calories from Fat | N/A | 0% |
| Total Fat | 0.1 g | 0% |
| Saturated Fat | 0 g | 0% |
| Cholesterol | 0 mg | 0% |
| Sodium | 1.4 mg | 0% |
| Total Carbohydrate | 8.7 g | 2% |
| Dietary Fiber | 0.7 g | 2% |
| Sugars | 7.9 g | 31% |
| Protein | 0.3 g | 0% |
Note: Nutritional information is an estimate and may vary based on specific ingredients and portion sizes.
Variations & Substitutions
- Fruit Forward: Incorporate other fruits like pineapple or mango (about 1/2 cup, diced) for a tropical twist. Adjust the sugar accordingly.
- Smoked Flavor: Add a teaspoon of smoked paprika for a smoky depth.
- Wine Infusion: Replace the white vinegar with apple cider vinegar or a splash of red wine vinegar for a different flavor profile.
- Herbaceous Notes: Add a tablespoon of finely chopped fresh herbs like cilantro or basil after the jam has cooled slightly.
- Extra Heat: For those who crave intense heat, consider adding a Scotch bonnet pepper (handle with extreme care!), finely minced, in addition to the jalapeños.
FAQs (Frequently Asked Questions)
Q: Can I use a different type of pectin?
A: It is highly recommended to use low-sugar dry pectin, as the recipe is specifically formulated for it. Other types of pectin may not work as effectively, leading to a runny jam.
Q: My jam didn’t set properly. What can I do?
A: If the jam is too runny, you can try cooking it longer on the stovetop over low heat, stirring constantly, until it reaches the desired consistency. Adding a little more pectin (mixed with a teaspoon of sugar) can also help.
Q: Can I use different colored bell peppers?
A: Absolutely! Using a mix of different colored bell peppers will create a visually appealing and flavorful jam.
Q: How long will the jam last?
A: Stored properly in the refrigerator, the jam will last for up to 2 weeks. For longer storage, you can freeze it for up to 3 months.
Q: What if I don’t have a bread machine?
A: No problem! You can easily make this jam on the stovetop. Combine all the ingredients in a saucepan and cook over medium heat, stirring occasionally, until the peppers are softened and the jam has thickened to your desired consistency, about 30-45 minutes.
Final Thoughts
This Bread Machine Hot Pepper Jam is more than just a recipe; it’s an invitation to add a spark of flavor and a touch of adventure to your everyday meals. Don’t be afraid to experiment with different pepper combinations and spice levels to create your own signature jam. I encourage you to give this recipe a try, and I’d love to hear about your experiences and any creative twists you come up with. Slather it on some crackers with creamy brie, spread it on a grilled cheese sandwich, or use it as a glaze for your next BBQ – and remember that beige foods are not mandatory.