
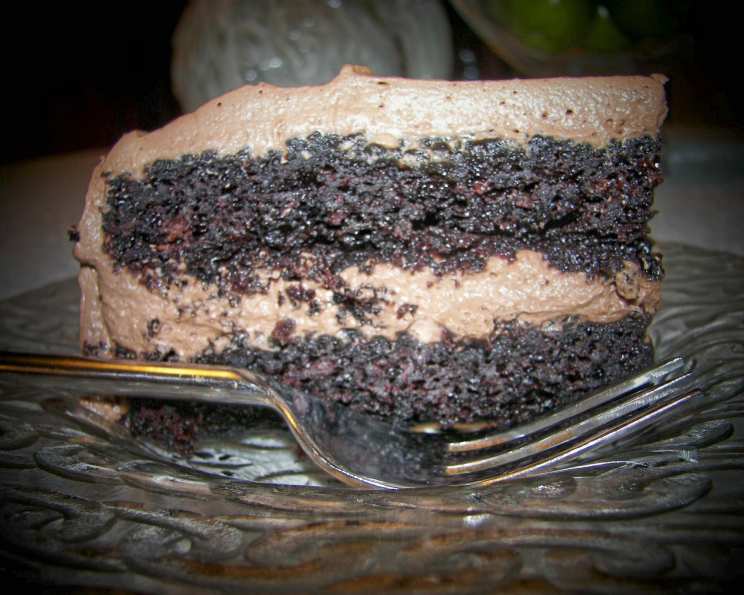
Hot Water Chocolate Cake: A Timeless Comfort
The scent of chocolate baking in the oven instantly transports me back to my grandmother’s kitchen. She always seemed to have a cake cooling on the counter, ready to be shared with a warm smile and a tall glass of milk. While she made many different desserts, her hot water chocolate cake was a particular favorite – its deep, rich flavor and unbelievably moist crumb were simply irresistible. It’s a recipe that’s been passed down through generations in my family, and I’m thrilled to share it with you.
Recipe Overview
- Prep Time: 20 minutes
- Cook Time: 60-90 minutes
- Total Time: 1 hour 20 minutes – 1 hour 50 minutes
- Servings: 12-16
- Yield: Two 8-inch cakes
- Dietary Type: Not specified
Ingredients
- 1 cup shortening
- 2 cups white sugar
- ½ cup cocoa, mixed in
- ½ cup boiling water, to make a smooth paste
- 1 cup milk
- 2 eggs
- 1 cup all-purpose flour
- 1 cup cake flour
- 3 ½ teaspoons baking powder
- 2 teaspoons baking soda, mixed in
- ¾ cup boiling water
Equipment Needed
- Two 8-inch cake pans
- Wax paper
- Mixing bowls
- Electric mixer (optional, but recommended)
- Measuring cups and spoons
- Spatula
- Toothpick or cake tester
- Cooling rack
Instructions
- Preheat your oven to 350°F (175°C). While the oven preheats, prepare your cake pans.
- Line two 8-inch cake pans with wax paper. This will ensure that the cakes release easily after baking. Set the prepared pans aside.
- In a large mixing bowl, cream together the shortening and white sugar until light and fluffy. This step is crucial for creating a tender crumb, so take your time to ensure the mixture is well-combined.
- In a separate small bowl, combine the cocoa with ½ cup of boiling water. Stir until you have a smooth paste. Add this cocoa paste to the creamed shortening and sugar mixture.
- Mix well to fully incorporate the cocoa flavor. The mixture will be quite dark and fragrant.
- Gradually add the milk, mixing until just combined. Be careful not to overmix at this stage.
- Beat in the eggs one at a time, ensuring each egg is fully incorporated before adding the next. This helps to emulsify the batter and create a smooth texture.
- In a separate bowl, whisk together the all-purpose flour, cake flour, and baking powder. Combining these dry ingredients beforehand ensures that they are evenly distributed throughout the batter.
- Gradually add the dry ingredients to the wet ingredients, mixing until just combined. Again, avoid overmixing to prevent a tough cake.
- In a small bowl, combine the baking soda with ¾ cup of boiling water. Be careful, as the mixture will fizz.
- Add the baking soda mixture to the cake batter and beat well until everything is thoroughly mixed. The batter will be quite thin at this point – don’t worry, this is normal.
- Divide the batter evenly between the two prepared cake pans.
- Bake for 1 hour to 1 hour and 30 minutes (60-90 minutes), or until a toothpick or cake tester inserted into the center comes out clean. Start checking for doneness around the 1-hour mark, as baking times can vary depending on your oven.
- Once the cakes are done, remove them from the oven and let them cool in the pans for 10-15 minutes before inverting them onto a wire rack to cool completely.
- Once the cakes are completely cool, frost with your favorite icing.
Expert Tips & Tricks
- Room Temperature Matters: Ensure your eggs and milk are at room temperature for optimal emulsification and a better cake texture.
- Sifting for Success: For an even lighter cake, sift your flours and baking powder together before adding them to the wet ingredients. This helps prevent lumps and ensures even distribution.
- Don’t Overmix: Overmixing develops the gluten in the flour, resulting in a tough cake. Mix until just combined.
- Pan Prep is Key: Properly greasing and flouring the cake pans (or using parchment paper liners) prevents sticking and ensures a clean release.
- Oven Thermometer: Use an oven thermometer to ensure your oven temperature is accurate. Many ovens fluctuate, which can affect baking times.
Serving & Storage Suggestions
Once the cake is frosted, it’s ready to be served! This cake is delicious on its own, or paired with a scoop of vanilla ice cream or a dollop of whipped cream. For a decadent treat, consider serving it with fresh berries or a chocolate sauce.
To store leftovers, wrap the cake tightly in plastic wrap or place it in an airtight container. It will keep at room temperature for up to 3 days, in the refrigerator for up to a week, or in the freezer for up to 3 months.
To reheat frozen cake, thaw it overnight in the refrigerator and then bring it to room temperature before serving.
Nutritional Information
(Estimated per serving, without frosting)
| Nutrient | Amount per Serving | % Daily Value |
|---|---|---|
| Calories | 350 kcal | 18% |
| Total Fat | 18g | 28% |
| Saturated Fat | 6g | 30% |
| Cholesterol | 35mg | 12% |
| Sodium | 300mg | 13% |
| Total Carbohydrate | 45g | 15% |
| Dietary Fiber | 1g | 4% |
| Sugars | 30g | N/A |
| Protein | 4g | 8% |
Note: Nutritional information is an estimate and may vary based on specific ingredients and portion sizes.
Variations & Substitutions
- Gluten-Free: Substitute a gluten-free all-purpose flour blend for the all-purpose flour and cake flour. Be sure to use a blend that contains xanthan gum or guar gum for binding.
- Dairy-Free: Replace the milk with your favorite non-dairy milk alternative, such as almond milk, soy milk, or oat milk.
- Vegan: In addition to substituting the milk, replace the eggs with flax eggs (1 tablespoon of ground flaxseed meal mixed with 3 tablespoons of water per egg). Let the mixture sit for 5 minutes to thicken before adding to the batter.
- Coffee Enhancement: Add 1-2 teaspoons of instant coffee granules to the boiling water when making the cocoa paste to enhance the chocolate flavor.
- Spice It Up: Add a pinch of cinnamon or nutmeg to the dry ingredients for a warm, comforting flavor.
FAQs (Frequently Asked Questions)
Q: Why is it called hot water chocolate cake?
A: The recipe gets its name from the use of boiling water to dissolve both the cocoa and the baking soda. The hot water helps to bloom the cocoa powder, intensifying its flavor, and activates the baking soda for a lighter, more tender cake.
Q: Can I use butter instead of shortening?
A: Yes, you can substitute butter for shortening in equal amounts. However, shortening will give you a slightly more tender cake due to its higher fat content.
Q: My cake came out dry. What did I do wrong?
A: Overbaking is the most common cause of dry cake. Be sure to check for doneness regularly after the 1-hour mark. Also, avoid overmixing the batter, as this can develop the gluten in the flour and result in a dry cake.
Q: Can I make this cake in a single layer instead of two?
A: Yes, you can bake the batter in a single 9×13 inch pan. The baking time will likely be longer, so check for doneness after about 1 hour and 15 minutes.
Q: What’s the best frosting for this cake?
A: Chocolate buttercream is a classic pairing, but vanilla buttercream, cream cheese frosting, or even a simple chocolate ganache would also be delicious.
Final Thoughts
I hope this recipe brings you as much joy as it has brought my family over the years. It’s a truly special dessert that is perfect for any occasion, from birthdays to holidays to simple weeknight treats. Don’t be afraid to experiment with variations and substitutions to make it your own. And most importantly, enjoy the process of baking and sharing this delicious cake with loved ones. Let me know how it turns out – I always love hearing about your baking adventures! Perhaps pair it with a rich cup of dark roast coffee or a scoop of your favorite ice cream. Happy baking!