
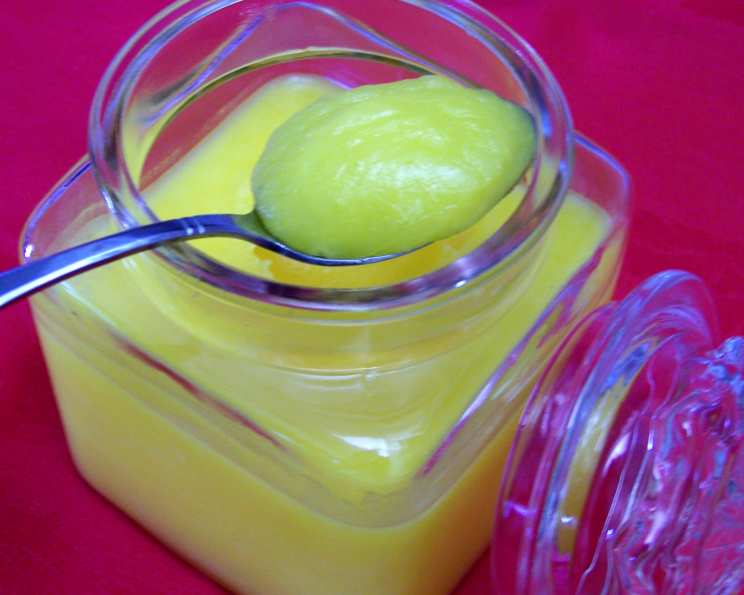
How to Prepare Ghee: A Culinary Journey to Golden Perfection
The scent of warm, nutty butter is a potent memory trigger for me. It instantly transports me back to my grandmother’s kitchen, a place perpetually filled with the comforting aromas of simmering spices and freshly baked treats. While she made many culinary masterpieces, her homemade ghee was legendary. I remember watching her carefully, mesmerized by the transformation of ordinary butter into that golden elixir, a secret ingredient that elevated every dish she made. The patient simmering, the gentle skimming, and the final, beautiful clarity of the ghee were a ritual I always looked forward to witnessing.
Recipe Overview
- Prep Time: 5 minutes
- Cook Time: 40 minutes
- Total Time: 45 minutes
- Yields: 1 1/2 cups
- Dietary Type: Gluten-Free, Casein-Free, Lactose-Free
Ingredients
- 1 lb unsalted butter
- Cheesecloth
Equipment Needed
- Stainless steel, thick-bottomed saucepan
- Wide-mouthed jar
- Fine-mesh strainer or cheesecloth
Instructions
- Begin by placing the unsalted butter into your stainless steel, thick-bottomed saucepan. The heavy bottom is essential to prevent scorching, which can ruin the flavor of your ghee.
- Place the saucepan over low-medium heat. Patience is key here! You want a gentle simmer, not a rapid boil.
- As the butter melts, it will begin to separate. The oil (which will become the ghee) will separate from the milk solids.
- As it simmers, a foam will begin to accumulate on the surface. This is composed of milk solids and impurities. Periodically remove the foam with a spoon. Skimming the foam is crucial for achieving a pure, clean flavor. Be diligent about removing this, as the solids will eventually brown and impart a burnt taste if left unchecked.
- Continue simmering the butter, watching it carefully. The process can take anywhere from 30-40 minutes, depending on the heat and the butter itself.
- The ghee is done when the oil is clear and golden in color. The milk solids at the bottom of the pan should be a light golden brown, not burnt black. Watch it closely towards the end as it can burn quickly. You should also notice a distinctive, nutty aroma.
- Remove the saucepan from the heat and allow the ghee to cool slightly for a few minutes. This will make it easier to handle.
- Carefully pour the ghee into a wide-mouthed jar. Secure several layers of cheesecloth to the opening of the jar, or use a fine-mesh strainer, to filter out the milk solids. This step ensures a smooth, sediment-free ghee.
- Let the ghee cool completely before covering the jar. Once cooled, store the ghee at room temperature. Because all the water and milk solids have been removed, it will keep for an extended period without refrigeration.
Expert Tips & Tricks
- Choosing the Right Butter: High-quality, unsalted butter is essential for the best-tasting ghee. Opt for butter from grass-fed cows, if possible, for a richer flavor and potentially higher nutrient content.
- Temperature Control: Maintaining a low and consistent heat is crucial. Too high, and the milk solids will burn, resulting in a bitter taste. Too low, and the process will take significantly longer.
- Don’t Rush It: The simmering process is what gives ghee its distinctive flavor. Don’t be tempted to turn up the heat to speed things up.
- Skimming is Key: Be diligent about removing the foam. This will ensure a cleaner, purer ghee.
- The ‘Water Drop’ Test: If you’re unsure whether all the water has evaporated, carefully drop a tiny droplet of water into the hot ghee. If it splatters vigorously, there’s still water present and you need to continue simmering.
- Aromatic Infusions: For a unique twist, consider adding spices like cardamom, cinnamon, or cloves to the butter during the simmering process. Just be sure to strain them out along with the milk solids.
- Saving the Solids: Don’t discard the browned milk solids! They are called “mava” and are considered a delicacy in some cuisines. Sprinkle them over rice, vegetables, or use them as a topping for desserts.
Serving & Storage Suggestions
Ghee can be used in place of butter or oil in virtually any recipe. It’s particularly well-suited for high-heat cooking due to its high smoke point. Use it for sautéing vegetables, searing meats, or baking. Its rich, nutty flavor also makes it a delightful addition to rice, dal, and other dishes.
Store your homemade ghee in an airtight container at room temperature, away from direct sunlight. Properly prepared ghee can last for several months, even up to a year, without refrigeration. If you prefer, you can also store it in the refrigerator, where it will solidify. To reheat solidified ghee, simply scoop out the desired amount and warm it gently over low heat.
Nutritional Information
| Nutrient | Amount per Serving (1 tbsp) | % Daily Value* |
|---|---|---|
| Calories | 120 kcal | 6% |
| Total Fat | 14 g | 22% |
| Saturated Fat | 9 g | 45% |
| Cholesterol | 45 mg | 15% |
| Sodium | 0 mg | 0% |
| Total Carbohydrate | 0 g | 0% |
| Dietary Fiber | 0 g | 0% |
| Sugars | 0 g | 0% |
| Protein | 0 g | 0% |
| Vitamin A | 435 IU | 9% |
| Vitamin E | 0.4 mg | 2% |
*Percent Daily Values are based on a 2,000 calorie diet. Your daily values may be higher or lower depending on your calorie needs.
Variations & Substitutions
- Herbed Ghee: Infuse the ghee with fresh herbs like rosemary, thyme, or sage during the simmering process for a savory twist.
- Spiced Ghee: Add warming spices like cinnamon, cardamom, cloves, or ginger for a fragrant and flavorful ghee.
- Garlic Ghee: Add minced garlic to the butter during the final stages of simmering for a delicious garlic-infused ghee. Be careful not to burn the garlic.
- Vegan Ghee: Although traditional ghee is made with butter, a vegan alternative can be created using coconut oil and a touch of turmeric for color. It won’t have the exact same flavor profile, but it can be a good substitute for those following a vegan diet.
FAQs (Frequently Asked Questions):
Q: What is the difference between ghee and clarified butter?
A: While often used interchangeably, ghee is simmered for a longer period than clarified butter, resulting in a deeper, nuttier flavor and the removal of more milk solids.
Q: Can I use salted butter to make ghee?
A: It’s generally recommended to use unsalted butter, as the salt can affect the flavor and potentially burn during the simmering process.
Q: How do I know when the ghee is done?
A: The ghee is done when the oil is clear and golden in color, the milk solids at the bottom of the pan are a light golden brown, and you detect a distinctive, nutty aroma.
Q: Why is ghee considered healthier than butter?
A: Ghee contains no lactose or casein, making it easier to digest for those with dairy sensitivities. It also has a higher smoke point than butter, making it suitable for high-heat cooking.
Q: Can I reuse the cheesecloth?
A: It’s best to use fresh cheesecloth for each batch of ghee to ensure proper filtration and avoid any unwanted flavors or particles. However, you can wash and reuse it for other purposes, such as straining stocks or making cheese.
Final Thoughts
Making ghee at home is a rewarding experience, connecting you to centuries of culinary tradition. It’s a simple process that transforms a humble ingredient into a versatile and flavorful staple. Don’t be intimidated – with a little patience and attention, you can create a batch of golden perfection that will elevate your cooking to new heights. I encourage you to try this recipe and experience the magic of homemade ghee for yourself. Share your creations and variations – I’d love to hear about your culinary adventures! Perhaps pair your freshly made ghee with some fragrant basmati rice and a flavorful lentil dal for a truly comforting and authentic meal.