
Mastering the Art of Yeast Dough Rising: Even in a Chilly Kitchen
I remember the first time I tried to bake bread in my tiny, drafty apartment. Winter was in full swing, and the kitchen felt perpetually like an icebox. I followed the recipe meticulously, but my dough just sat there, stubbornly refusing to rise. Discouraged, I almost gave up, but a seasoned baker friend shared a simple trick that transformed my baking game. Now, no matter the season or the temperature of my kitchen, I can consistently achieve perfectly risen dough.
Recipe Overview
- Prep Time: 10 minutes (plus dough making time)
- Rise Time: Variable, see instructions
- Cook Time: N/A
- Total Time: Variable, see instructions
- Yield: Varies depending on the dough recipe
- Dietary Type: Varies depending on the dough recipe
Ingredients
- 1 cup warm water
- Your favorite yeast bread dough, prepared according to its recipe
Equipment Needed
- Large mixing bowl (if not using a stand mixer)
- Greased bowl for rising
- Clean damp dish cloth
- Large glass measuring cup
- Microwave
Instructions
- Begin by preparing your yeast bread dough according to your chosen recipe. This could be a classic white bread, a hearty whole wheat, or a flavorful sourdough. Ensure all ingredients are fresh and accurately measured for the best results.
- Once the dough is mixed and kneaded (either by hand or with a stand mixer), transfer it to a greased bowl. Turn the dough to coat both sides with the grease – this prevents it from drying out during the rising process.
- Cover the bowl tightly with a clean, damp dish cloth. The moisture from the cloth will help create a humid environment, which is ideal for yeast activity.
- Now, for the magic trick: Fill a large glass measuring cup about halfway with water.
- Place the measuring cup filled with water into the microwave. Heat the water until it just comes to a boil and steams up the inside of the microwave. This should take a few minutes, depending on the power of your microwave. Watch carefully to prevent it from boiling over.
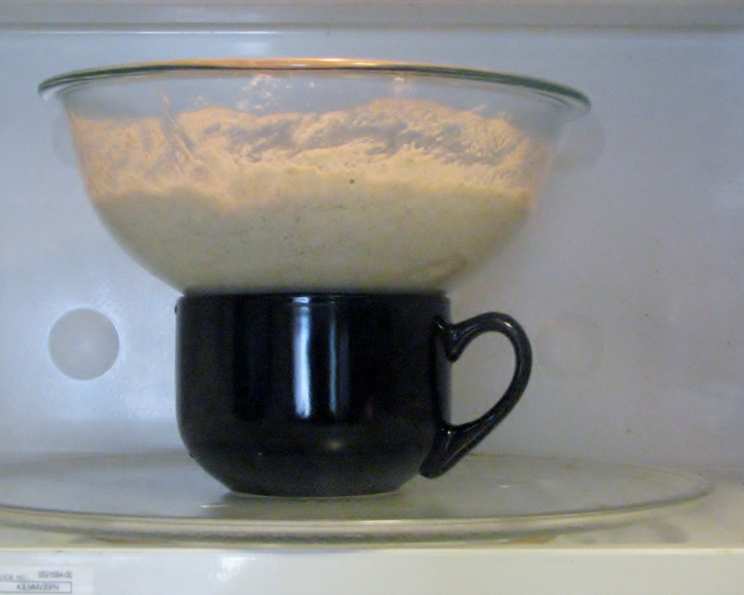
- Quickly open the microwave door and carefully place the bowl of dough inside, alongside the hot water. Position the water towards the back corner of the microwave.
- Close the microwave door immediately to trap the steam and create a warm, humid environment. Do not turn the microwave on. The residual heat from the water will gently warm the dough, encouraging the yeast to work its magic.
- Let the dough rise in the microwave until it has doubled in size. The time this takes will vary depending on the temperature of your kitchen and the type of dough. Check it periodically – it could take anywhere from 30 minutes to 2 hours. Be patient, and resist the urge to open the door frequently, as this will release the trapped heat and steam.
- Once the dough has doubled, it’s ready to be punched down and shaped according to your recipe instructions. Proceed with baking as directed.
Expert Tips & Tricks
- Temperature is key: Aim for a water temperature of around 120-130°F (49-54°C) when initially mixing your dough. This optimal temperature activates the yeast effectively.
- Don’t overheat the water: Be careful not to overheat the water in the microwave to the point where it violently boils. This can create excessive steam and potentially damage the dough.
- Maintain moisture: If the dish cloth covering the dough starts to dry out, remoisten it with warm water.
- Use a microwave-safe bowl: Ensure both the bowl containing the dough and the measuring cup are microwave-safe.
- Consider the dough type: Enriched doughs (those containing eggs, butter, or sugar) may take longer to rise than leaner doughs.
- Proofing drawer alternative: If you have a proofing drawer on your oven, use that instead. Follow the manufacturer’s instructions for best results.
- Oven proofing: If you don’t have a microwave, you can also use your oven. Preheat the oven to the lowest setting for just a few minutes, then turn it off. Place the dough inside with a bowl of hot water. Ensure the oven isn’t too hot, or you’ll kill the yeast.
- Cold rise (retarding): For a more complex flavor, after the initial rise, punch down the dough and place it in the refrigerator for 12-24 hours. This slow fermentation develops deeper flavors.
Serving & Storage Suggestions
Serve your freshly baked bread warm, with your favorite toppings or as a side to a hearty meal. Store leftover bread in an airtight container at room temperature for up to 2 days, or in the refrigerator for up to 5 days. For longer storage, slice the bread and freeze it in a freezer-safe bag for up to 3 months. To reheat, thaw at room temperature and warm in the oven or toaster.
Nutritional Information
Note: Nutritional information will vary significantly depending on the specific dough recipe used. This table provides a general estimate for a basic white bread dough.
| Nutrient | Amount per Serving | % Daily Value |
|---|---|---|
| Calories | 150 kcal | 8% |
| Total Fat | 1g | 2% |
| Saturated Fat | 0g | 0% |
| Cholesterol | 0mg | 0% |
| Sodium | 200mg | 9% |
| Total Carbohydrate | 30g | 11% |
| Dietary Fiber | 1g | 4% |
| Sugars | 1g | – |
| Protein | 4g | 8% |
Variations & Substitutions
- Gluten-Free: Use a gluten-free bread flour blend and follow a gluten-free bread recipe. You may need to add a binding agent like xanthan gum.
- Whole Wheat: Substitute up to 50% of the all-purpose flour with whole wheat flour for a nuttier flavor and added fiber.
- Sourdough: Use a sourdough starter instead of commercial yeast for a tangy flavor. Be aware that sourdough can take longer to rise.
- Enriched Dough: Add ingredients like eggs, butter, or milk to create a richer dough, suitable for rolls, brioche, or challah.
- Sweet Dough: Add sugar, honey, or maple syrup to create a sweet dough for cinnamon rolls, sweet breads, or coffee cakes.
FAQs (Frequently Asked Questions)
Q: Can I use this method with any type of yeast dough?
A: Yes, this method works well with most yeast doughs, including bread, pizza, and rolls. Just be sure to adjust the rising time as needed, depending on the dough’s density and ingredients.
Q: What if I don’t have a microwave?
A: You can use your oven instead. Preheat it to the lowest setting for a few minutes, then turn it off. Place the dough inside with a bowl of hot water. Ensure the oven isn’t too hot.
Q: How do I know when the dough has risen enough?
A: The dough should have doubled in size and feel light and airy. You can also gently poke it – if the indentation slowly springs back, it’s ready.
Q: What if the water in the microwave cools down too quickly?
A: You can carefully reheat the water in the microwave for a short burst (about 30 seconds) to maintain the warm, humid environment.
Q: Can I over-proof the dough using this method?
A: Yes, it’s possible to over-proof dough. Keep a close eye on it and check it regularly. If it becomes overly puffy or starts to collapse, it’s likely over-proofed.
Final Thoughts
Don’t let a cool kitchen stand between you and the joy of freshly baked bread! This simple microwave trick is a game-changer for achieving perfectly risen dough, no matter the season. Experiment with different dough recipes, share your creations with friends and family, and enjoy the comforting aroma and taste of homemade bread. I encourage you to give this method a try and leave me a comment with your results!