
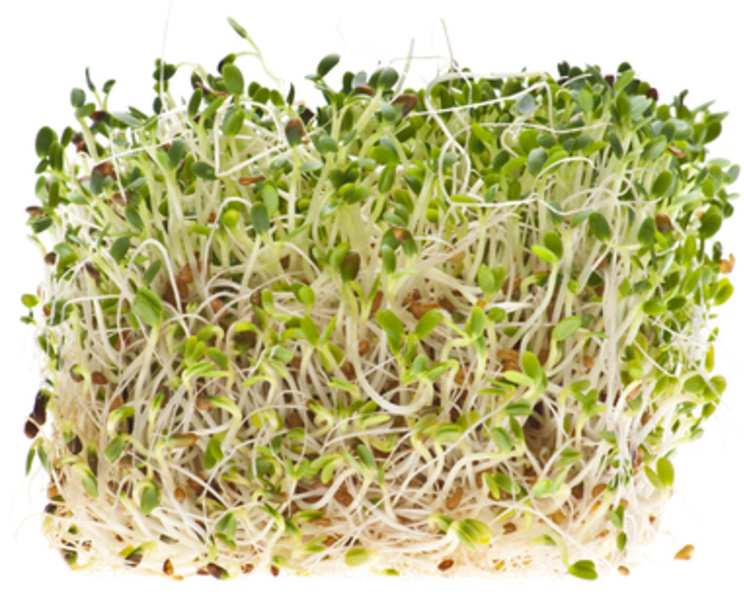
How to Sprout Alfalfa: A Simple Guide to Nutrient-Rich Goodness
My first encounter with alfalfa sprouts wasn’t in some trendy salad bar, but in my grandmother’s garden. She always had a little jar sitting on her sunny windowsill, filled with these delicate, verdant threads. She’d sprinkle them on everything from her morning toast with avocado to her hearty lentil soup. I remember being fascinated by the way she transformed tiny seeds into such a vibrant, living garnish, and the subtle, earthy flavor they added to every dish. It was a magical process, and one that instilled in me a lifelong love for these little nutritional powerhouses.
Recipe Overview
- Prep Time: 24 hours
- Sprouting Time: 5-6 days
- Total Time: 6-7 days
- Yield: 2 1/2 cups
- Serves: 6
- Dietary Type: Vegan, Gluten-Free, Raw
Ingredients
- 1 cup organic alfalfa seeds
- 1 tablespoon 3% food-grade hydrogen peroxide
- Water
- 1 teaspoon Effective Micro-organisms (EM) per gallon of water (optional, but recommended for enhanced sprouting)
- 1/2 teaspoon ocean mineral solution per gallon of water (optional, but recommended for enhanced nutrient content)
Equipment Needed
- Wide-mouth glass jar (quart size is ideal)
- Mesh nylon window screen or sprouting lid
- Rubber band or jar ring
- Bowl or container for soaking
- Measuring spoons
Instructions
-
Day 1: Initial Hydrogen Peroxide Soak: Begin by sanitizing your alfalfa seeds. Fill your jar approximately 1/10 full with the organic alfalfa seeds. Then, fill the jar to the top with water. Add approximately 1 tablespoon of diluted 3% food-grade hydrogen peroxide per gallon of water. Cover the jar with your mesh nylon window screen and secure it tightly with a rubber band. Allow the seeds to soak in this solution for 20 minutes. This helps to kill off any potential bacteria or mold spores.
-
Day 1: Effective Micro-organisms (EM) Soak: After the hydrogen peroxide soak, drain the water completely. Fill the jar up again with fresh water. Now, add 1 teaspoon of Effective Micro-organisms (EM) per gallon of water. Let the seeds soak in this mixture for another 20 minutes. EM helps to promote healthy growth and can enhance the sprouting process.
-
Day 1: Ocean Mineral Solution Soak: Following the EM soak, drain the water once more. Refill the jar with fresh water, and this time, add 1/2 teaspoon of ocean mineral solution per gallon of water. Allow the seeds to soak in this solution for 8-12 hours. This step enriches the sprouts with essential minerals.
-
Day 2-4: Rinsing and Draining: This is where the real sprouting begins! After the initial soaks, drain the water from the jar. Position the jar upside down at approximately a 45-degree angle, ensuring it’s out of direct sunlight. Rinse and drain the seeds thoroughly 2-3 times per day for the next 2-3 days. It’s crucial to maintain good air circulation within the jar. Stagnant air can lead to mold growth. Using a fan or opening windows can significantly help with air circulation. Optimal temperature for sprouting is around 70 degrees Fahrenheit.
-
Day 5-6: Diffused Light Exposure: As the sprouts develop tails about 1/2 inch long, it’s time to introduce them to diffused light. Place the jar in a location with indirect or diffused sunlight for a few days. Continue the rinsing and draining process 2-3 times per day. This step encourages the sprouts to develop their characteristic green color.
-
Day 6: Harvesting: When the sprouts reach approximately 1-2 inches in length, they are ready to harvest. Give them one final rinse and drain.
Expert Tips & Tricks
- Seed Quality Matters: Always use high-quality, organic alfalfa seeds specifically intended for sprouting. Avoid using seeds meant for planting, as they may be treated with chemicals.
- Preventing Mold: Good air circulation is key to preventing mold growth. Ensure the jar is well-ventilated and not overcrowded with seeds. If you notice any signs of mold, discard the entire batch.
- Consistent Rinsing: Don’t skip the rinsing! This keeps the sprouts hydrated and prevents them from drying out or becoming bitter.
- Temperature Control: Maintaining a consistent temperature around 70°F (21°C) is ideal for sprouting. Avoid extreme temperature fluctuations.
- Taste Test: Give your sprouts a little taste test before harvesting. The flavor should be mild and slightly nutty.
- Hydrogen Peroxide Caution: Always use 3% food-grade hydrogen peroxide, properly diluted. Stronger concentrations can damage the seeds.
Serving & Storage Suggestions
Freshly harvested alfalfa sprouts are best enjoyed immediately for their optimal flavor and texture. To store, gently pat them dry with a paper towel and place them in an airtight container lined with a clean paper towel. Store in the refrigerator for up to 5-7 days. Avoid storing them in a closed plastic bag, as this can trap moisture and promote spoilage. Alfalfa sprouts are delicious sprinkled on salads, sandwiches, wraps, avocado toast, soups, and stir-fries. They add a refreshing crunch and a boost of nutrients to any dish.
Nutritional Information
| Nutrient | Amount per Serving (approx. 1/6 of total yield) | % Daily Value (approximate) |
|---|---|---|
| Calories | 10 kcal | <1% |
| Total Fat | 0g | 0% |
| Saturated Fat | 0g | 0% |
| Cholesterol | 0mg | 0% |
| Sodium | 1mg | 0% |
| Total Carbohydrate | 1g | <1% |
| Dietary Fiber | 0g | 0% |
| Sugars | 0g | 0% |
| Protein | 1g | 2% |
| Vitamin K | 7.6 mcg | 6% |
| Vitamin C | 0.8 mg | 1% |
| Folate | 8 mcg | 2% |
Note: Nutritional information is an estimate and can vary based on seed quality and growing conditions.
Variations & Substitutions
- Other Seeds: While this recipe focuses on alfalfa, you can use the same method to sprout other seeds like broccoli, radish, or clover. Each will offer its own unique flavor and nutritional profile.
- Sprouting Mixes: Experiment with pre-mixed sprouting blends that combine various seeds for a diverse nutrient boost.
- Different Liquids: While water is the primary soaking and rinsing agent, you can try using diluted vegetable broth or herbal teas for added flavor and potential health benefits. Be cautious with strong flavors, as they can overpower the delicate taste of the sprouts.
- Sprouting Equipment: If you don’t have a mesh screen, you can use cheesecloth or a specialized sprouting lid.
FAQs (Frequently Asked Questions)
Q: Why is it important to use organic alfalfa seeds?
A: Organic seeds ensure that you’re not consuming any residual pesticides or herbicides that may be present in conventionally grown seeds. It’s a healthier and safer choice for sprouting.
Q: How can I tell if my alfalfa sprouts have gone bad?
A: Signs of spoilage include a slimy texture, a foul odor, or the presence of mold. Discard any sprouts that exhibit these characteristics.
Q: What if my sprouts don’t turn green?
A: The greening process requires exposure to indirect light. Make sure to place your sprouting jar in a well-lit area (but not direct sunlight) during the final stages of growth.
Q: Can I eat the alfalfa seeds that don’t sprout?
A: It’s generally not recommended to eat unsprouted seeds, as they can be hard to digest.
Q: How do I know when the sprouts are ready to eat?
A: The sprouts are ready to eat when they are about 1-2 inches long and have a fresh, slightly nutty flavor. Taste them to ensure they are to your liking.
Final Thoughts
Sprouting alfalfa is a surprisingly simple and rewarding way to cultivate your own fresh, nutrient-rich food right in your kitchen. It’s a process that connects you to the life cycle of plants and provides a tangible sense of accomplishment. I encourage you to give it a try and experience the joy of growing your own delicious and healthy sprouts. Don’t hesitate to experiment with different variations and find what works best for you. And, of course, I’d love to hear about your sprouting adventures and any creative ways you incorporate alfalfa sprouts into your meals!