
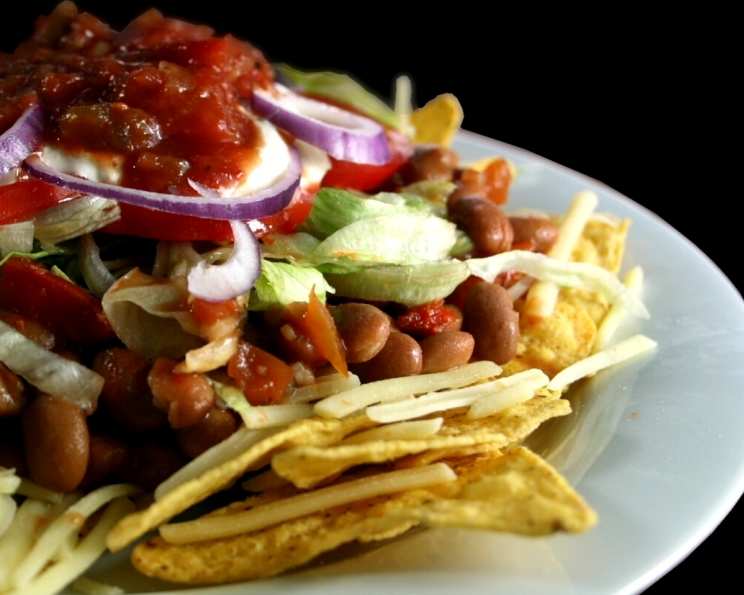
Hully Gully (Frito Chili Salad): A Crowd-Pleasing Fiesta on a Plate
I’ll never forget the first time I encountered Hully Gully. It wasn’t in a fancy restaurant, or even at a potluck. It was at a summer camp, during a particularly grueling week of outdoor activities. We were all starving, and this mountain of colorful ingredients just appeared – a DIY masterpiece. The combination of crunchy, salty Fritos, warm, comforting chili, and cool, crisp toppings was pure magic, instantly transforming the camp dining hall into a fiesta.
Recipe Overview
- Prep Time: 30 minutes
- Cook Time: Approximately 2 hours for the chili (or less if preferred)
- Total Time: 2 hours 30 minutes (or less depending on chili prep)
- Servings: 8-10
- Yield: Varies depending on portion sizes
- Dietary Type: Adaptable (can be made gluten-free with appropriate chips)
Ingredients
- 8 cups chili, served hot (such as Chili Con Carne With Beans)
- 1 head lettuce, shredded
- 5 tomatoes, chopped
- 1 onion, chopped
- Corn chips (such as Frito’s – 1 to 2 bags of the small ones)
- 4 cups grated Monterey Jack cheese or 4 cups grated cheddar cheese
- 8 ounces sour cream (1 to 2 containers)
- Garlic powder
- 8 ounces salsa (1 to 2 jars)
Equipment Needed
- Large pot or Dutch oven for cooking chili
- Cutting board
- Knife
- Bowls for individual ingredients
- Serving spoons
- Plates
Instructions
-
Begin by preparing your chili. If you’re making it from scratch, allow ample time for it to simmer and develop its flavors. While the traditional recipe suggests a cooking time of 2-3 hours, you can certainly shorten this if you’re pressed for time. Just ensure the meat (if using) is fully cooked and the flavors have had a chance to meld.
-
While the chili is simmering, prepare the salad components. Shred the lettuce, chop the tomatoes, and chop the onion. Ensure the vegetables are fresh and crisp for the best textural contrast.
-
Enhance the sour cream by stirring in a bit of garlic powder. This adds a subtle savory note and helps to loosen the sour cream, making it easier to dollop. Use about 1/4 teaspoon of garlic powder per 8 ounces of sour cream as a starting point. Adjust to taste.
-
If you’re using a block of cheese, grate it now. Pre-shredded cheese is convenient, but freshly grated cheese melts more smoothly.
-
Open the salsa jar and set it aside for serving. Choose a salsa that suits your spice preference – mild, medium, or hot.
-
Now, arrange all the ingredients in separate bowls in a serving line fashion. This allows everyone to customize their own Hully Gully creation. The suggested order is: plates, chips, cheese, chili, lettuce, tomatoes, onion, sour cream, and salsa. This order ensures the cheese melts nicely over the warm chili.
-
To assemble the Hully Gully, start with a generous layer of chips on the plate. This forms the base of the salad.
-
Next, sprinkle a generous amount of cheese over the chips.
-
Spoon a ladleful of hot chili over the cheese. The heat from the chili will melt the cheese, creating a gooey, delicious layer.
-
Top with the cold components: shredded lettuce, chopped tomatoes, chopped onion, a dollop of garlic-infused sour cream, and a spoonful of salsa.
-
Serve immediately and enjoy the explosion of flavors and textures!
Expert Tips & Tricks
- Chili Consistency: The ideal chili consistency for Hully Gully is thick enough to cling to the chips but not so thick that it’s difficult to spoon. If your chili is too watery, simmer it uncovered for a bit longer to reduce the liquid.
- Chip Choice: While Fritos are the classic choice, feel free to experiment with other types of corn chips. Look for sturdy chips that can hold up to the weight of the toppings.
- Make-Ahead Prep: You can prepare all the components of Hully Gully ahead of time. Store the chopped vegetables, cheese, and sour cream in separate containers in the refrigerator. Reheat the chili just before serving.
- Spice Level: Adjust the spice level of the chili and salsa to your liking. If you prefer a milder flavor, use a mild chili recipe and a mild salsa. For a spicier kick, add a pinch of cayenne pepper to the chili or use a hot salsa.
- Presentation: While Hully Gully is a casual dish, you can still make it look appealing. Arrange the toppings neatly in their bowls, and use colorful serving spoons.
Serving & Storage Suggestions
Hully Gully is best served immediately after assembly to prevent the chips from becoming soggy. It’s a fantastic dish for parties, potlucks, or casual gatherings.
Leftovers can be stored in the refrigerator in separate containers. The chili will keep for 3-4 days, and the chopped vegetables and cheese will last for 2-3 days. However, the chips will likely become soggy, so it’s best to add fresh chips when reheating and reassembling the salad. It is not recommended to freeze Hully Gully.
Nutritional Information
| Nutrient | Amount per Serving | % Daily Value |
|---|---|---|
| Calories | 589 kcal | N/A |
| Calories from Fat | 336 kcal | N/A |
| Total Fat | 37.3 g | 57% |
| Saturated Fat | 20.3 g | 101% |
| Cholesterol | 109.3 mg | 36% |
| Sodium | 1850.2 mg | 77% |
| Total Carbohydrate | 39.1 g | 13% |
| Dietary Fiber | 13.5 g | 53% |
| Sugars | 8.2 g | N/A |
| Protein | 30.9 g | 61% |
Note: Nutritional information is an estimate and may vary based on specific ingredients and portion sizes.
Variations & Substitutions
- Vegetarian/Vegan: Use a vegetarian or vegan chili recipe. Substitute dairy cheese with a plant-based cheese alternative. Use a vegan sour cream alternative.
- Gluten-Free: Ensure the chili is gluten-free and use gluten-free corn chips.
- Lower-Fat: Use lean ground beef or ground turkey in the chili. Reduce the amount of cheese or use a reduced-fat cheese. Substitute sour cream with Greek yogurt.
- Spicy: Add diced jalapeños, a dash of hot sauce, or cayenne pepper to the chili.
- Different Beans: Use kidney beans, pinto beans, black beans, or a combination of your favorites in the chili.
- Seasonal Variation: In the fall, top with roasted butternut squash or pumpkin seeds. In the summer, add grilled corn or black bean salsa.
FAQs (Frequently Asked Questions)
Q: Can I make the chili ahead of time?
A: Absolutely! In fact, the chili often tastes better the next day as the flavors have had more time to meld. Store it in an airtight container in the refrigerator for up to 3-4 days.
Q: Can I use a different type of cheese?
A: Of course! Monterey Jack and cheddar are classic choices, but you can also use Colby Jack, pepper jack, or a Mexican cheese blend.
Q: What’s the best way to prevent the chips from getting soggy?
A: The key is to assemble the Hully Gully just before serving. If you’re preparing it for a party, keep all the ingredients separate and let your guests assemble their own plates.
Q: Can I freeze the leftovers?
A: Freezing is not recommended as it can affect the texture of the ingredients, especially the vegetables and sour cream. The chips will also become soggy.
Q: Can I add guacamole to Hully Gully?
A: Absolutely! Guacamole adds a creamy, rich element that complements the other flavors and textures perfectly.
Final Thoughts
Hully Gully is more than just a salad; it’s a celebration of flavors, textures, and good times. It’s a customizable, crowd-pleasing dish that’s perfect for any occasion. So gather your friends and family, set up your serving line, and let everyone create their own masterpiece. Don’t be afraid to experiment with different variations and substitutions to make it your own. I encourage you to give this recipe a try and share your creations. After all, the best meals are the ones shared with loved ones, filled with laughter and delicious food. Enjoy!