
I Can’t Believe I Made Cream Puffs!
The first time I tasted a cream puff, I was at a church potluck, a shy kid overwhelmed by a sea of casseroles. But then, nestled among the Jell-O molds, I spotted them – golden, puffy clouds filled with creamy sweetness. One bite, and I was hooked. That airy pastry, that cool filling… it felt like pure magic. I remember thinking, “Someday, I’m going to learn how to make these!” Years later, I did, and now I’m sharing the secret with you.
Recipe Overview
- Prep Time: 15 minutes
- Cook Time: 35-40 minutes
- Total Time: 50-55 minutes
- Yields: Approximately 15 puffs
- Dietary Type: Not Gluten-Free
Ingredients
For the Puffs:
- 1 cup water
- ½ cup butter or ½ cup margarine
- 1 cup all-purpose flour
- 4 eggs
For the Filling:
- 1 (5 1/8 ounce) box instant vanilla pudding (large-size box)
- 1 (5 1/4 ounce) package whipped dessert topping mix, Dream Whip brand (2 envelopes)
Equipment Needed
- Saucepan
- Wooden spoon or sturdy spatula
- Electric mixer
- Baking sheet
- Measuring cups and spoons
- Knife
- Mixing bowls
Instructions
-
Preheat your oven to 400°F (200°C). Make sure your baking sheet is ungreased.
-
In a saucepan, combine 1 cup water and ½ cup butter (or margarine). Heat over medium heat until the butter is melted and the mixture comes to a rolling boil. A “rolling boil” means that the mixture continues to boil even while you’re stirring it.
-
Remove the saucepan from the heat and immediately add 1 cup all-purpose flour. Stir vigorously with a wooden spoon or sturdy spatula over low heat for about 1 minute. It’s crucial to stir constantly to prevent the flour from sticking and burning. The mixture will start to come together and form a ball that pulls away from the sides of the pan.
-
Take the pan off the heat. Let the mixture cool slightly for a minute or two. This prevents the eggs from cooking when you add them.
-
Add 4 eggs all at once to the flour mixture. Using an electric mixer, beat continuously until the dough is smooth and glossy. This may take a few minutes, but be patient. The dough will initially look curdled, but keep beating, and it will eventually come together into a smooth, thick paste.
-
Drop the dough by scant ¼ cupfuls onto the ungreased baking sheet, spacing them about 3 inches apart. This gives them room to expand as they bake. You can use two spoons to form the mounds of dough, or a piping bag for more uniform results.
-
Bake at 400°F (200°C) for 35 to 40 minutes, or until the puffs are puffed up and golden brown. It is very important not to open the oven door during baking. Doing so can cause the puffs to collapse. The baking time might vary slightly depending on your oven, so keep a close eye on them towards the end.
-
Once the cream puffs are baked, immediately remove them from the oven and transfer them to a wire rack to cool completely. Cooling out of a draft helps prevent them from deflating.
-
While the puffs are cooling, prepare the filling. Make the Dream Whip according to the package directions. In a separate bowl, make the instant vanilla pudding using only half the amount of milk called for on the box. Using less milk will create a thicker, more stable filling.
-
Quickly add the thickened pudding to the prepared Dream Whip and mix well until fully combined. Working quickly helps prevent the pudding from setting too much before it’s mixed.
-
Once the cream puffs have completely cooled, use a sharp knife to cut them in half horizontally. Open them up and remove any uncooked filaments of dough from the inside, if desired. This is optional, but it can improve the texture.
-
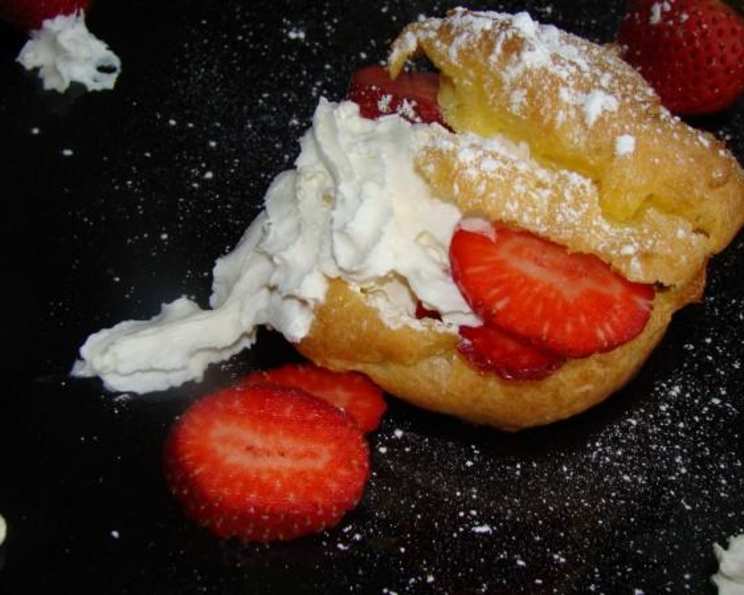
Fill the cream puffs generously with the pudding and whipped cream mixture.
-
Sprinkle with a little powdered sugar for an elegant finish.
-
Refrigerate the filled cream puffs until serving. This allows the filling to set and the puffs to soften slightly. Although, resist the temptation to eat them all immediately!
Expert Tips & Tricks
- Temperature is key: Ensure the water and butter mixture is at a rolling boil before adding the flour, and avoid opening the oven door during baking. These steps are crucial for proper puffing.
- Don’t overmix: Beating the dough too much after adding the eggs can result in tough cream puffs. Mix until just combined.
- Docking the puffs: After baking, you can poke a small hole in the side of each puff to release steam. This helps prevent them from becoming soggy.
- Flavor boost: A teaspoon of vanilla extract added to the dough can enhance the flavor of the puffs.
- Piping perfection: For uniform and professional-looking puffs, use a piping bag with a large round tip to deposit the dough onto the baking sheet.
- Prevent Soggy Puffs: The cream puffs should be filled as close to serving time as possible. The longer the filling sits inside the puff, the soggier it will become.
Serving & Storage Suggestions
Cream puffs are best served chilled. Arrange them on a platter, dusted with powdered sugar, for an elegant presentation. They’re perfect for parties, afternoon tea, or a special dessert.
Store unfilled cream puffs in an airtight container at room temperature for up to 2 days or in the freezer for up to 2 months. Filled cream puffs should be stored in the refrigerator and consumed within 24 hours. Due to the nature of the filling, they don’t freeze well once filled.
Nutritional Information
| Nutrient | Amount per Serving | % Daily Value |
|---|---|---|
| Calories | 199 kcal | N/A |
| Calories from Fat | 104 kcal | N/A |
| Total Fat | 11.6g | 17% |
| Saturated Fat | 8g | 40% |
| Cholesterol | 72.7mg | 24% |
| Sodium | 214.4mg | 8% |
| Total Carbohydrate | 20.7g | 6% |
| Dietary Fiber | 0.2g | 0% |
| Sugars | 14.4g | 57% |
| Protein | 3.1g | 6% |
Variations & Substitutions
- Chocolate Cream Puffs: Add 2 tablespoons of unsweetened cocoa powder to the flour mixture for chocolate-flavored puffs. Use a chocolate pudding mix for the filling.
- Savory Cream Puffs: Omit the vanilla extract and powdered sugar. Fill with a savory filling such as cream cheese and herbs, chicken salad, or a cheese spread.
- Gluten-Free Cream Puffs: Substitute the all-purpose flour with a gluten-free all-purpose flour blend. Be sure to use a blend that contains xanthan gum for proper binding.
- Different Fillings: Get creative with your fillings! Try pastry cream, whipped cream, lemon curd, or even ice cream.
FAQs (Frequently Asked Questions)
Q: Why did my cream puffs not puff up?
A: The most common reason is that the oven temperature was too low or that the oven door was opened during baking. Make sure your oven is properly preheated and avoid peeking.
Q: My cream puffs collapsed after baking. What went wrong?
A: This can happen if the puffs were not baked long enough or if they cooled too quickly. Ensure they are golden brown before removing them from the oven, and let them cool gradually.
Q: Can I make the dough ahead of time?
A: Yes, you can prepare the dough ahead of time and store it in the refrigerator for up to 24 hours. Bring it to room temperature before baking.
Q: Can I freeze the filled cream puffs?
A: Filled cream puffs don’t freeze well as the filling can become watery and the puffs can become soggy. It’s best to freeze the baked, unfilled puffs and fill them when ready to serve.
Q: How can I tell if the cream puffs are done baking?
A: The puffs should be puffed up, golden brown, and feel light and hollow when tapped.
Final Thoughts
So, there you have it – the secret to unbelievably delicious cream puffs, unveiled! Don’t be intimidated; this recipe is surprisingly simple to master. Gather your ingredients, follow the steps carefully, and prepare to be amazed by what you can create. Serve these delightful treats at your next gathering or simply enjoy them as a special indulgence. I encourage you to try this recipe, share your results, and maybe even pair them with a fragrant cup of coffee or tea. Happy baking!