
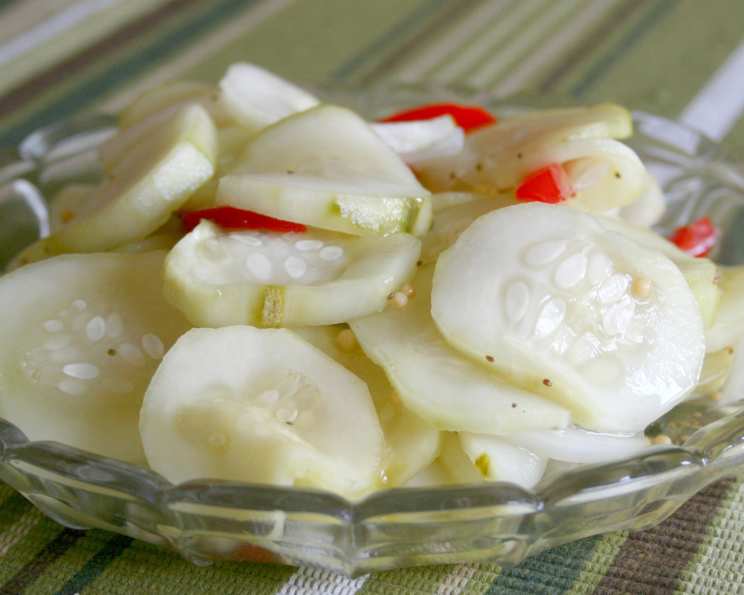
Ice Cream Pail Refrigerator Pickles: A Crunchy, Sweet & Tangy Delight
I remember summers at my grandmother’s farmhouse, the air thick with the scent of sun-baked tomatoes and freshly cut grass. But the smell I remember most vividly is the sweet-tangy aroma that would waft from her kitchen as she prepared her famous refrigerator pickles. She always used a repurposed ice cream pail, its plastic worn smooth with age, filled to the brim with crisp cucumbers swimming in a sugary brine. Every time I make this recipe, those memories flood back, a comforting reminder of her love and the simple pleasures of summer.
Recipe Overview
- Prep Time: 20 minutes
- Cook Time: 2-4 hours standing time
- Total Time: 2 hours 20 minutes to 4 hours 20 minutes
- Yields: Approximately 4 litres
- Serves: 24
- Dietary Type: Vegetarian, Gluten-Free
Ingredients
- 8-10 large cucumbers (enough to almost fill a 4 litre ice cream pail or fill a gallon container about 3/4)
- 1-2 cup onion, sliced
- 1 cup celery, sliced (optional)
- 1-2 cup green bell peppers, sliced (or a combination, use whichever you like) or 1-2 cup red bell pepper (or a combination, use whichever you like)
- 1 tablespoon salt
For the Brine:
- 1 1/2 cups sugar
- 1 cup white vinegar
- 1 teaspoon celery seed
- 1 teaspoon yellow mustard seeds
Equipment Needed
- 4-litre ice cream pail (or gallon container)
- Large bowl (optional, for rinsing)
- Knife
- Cutting board
- Measuring cups and spoons
Instructions
-
Begin by peeling and slicing the cucumbers thinly. As you slice, fill the ice cream pail (or your chosen container) until it’s approximately 3/4 full. This allows room for the other vegetables and the brine.
-
Add the sliced onion, celery (if using), and bell peppers (either green, red, or a combination) to the pail. Feel free to adjust the amount of peppers and onions to your liking. If you’re not a fan of celery, you can simply omit it.
-
Sprinkle the salt over the mixture of vegetables. Stir well to ensure the salt is evenly distributed throughout. This step is crucial for drawing out excess water from the cucumbers, resulting in a satisfyingly crisp pickle.
-
Cover the pail or container and let it stand at room temperature for 2 to 4 hours. The longer it stands, the more water will be extracted.
-
After the standing time, drain off the liquid that has accumulated. For a less salty pickle, rinse the vegetables briefly and drain again. This removes some of the salt that was used to draw out the moisture.
-
In the same ice cream pail (or another suitable container), prepare the brine. Combine the sugar, white vinegar, celery seed, and yellow mustard seeds. Stir well until the sugar starts to dissolve. Don’t worry if the sugar doesn’t completely dissolve at this stage; it will dissolve fully over time in the refrigerator.
-
Mix the drained cucumbers and other vegetables into the brine. Ensure the vegetables are reasonably well distributed in the brine.
-
Cover the container securely and refrigerate.
-
During the first few days, stir the pickles once a day. This helps to ensure that all the vegetables are exposed to the brine and promotes even pickling. Because the brine will likely not completely cover the cucumbers at first, this daily stirring is important. The cucumbers will gradually release more liquid, increasing the volume of the brine.
-
The pickles are usually ready to eat after a day or two in the refrigerator. The longer they sit, the more pronounced the flavor will become. The “cooking time” for this recipe refers to the standing time and refrigeration time, which are essential for the pickling process to occur.
Expert Tips & Tricks
- For extra crunch, add a pinch of calcium chloride (pickle crisp) to the brine. This helps maintain the cucumbers’ firmness. Be careful not to use too much, as it can make the pickles unpleasantly bitter.
- If you prefer a sweeter pickle, increase the amount of sugar slightly. Conversely, if you prefer a tangier pickle, increase the amount of white vinegar. Adjusting these ingredients allows you to customize the flavor to your personal preference.
- Don’t discard the brine once you’ve eaten all the pickles! You can reuse it to pickle another batch of cucumbers or other vegetables, such as green beans or carrots. The brine will lose some of its potency with each use, so you may need to add a little extra vinegar or sugar.
- When slicing the cucumbers, use a mandoline for consistent thickness. This ensures that all the pickles are uniformly crisp and that they pickle at the same rate.
Serving & Storage Suggestions
These refrigerator pickles are a versatile condiment that can be served in a variety of ways. They are a delicious accompaniment to sandwiches, burgers, and grilled meats. They can also be added to salads, cheese boards, or relish trays.
Store the pickles in the refrigerator in an airtight container. They will keep for at least a month or two, possibly longer. However, they rarely last that long because they are so delicious! Be sure that the vegetables are always submerged in the brine. If they are not, they may spoil more quickly.
Because these are refrigerator pickles and not processed for long-term storage, they are not suitable for canning. They must be stored in the refrigerator.
Nutritional Information
Please note that these values are estimates and may vary based on specific ingredients and portion sizes.
| Nutrient | Amount per Serving | % Daily Value |
|---|---|---|
| Calories | 71 kcal | 4% |
| Total Fat | 0.2 g | 0% |
| Saturated Fat | 0 g | 0% |
| Cholesterol | 0 mg | 0% |
| Sodium | 294 mg | 12% |
| Total Carbohydrate | 17.3 g | 6% |
| Dietary Fiber | 0.7 g | 3% |
| Sugars | 14.7 g | N/A |
| Protein | 0.8 g | 2% |
Variations & Substitutions
- Spicy Pickles: Add a pinch of red pepper flakes or a sliced jalapeno pepper to the brine for a spicy kick.
- Dill Pickles: Substitute the celery seed with dill seed or fresh dill for a classic dill pickle flavor.
- Garlic Pickles: Add a few cloves of minced garlic to the brine for a pungent and savory flavor.
- Bread and Butter Pickles: Increase the amount of sugar to 2 cups for a sweeter “bread and butter” style pickle. Consider adding a pinch of turmeric for color.
- No Sugar Pickles: Replace the sugar with a sugar substitute suitable for pickling. Be mindful that sugar not only adds sweetness but also helps to preserve the pickles, so this substitution may affect the shelf life.
FAQs (Frequently Asked Questions)
Q: Can I use different types of vinegar?
A: While white vinegar is the traditional choice, you can experiment with other types like apple cider vinegar for a slightly different flavor profile. However, avoid using balsamic vinegar, as its strong flavor will overpower the pickles.
Q: My pickles are too salty. What can I do?
A: If your pickles are too salty, rinse them thoroughly after the initial salting period. You can also try adding a little more sugar to the brine to balance the saltiness.
Q: How long do these pickles last in the refrigerator?
A: Properly stored in the refrigerator, these pickles should last for at least a month, and possibly longer. Look for any signs of spoilage, such as cloudiness or a sour smell, before consuming.
Q: Can I use smaller cucumbers?
A: Yes, you can use smaller cucumbers, such as Kirby cucumbers. You may need to adjust the amount of the other ingredients accordingly.
Q: Can I add other vegetables to the pickles?
A: Absolutely! Feel free to experiment with other vegetables like carrots, cauliflower florets, or pearl onions. Just be sure to slice them thinly enough so they pickle evenly.
Final Thoughts
These Ice Cream Pail Refrigerator Pickles are a simple yet satisfying way to capture the flavors of summer. The crisp, sweet, and tangy combination is irresistible, and the recipe is incredibly easy to customize to your liking. Don’t be afraid to experiment with different vegetables, spices, and sweeteners to create your own signature pickle. I encourage you to give this recipe a try and share your creations with friends and family. These pickles are a perfect complement to any summer barbecue or picnic. Happy pickling!