
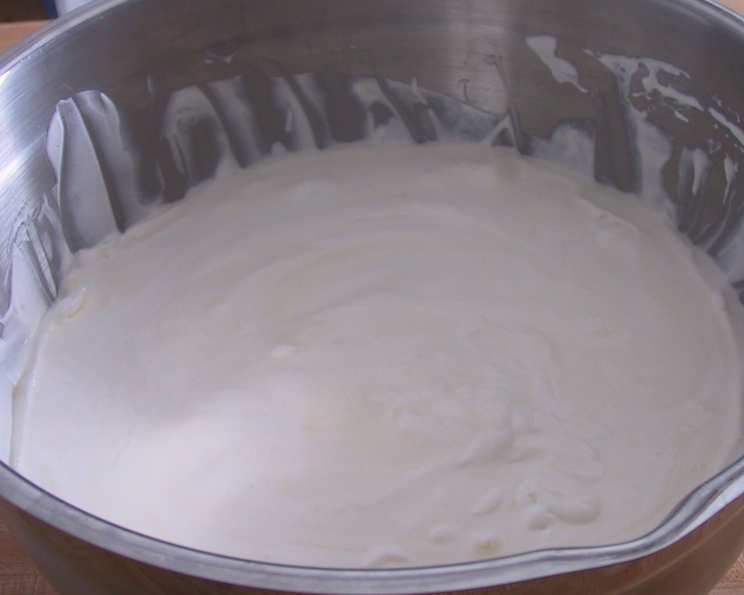
The Creamiest Dream: Homemade Vanilla Ice Cream
The memory is etched in my mind: a sweltering summer afternoon, the rhythmic churning of the hand-cranked ice cream maker, and the excited anticipation bubbling in my young heart. My grandmother, a true culinary artist, would gather us grandkids around as she poured in the final touches – a splash of vanilla, a handful of fresh peaches from the orchard. The reward? A spoonful of the most intensely flavored, velvety smooth ice cream I had ever tasted. It wasn’t just dessert; it was pure joy, a tangible expression of love transformed into a frozen delight. This recipe, a faithful homage to those cherished moments, promises to deliver that same taste of happiness, right from your own kitchen.
Recipe Overview
- Prep Time: 30 minutes
- Cook Time: 20 minutes
- Total Time: 72 hours and 50 minutes (includes chilling and freezing time)
- Yields: 1 gallon
- Serves: 60
- Dietary Type: Not specified, contains dairy
Ingredients
- 4-6 eggs (6 recommended)
- 2 cups sugar (minimum, adjust to taste)
- 6 tablespoons flour (or 3 tablespoons cornstarch)
- 1/2 teaspoon salt
- 1 tablespoon vanilla extract (or vanilla beans)
- 2 quarts milk (full fat, or substitute with 2 quarts of 18% cream)
- 1 tablespoon gelatin
- 1/2 cup water
- 1 pint whipping cream (or 1 quart whipping cream)
Equipment Needed
- Large saucepan
- Whisk
- Fork
- Ice cream maker (hand-cranked or electric)
- Measuring cups and spoons
- Kitchen Aid Stand Mixer (optional)
- Airtight container for freezing
Instructions
-
Prepare the egg mixture: In a bowl, beat the eggs lightly with a fork. In a separate bowl, sift together the sugar, flour (or cornstarch), and salt. Gradually add the dry ingredients to the beaten eggs, mixing well to combine.
-
Scald the milk: In a large saucepan, scald the milk over medium heat. This means heating it until it’s just about to boil, but not quite. You’ll see small bubbles forming around the edges and a thin skin starting to form on the surface. This step is crucial for thickening the custard.
-
Temper the egg mixture: Carefully pour a small amount of the hot milk into the egg mixture, whisking constantly to prevent the eggs from scrambling. This process is called tempering and gradually raises the temperature of the eggs so they don’t cook too quickly when added to the rest of the milk.
-
Combine and cook: Pour the tempered egg mixture into the saucepan with the remaining milk. Cook over medium-low heat, stirring constantly with a wooden spoon or heat-resistant spatula. Continue cooking until the mixture thickens enough to coat the back of the spoon. This usually takes about 10-20 minutes. Be patient and keep stirring to prevent scorching.
-
Prepare the gelatin: While the custard is cooking, soften the gelatin by soaking it in 1/2 cup of cold water. Let it sit for about 5 minutes until it becomes softened and pliable.
-
Add gelatin to the custard: Once the custard has thickened, remove it from the heat and stir in the softened gelatin until it is completely dissolved.
-
Cool the custard: Pour the custard into a clean bowl and cover the surface with plastic wrap, pressing it directly onto the custard to prevent a skin from forming. Refrigerate the custard for at least 24 hours, or preferably 48 hours. This allows the flavors to meld together and the custard to fully chill.
-
Whip the cream: In a separate bowl, whip the whipping cream until soft peaks form. You can use a hand mixer, stand mixer, or a whisk for this step. Be careful not to overwhip the cream, as it will become grainy.
-
Combine custard and cream: Gently fold the whipped cream into the chilled custard using a spatula. Add the vanilla extract (or scrape the seeds from a vanilla bean) and stir to combine. The mixture should be well combined but avoid overmixing. The goal is to incorporate the cream without deflating it.
-
Freeze: Pour the mixture into your ice cream maker and churn according to the manufacturer’s instructions. Churning time will vary depending on the machine, but it usually takes about 20-30 minutes.
-
Harden: Once the ice cream is churned, it will have a soft-serve consistency. Transfer it to an airtight container and freeze for at least 24 hours to harden completely.
Expert Tips & Tricks
- Custard Consistency is Key: Achieving the right custard consistency is crucial. It should be thick enough to coat the back of a spoon but not so thick that it becomes lumpy. Constant stirring and low heat are your best friends here.
- Vanilla Bean Infusion: For a truly decadent vanilla flavor, use a vanilla bean instead of extract. Split the bean lengthwise and scrape out the seeds. Add the seeds to the milk while scalding, and add the pod as well for extra flavor. Remove the pod before adding the egg mixture.
- Preventing Ice Crystals: To minimize ice crystal formation, ensure the custard is thoroughly chilled before churning. Also, adding a tablespoon of vodka or other clear liquor to the mixture can help prevent ice crystals from forming, as alcohol doesn’t freeze.
- Adjust the Sugar: Taste the custard before churning and adjust the sugar level to your liking. Remember that the sweetness will be slightly muted once the ice cream is frozen.
- Don’t Skip the Chilling Time: The 24-48 hour chilling period for the custard is not just about cooling it down. It allows the flavors to meld and mature, resulting in a richer and more complex ice cream.
Serving & Storage Suggestions
Serve the ice cream straight from the freezer, allowing it to soften slightly for a few minutes before scooping. It’s delicious on its own or paired with fresh fruit, chocolate sauce, or crumbled cookies.
Store leftover ice cream in an airtight container in the freezer for up to 2 weeks. To prevent freezer burn, press a piece of plastic wrap directly onto the surface of the ice cream before sealing the container.
Avoid letting the ice cream sit at room temperature for extended periods, as this can cause it to melt and re-freeze with an undesirable texture.
Nutritional Information
| Nutrient | Amount per Serving | % Daily Value (Estimated) |
|---|---|---|
| Calories | 83 kcal | N/A |
| Calories from Fat | 40 kcal | N/A |
| Total Fat | 4.5g | 6% |
| Saturated Fat | 2.7g | 13% |
| Cholesterol | 27.8mg | 9% |
| Sodium | 43.5mg | 1% |
| Total Carbohydrate | 9.1g | 3% |
| Dietary Fiber | 0g | 0% |
| Sugars | 6.7g | N/A |
| Protein | 1.8g | 3% |
Note: Nutritional information is an estimate and can vary based on specific ingredients and portion sizes.
Variations & Substitutions
- Chocolate Ice Cream: Add 1/2 cup of unsweetened cocoa powder to the dry ingredients (sugar, flour, salt) and proceed with the recipe as directed.
- Strawberry Ice Cream: Puree 1 pint of fresh strawberries and fold them into the custard mixture before churning.
- Mint Chocolate Chip Ice Cream: Add 1/2 teaspoon of mint extract to the custard mixture and fold in 1/2 cup of mini chocolate chips before churning.
- Dairy-Free Option: While the original recipe relies heavily on dairy for its texture and flavor, experimenting with full-fat coconut milk and a high-quality non-dairy whipping cream alternative could yield a similar result, although some adjustments to stabilizers may be needed.
- Brown Butter Pecan Ice Cream: Brown the butter first. Allow to cool, then strain the milk using the browned butter and butter sediments to flavor the milk. Strain again once it has cooled. Add in toasted pecans with the vanilla.
FAQs (Frequently Asked Questions)
Q: Why is it important to scald the milk?
A: Scalding the milk helps to thicken the custard and create a smoother texture. It also helps to dissolve the sugar and activate the proteins in the milk, contributing to the overall richness of the ice cream.
Q: Can I use less sugar in this recipe?
A: Yes, you can adjust the amount of sugar to your liking. However, keep in mind that sugar not only adds sweetness but also helps to prevent ice crystals from forming. Reducing the sugar too much may result in a slightly icier texture.
Q: What happens if I don’t chill the custard for 24 hours?
A: Chilling the custard for 24-48 hours is crucial for allowing the flavors to meld and develop. It also helps the custard to thicken further, resulting in a smoother and creamier ice cream. If you don’t chill it long enough, the ice cream may be less flavorful and have a slightly icier texture.
Q: Can I use a different type of milk?
A: While full-fat milk or cream is recommended for the best results, you can experiment with other types of milk. However, keep in mind that using lower-fat milk will result in a less creamy ice cream.
Q: My ice cream is icy. What did I do wrong?
A: Icy ice cream can be caused by several factors, including not chilling the custard long enough, using too little sugar, or not churning the ice cream properly. Make sure to follow the recipe carefully and ensure that the custard is thoroughly chilled before churning. Also, avoid overfilling the ice cream maker, as this can prevent proper churning and result in icy ice cream.
Final Thoughts
There’s a certain magic in creating something as simple yet profoundly satisfying as homemade ice cream. The transformation of humble ingredients into a frozen delicacy is a testament to the power of good food to evoke joy and connection. So, gather your ingredients, embrace the process, and prepare to be transported to a world of creamy, dreamy deliciousness. Don’t hesitate to experiment with your favorite flavors and share your creations with loved ones. Happy churning!