
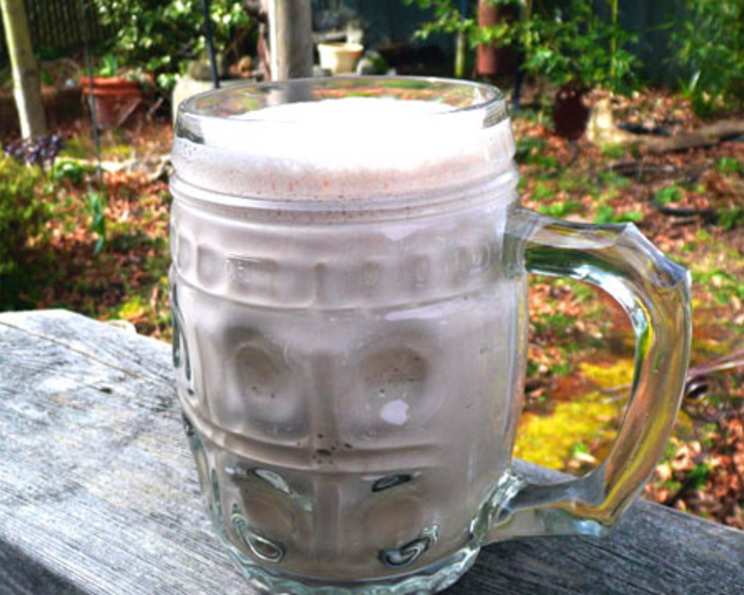
The “Almost-a-Real” Ice Creamless Milkshake: A Thrifty Treat
I remember being a kid, desperately craving an ice cream milkshake on a sweltering summer day, only to be met with the disappointing news that we were out of ice cream. My grandma, bless her heart, would always whip up something she called a “poor man’s milkshake” – a concoction of milk, syrup, and ice. Honestly, back then, it never quite scratched that ice cream itch. It was always a bit too…icy. But recently, I rediscovered the secret ingredient that transforms this simple drink into a surprisingly satisfying treat: vanilla syrup. It bridges the gap, adding a touch of creamy sweetness that makes all the difference. So, if you’re looking for a quick, easy, and budget-friendly way to satisfy your milkshake craving, this recipe is for you!
Recipe Overview
- Prep Time: 3 minutes
- Total Time: 8 minutes
- Servings: 1
- Yields: 1 shake
- Dietary Type: Vegetarian
Ingredients
- 4 tablespoons chocolate syrup (adjust to taste)
- 2 tablespoons sugar-free vanilla syrup (I recommend Torani Sugar-Free Vanilla)
- 12 ice cubes (approximately the amount that fits in an 8oz glass)
- 2 cups milk (again, about an 8oz glass full)
Equipment Needed
- Blender (ideally a single-serving blender like a Magic Bullet, but a regular blender will work)
Instructions
- First, place the ice cubes into your blender. Remember, if you’re using a smaller blender like a Magic Bullet (as I do), make sure not to overfill it.
- Next, pour in the chocolate syrup. Feel free to adjust the amount based on your chocolate preference. If you’re not a huge chocolate fan, start with less and add more to taste after blending.
- Add the sugar-free vanilla syrup. This is the secret weapon that elevates this milkshake, so don’t skip it! The vanilla adds a depth of flavor that complements the chocolate beautifully.
- Finally, pour in the milk. Whole milk will give you a richer flavor, but you can use any kind you like, including skim milk or even non-dairy alternatives.
- Now, it’s time to blend! If using a regular blender, start on low speed and gradually increase to high. If using a Magic Bullet, blend until the mixture is smooth and the sound of large ice chunks knocking around disappears. This should take around 5 minutes, maybe longer depending on the strength of your blender. You want a thick, slushy consistency.
- Once blended, pour the milkshake into a glass.
- Enjoy immediately! Be aware that because this milkshake is made with ice rather than ice cream, it might be quite thick initially and require a spoon. As the ice melts slightly, it will become easier to drink.
Expert Tips & Tricks
- Chill Your Glass: For an even more refreshing experience, chill your glass in the freezer for a few minutes before pouring in the milkshake.
- Adjust Sweetness: Taste the milkshake after blending and adjust the amount of chocolate syrup or vanilla syrup to your liking. Remember, you can always add more, but you can’t take it away!
- Prevent Clumping: To prevent the chocolate syrup from clumping, try pouring it in a slow, steady stream while the blender is running.
- Blender Strength: If your blender isn’t very powerful, you might need to blend for a longer time or add a bit more milk to help the ice break down completely.
- Frozen Fruit Boost: Add a handful of frozen berries (like strawberries or raspberries) for extra flavor and nutrients. This will make the shake thicker and more like a smoothie.
- Salt Enhances Sweetness: A tiny pinch of salt can actually enhance the sweetness of the milkshake and balance the flavors. Don’t overdo it, though – just a tiny pinch is all you need.
Serving & Storage Suggestions
Serve this “almost-a-real” ice creamless milkshake immediately for the best texture and flavor. Garnish with a swirl of chocolate syrup or a sprinkle of cocoa powder for a more appealing presentation.
Since this milkshake is best enjoyed fresh, I don’t recommend storing leftovers. However, if you absolutely must save some, pour it into an airtight container and store it in the freezer. Keep in mind that the texture will change significantly – it will become very icy and may separate. You can try re-blending it with a little more milk when you’re ready to drink it, but it won’t be quite the same as the freshly made version.
Nutritional Information
Note: Nutritional information is an estimate and may vary based on specific ingredient brands and quantities used.
| Nutrient | Amount per Serving | % Daily Value |
|---|---|---|
| Calories | 350 kcal | 18% |
| Total Fat | 10g | 15% |
| Saturated Fat | 6g | 30% |
| Cholesterol | 30mg | 10% |
| Sodium | 250mg | 10% |
| Total Carbohydrate | 50g | 17% |
| Dietary Fiber | 2g | 8% |
| Sugars | 40g | – |
| Protein | 8g | 16% |
Variations & Substitutions
- Non-Dairy: Use your favorite non-dairy milk alternative (almond milk, soy milk, oat milk) for a vegan version. Be sure to check the sugar content of your milk alternative.
- Different Syrups: Experiment with different flavored syrups, such as caramel, hazelnut, or peppermint.
- Protein Boost: Add a scoop of your favorite protein powder for a post-workout treat.
- Coffee Kick: Add a shot of espresso or a tablespoon of instant coffee for a mocha milkshake.
- Peanut Butter Power: Add a tablespoon of peanut butter (or any nut butter) for a richer, more filling milkshake.
- Mint Chocolate Chip: Add a few drops of peppermint extract and some chocolate chips for a refreshing twist.
- Seasonal Flavors: Adapt the recipe to suit the season. For example, add pumpkin puree and pumpkin pie spice in the fall, or fresh strawberries in the summer.
FAQs (Frequently Asked Questions)
Q: Can I use regular vanilla syrup instead of sugar-free?
A: Absolutely! You can use regular vanilla syrup, but be aware that it will increase the sugar content of the milkshake.
Q: My milkshake is too thick. What should I do?
A: Add a little more milk, a tablespoon at a time, until you reach your desired consistency. Blend again after each addition.
Q: My milkshake is too icy. How can I fix it?
A: Try blending in a small amount of softened ice cream (if you have some on hand) or a splash of heavy cream to make it smoother. Next time, use slightly less ice.
Q: Can I make this recipe in advance?
A: While this milkshake is best enjoyed fresh, you can prepare the ingredients ahead of time. Measure out the chocolate syrup, vanilla syrup, and milk, and store them in the refrigerator. When you’re ready to make the milkshake, simply add the ingredients to the blender with the ice and blend.
Q: What other toppings can I add?
A: The possibilities are endless! Try adding whipped cream, chocolate shavings, sprinkles, or a maraschino cherry.
Final Thoughts
This “almost-a-real” ice creamless milkshake is a testament to the fact that you don’t always need fancy ingredients to create a delicious treat. It’s a simple, budget-friendly recipe that’s perfect for satisfying your sweet cravings any time of day. So, go ahead and give it a try! Experiment with different flavors and variations to find your perfect combination. And don’t forget to share your creations and feedback – I’d love to hear what you think! Happy blending!