
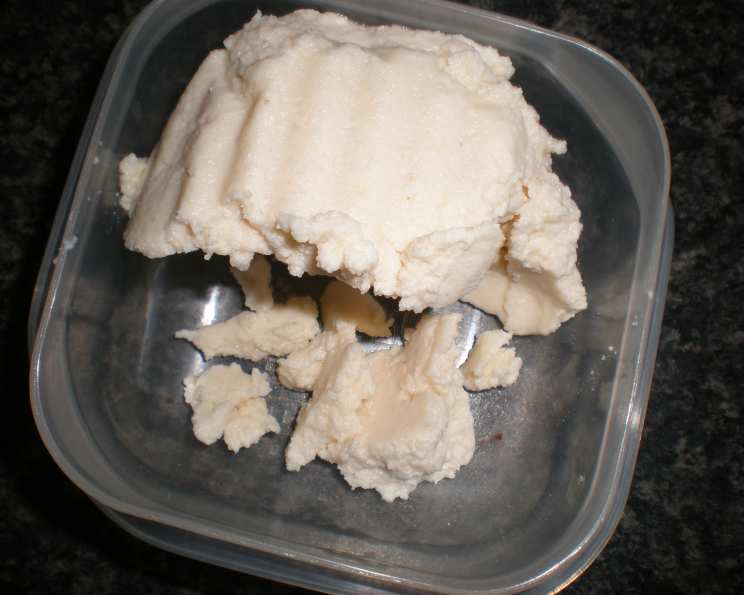
Icelandic Skyr: A Taste of Viking Tradition
The first time I tried skyr, I was hiking through Iceland’s otherworldly landscapes. The wind howled, the rain threatened, and I was cold to the bone. An elderly woman, seeing my plight, offered me a bowl of something thick and creamy, dusted with a sprinkle of brown sugar. One spoonful, and the Icelandic chill seemed to melt away. The tang, the richness, the sheer comforting simplicity of that skyr transformed a miserable afternoon into a cherished memory. It was more than just food; it was a taste of Iceland itself.
Recipe Overview
- Prep Time: 30 minutes
- Cook Time: Varies (see instructions)
- Total Time: Approximately 24 hours and 30 minutes
- Servings: Varies depending on milk used
- Yield: Approximately 1.5 quarts
- Dietary Type: Vegetarian
Ingredients
- 4 quarts milk (whole milk preferred for richer flavor)
- ½ pint sour cream (full-fat recommended)
- ½ rennet tablet
Equipment Needed
- Large pot
- Whisk
- Fine linen sieve or several layers of cheesecloth
- Large bowl or pot to catch whey
Instructions
- Begin by pouring the milk into a large pot.
- Carefully bring the milk to a boil over medium heat, watching constantly to prevent scorching. It is essential to stir frequently to prevent the milk from sticking to the bottom of the pot and burning.
- Once the milk has reached a boil, immediately remove it from the heat and allow it to cool to blood heat, approximately 98°F (37°C). You can use a thermometer to ensure accuracy. This cooling process is crucial for the rennet to work effectively.
- While the milk is cooling, prepare the sour cream. In a separate bowl, thoroughly whisk the sour cream until it is smooth and lump-free.
- Once the milk has cooled to the correct temperature, take a cupful of the cooled milk and gradually whisk it into the prepared sour cream. Continue whisking until the sour cream is completely thinned and smooth.
- Pour the sour cream mixture into the pot of cooled milk. Stir gently to combine the two.
- Now, prepare the rennet tablet. Dissolve one-half of a rennet tablet in a small amount of cold water, about a tablespoon. Ensure the tablet is fully dissolved.
- Pour the dissolved rennet mixture into the pot with the milk and sour cream. Stir gently but thoroughly to ensure all ingredients are well combined.
- Allow the mixture to stand undisturbed at room temperature for approximately 24 hours. During this time, the mixture will coagulate and begin to separate into curds and whey. The exact time may vary depending on the room temperature; a slightly warmer room will expedite the process. You can tell it’s ready when the mixture has set like a very soft yogurt.
- After 24 hours, gently scoop the coagulated skyr mixture from the pot and place it into a fine linen sieve or a colander lined with several layers of cheesecloth. Position the sieve or colander over a large bowl or pot to catch the whey as it drains.
- Allow the skyr to strain gradually through the sieve or cheesecloth. This process can take several hours, depending on the consistency you desire. The longer it strains, the thicker the skyr will become.
- Once the skyr has reached your desired thickness – ideally about as thick as ice cream – transfer it to a container.
- The straining process should yield approximately 1.5 quarts of skyr from 4 quarts of milk. The exact yield will vary based on the fat content of the milk and the length of the straining process.
- Before serving, whip the skyr well with a spoon or whisk to achieve a smooth, ice-cream-like consistency. This will help to eliminate any graininess and create a more enjoyable texture. If the skyr seems too thick, you can whisk in a tablespoon or two of the reserved whey to loosen it.
Expert Tips & Tricks
- Temperature is Key: Maintaining the correct temperature when adding the sour cream and rennet is critical for successful skyr making. Too hot, and the rennet won’t work. Too cold, and the culturing process will be slowed.
- Don’t Rush the Straining: Patience is key in achieving the perfect skyr consistency. Avoid squeezing the cheesecloth, as this can force smaller curds through and result in a grainy texture. Let gravity do the work.
- Save the Whey: Don’t discard the whey! It is incredibly nutritious and can be used in smoothies, baking, or even as a base for soups.
- Experiment with Milk: While whole milk creates the richest skyr, you can experiment with lower-fat milk options. The texture will be slightly less creamy, but still delicious.
- Reviving Skyr: If your skyr separates slightly in the fridge, simply whisk it vigorously to bring it back to its smooth, creamy state.
Serving & Storage Suggestions
Icelanders traditionally enjoy skyr as a dessert, often topped with sugar, cream, or fresh fruit. It is also delicious with granola, nuts, or a drizzle of honey. Skyr makes a wonderful breakfast option, a satisfying afternoon snack, or a light and healthy dessert.
Store skyr in an airtight container in the refrigerator. It will keep for up to a week. While freezing is not recommended as it can alter the texture, it is safe to consume if you don’t mind a slight change in consistency after thawing.
Nutritional Information
| Nutrient | Amount per Serving (estimated) | % Daily Value (estimated) |
|---|---|---|
| Calories | 150 kcal | 8% |
| Total Fat | 8g | 12% |
| Saturated Fat | 5g | 25% |
| Cholesterol | 25mg | 8% |
| Sodium | 80mg | 3% |
| Total Carbohydrate | 5g | 2% |
| Dietary Fiber | 0g | 0% |
| Sugars | 4g | – |
| Protein | 15g | 30% |
Note: Nutritional information is an estimate and may vary based on specific ingredients and portion sizes.
Variations & Substitutions
- Flavored Skyr: Infuse the milk with vanilla beans or citrus zest while heating for a subtle flavor enhancement. You can also add fruit purees or extracts after the skyr has been strained.
- Vegan Skyr: While traditional skyr relies on dairy, experimentation with plant-based alternatives like coconut milk or cashew milk might yield interesting results, although the texture and flavor will differ significantly. You’ll also need a plant-based rennet alternative.
- Sweeteners: Instead of traditional sugar, consider using honey, maple syrup, agave nectar, or stevia to sweeten your skyr.
- Toppings: Get creative with your toppings! Try berries, chopped nuts, seeds, granola, chocolate shavings, or a drizzle of nut butter.
FAQs (Frequently Asked Questions)
Q: What is skyr, and how is it different from yogurt?
A: Skyr is a traditional Icelandic dairy product similar to yogurt but technically classified as a cheese due to its production process. It’s made with more milk than yogurt, resulting in a thicker, creamier texture and higher protein content.
Q: Can I use ultra-pasteurized milk?
A: While it’s possible, ultra-pasteurized milk might not yield the best results. The high heat treatment can affect the milk’s proteins and prevent proper coagulation. Regular pasteurized milk is generally recommended.
Q: My skyr didn’t thicken properly. What went wrong?
A: Several factors could be at play: the milk temperature might have been too high or too low when adding the rennet, the rennet may have been old or inactive, or the mixture may not have stood for a sufficient amount of time.
Q: How can I make my skyr even thicker?
A: If you prefer an extra-thick skyr, allow it to strain for a longer period. You can also place a weight on top of the cheesecloth to gently press out more whey.
Q: Is skyr naturally low in sugar?
A: Yes, skyr is naturally low in sugar compared to many commercial yogurts because most of the lactose is drained off with the whey during the straining process. This makes it a healthy and satisfying option.
Final Thoughts
Making skyr at home is a rewarding experience that connects you to centuries of Icelandic tradition. While it requires some patience and attention to detail, the result is a deliciously creamy and nutritious treat that you can customize to your liking. Don’t be afraid to experiment with flavors and toppings, and most importantly, enjoy the process of creating this unique and wholesome dish. Share your skyr creations with friends and family, and let them experience a taste of Iceland!