
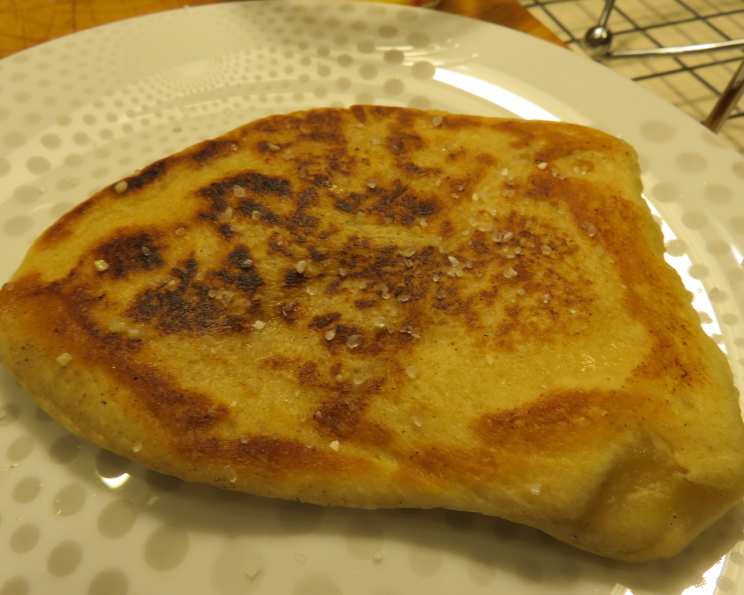
The Art of Naan: Crafting Perfect Indian Flatbread at Home
The scent of freshly baked naan is, for me, inextricably linked to memories of bustling Indian markets. As a child, traveling with my family, the vibrant chaos of the spice-filled air always gave way to a moment of blissful calm when we’d find a street vendor pulling puffy, golden naan from a scorching tandoor oven. The warm, slightly charred bread, brushed with ghee and sprinkled with herbs, was always the perfect counterpoint to the fiery curries we’d inevitably devour. To this day, that first bite of a perfect naan transports me back to those sensory-rich experiences.
Recipe Overview
- Prep Time: 20 minutes
- Cook Time: 10 minutes
- Total Time: 1 hour 30 minutes (including rising time)
- Servings: 6
- Yield: 6 flatbreads
- Dietary Type: Vegetarian
Ingredients
- 1 teaspoon active dry yeast
- 1/2 teaspoon sugar
- 1/2 cup warm water, (107 degrees F)
- 1 1/4 cups all-purpose flour, (plus more for kneading)
- 1/2 teaspoon salt
- 1/4 cup butter, plus 1 teaspoon melted butter (still warm, not hot)
- 1 tablespoon vegetable oil
Optional Toppings:
- 1 tablespoon melted butter
- 1 1/2 tablespoons mixed seeds (mixture of nigella, sesame and white poppy seeds, or any combination)
Equipment Needed
- Small bowl
- Large bowl
- Plastic wrap or damp kitchen towel
- Lightly floured board
- Rolling pin
- Oven
- Griddle or baking stone
- Heatproof basting brush
Instructions
- In a small bowl, combine the active dry yeast and sugar.
- Add the warm water and stir well. Let rest until foamy, about 5 minutes. This indicates that the yeast is active and ready to use.
- In a large bowl, stir together the all-purpose flour and salt.
- Make a well in the center of the flour mixture and pour in the yeast mixture and melted butter (1/4 cup).
- Mix together with your fingers until a smooth dough forms that is just slightly sticky, working in additional flour if needed. A little stickiness is fine, but the dough shouldn’t be unmanageable.
- Transfer the dough to a lightly floured board and knead for 3 minutes. Kneading develops the gluten in the flour, which gives the naan its characteristic chewiness.
- Oil a small bowl with the remaining teaspoon of melted butter and place the dough in the bowl, turning to coat. This will prevent the dough from drying out during rising.
- Cover the bowl with plastic wrap or a damp kitchen towel and let rest in a warm, draft-free area until doubled in size, about 1 hour. This is a crucial step for allowing the yeast to work its magic and create a light, airy naan.
- Preheat oven and griddle (or baking stone) to 400 degrees F (200 degrees C). Ensure the griddle or stone is thoroughly heated before baking.
- Divide the dough into 6 equal pieces and transfer to a lightly floured work surface.
- Using a lightly floured rolling pin, gently roll each portion of dough into a circle, about 5-6 inches in diameter. Don’t roll it too thin, or the naan will become brittle.
- Optional: Brush the tops with melted butter and sprinkle with mixed seeds. The seeds add a lovely textural contrast and nutty flavor.
- Using a heatproof basting brush, lightly coat the griddle/stone with a little vegetable oil and quickly place the dough onto the griddle. Be careful not to overcrowd the griddle; you may need to bake in batches.
- Bake until light golden brown and puffed, 8 – 10 minutes. Watch carefully, as baking times can vary depending on your oven.
- Remove the bread and bake the remaining rounds.
- Serve the naan hot or warm.
Expert Tips & Tricks
- Temperature is key: The warm water for activating the yeast is crucial. Too hot and you’ll kill the yeast; too cold and it won’t activate. Use a thermometer to ensure the water is between 105-115 degrees F (40-46 degrees C).
- Dough Consistency: The dough should be slightly sticky, but not unmanageable. Add flour sparingly while kneading until you reach the desired consistency.
- Rising Time: The rising time can vary depending on the ambient temperature. A warm, humid environment will speed up the process.
- Griddle/Stone Temperature: Make sure your griddle or baking stone is thoroughly preheated. This will ensure that the naan cooks quickly and evenly, and develops a beautiful golden brown color.
- Don’t Overbake: Overbaking will result in dry, hard naan. Keep a close eye on the naan as it bakes and remove it from the oven as soon as it’s puffed up and golden brown.
- Brushing with Butter: Don’t skip brushing with melted butter after baking! It adds richness and shine to the naan, and helps keep it soft.
- For a Tandoor Effect: If you want to mimic the intense heat of a tandoor oven, you can preheat a pizza stone on the highest rack in your oven for at least an hour. Then, carefully slide the naan onto the hot stone and bake as directed.
Serving & Storage Suggestions
Serve your homemade naan fresh from the oven for the best flavor and texture. It’s a perfect accompaniment to Indian curries, stews, and grilled meats. It’s also delicious on its own, simply brushed with butter or dipped in raita.
Leftover naan can be stored in an airtight container at room temperature for up to 2 days. For longer storage, wrap the naan tightly in plastic wrap and freeze for up to 1 month. To reheat, wrap the naan in foil and warm it in a preheated oven at 350 degrees F (175 degrees C) for about 5-10 minutes, or until heated through. You can also reheat it in a dry skillet over medium heat, flipping occasionally, or even microwave it briefly (but be careful not to overcook it, as it can become tough).
Nutritional Information
| Nutrient | Amount per Serving | % Daily Value |
|---|---|---|
| Calories | 203 kcal | – |
| Calories from Fat | 109 kcal | 54% |
| Total Fat | 12.1 g | 18% |
| Saturated Fat | 6.4 g | 32% |
| Cholesterol | 25.4 mg | 8% |
| Sodium | 263.1 mg | 10% |
| Total Carbohydrate | 20.5 g | 6% |
| Dietary Fiber | 0.8 g | 3% |
| Sugars | 0.4 g | 1% |
| Protein | 3 g | 6% |
Note: Nutritional information is an estimate and may vary depending on specific ingredients and portion sizes.
Variations & Substitutions
- Whole Wheat Naan: Substitute half of the all-purpose flour with whole wheat flour for a nuttier flavor and added fiber.
- Garlic Naan: Add 1-2 cloves of minced garlic to the dough for a savory twist. You can also brush the naan with garlic-infused butter after baking.
- Herb Naan: Incorporate fresh herbs like cilantro, mint, or dill into the dough for a fragrant and flavorful naan.
- Gluten-Free Naan: Use a gluten-free all-purpose flour blend and follow the recipe as directed. You may need to add a binder like xanthan gum to help hold the dough together.
- Sweet Naan: Add a tablespoon of honey or sugar to the dough for a slightly sweet naan that pairs well with fruit and yogurt.
- Vegan Naan: Substitute the butter with vegan butter or vegetable oil.
FAQs (Frequently Asked Questions)
Q: Why is my naan not puffing up?
A: There could be several reasons. Make sure your yeast is active, the dough has risen properly, and the griddle or baking stone is hot enough. Also, avoid rolling the dough too thin.
Q: Can I make the dough ahead of time?
A: Yes, you can prepare the dough and let it rise in the refrigerator for up to 24 hours. Bring it to room temperature before rolling and baking.
Q: What if I don’t have a griddle or baking stone?
A: You can use a large cast-iron skillet or even a regular baking sheet. The results may not be quite as good, but it will still work.
Q: How do I keep the naan soft after baking?
A: Brush the naan with melted butter immediately after baking and stack them on a plate covered with a clean kitchen towel. This will trap the steam and keep them soft.
Q: Can I use a stand mixer to make the dough?
A: Yes, you can use a stand mixer with a dough hook attachment to knead the dough. Knead for about 5-7 minutes, or until the dough is smooth and elastic.
Final Thoughts
Homemade naan is a truly rewarding culinary experience. It may seem intimidating at first, but with a little practice, you’ll be turning out perfectly puffy, golden naan in no time. Don’t be afraid to experiment with different variations and toppings to create your own signature naan. I encourage you to try this recipe, share it with your loved ones, and savor the incredible flavors and textures of this classic Indian bread. Enjoy!