
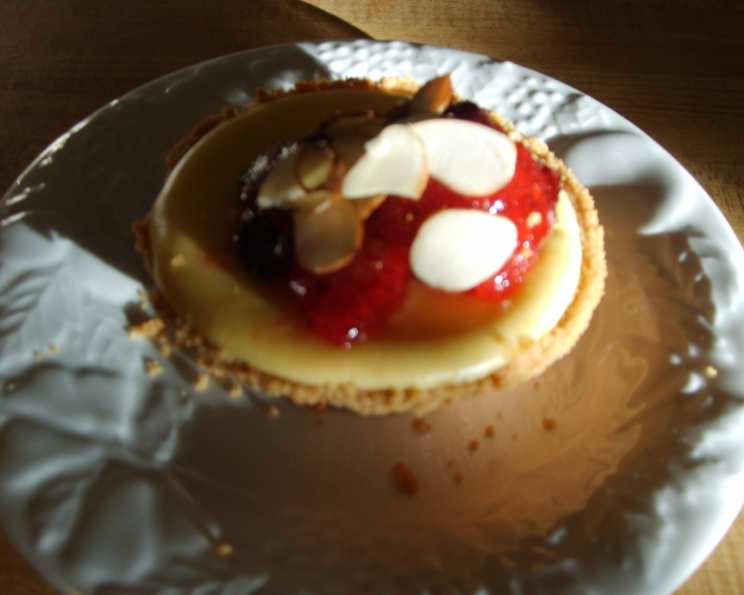
Individual Cheesecakes: A Bite-Sized Slice of Heaven
I remember one particularly sweltering summer barbecue when my assigned dessert mysteriously went missing. Panic set in until I spotted a box of miniature graham cracker crusts in the pantry. With a little improvisation and a prayer to the baking gods, I whipped up these individual cheesecakes. They were an instant hit, disappearing faster than I could explain my last-minute creation. To this day, those little cheesecakes remain a testament to the fact that sometimes, the best things in life are born out of delicious accidents.
Recipe Overview
- Prep Time: 20 minutes
- Cook Time: 50 minutes
- Total Time: 1 hour 10 minutes
- Servings: 18
- Yield: 18 individual cheesecakes
- Dietary Type: Not specified
Ingredients
- 18 miniature graham cracker pie crusts (such as Keebler brand)
- 2 ½ (8 ounce) packages cream cheese, softened
- 8 tablespoons sugar
- 3 large eggs
- 3 large egg yolks
- 1 ½ teaspoons vanilla
- 1 ½ tablespoons lemon juice
- ½ cup sour cream
- ¼ cup flour
Equipment Needed
- 9×13 inch baking pan
- Electric mixer (stand or hand-held)
- Large serving spoon
- Baking sheet
- Wire rack
Instructions
- Preheat your oven to 350 degrees Fahrenheit (175 degrees Celsius). Make sure your oven rack is in the middle position.
- Prepare a water bath by filling a 9×13 inch baking pan with water. The water level should be about halfway up the sides of the pan. Place the pan with the water on the lower rack of the oven. This water bath creates a humid environment that helps the cheesecakes bake evenly and prevents them from cracking.
- In a large bowl, combine the softened cream cheese and sugar. Using an electric mixer, beat on medium speed until the mixture is light and fluffy. This step is crucial for a smooth and creamy cheesecake. Make sure the cream cheese is properly softened to avoid lumps.
- Add the whole eggs one at a time, beating well after each addition. Continue beating until the mixture is smooth and fully incorporated. Avoid over-mixing at this stage, as it can introduce too much air into the batter.
- Add the egg yolks, one at a time, beating again until the mixture is smooth. Egg yolks add richness and help create that signature cheesecake texture.
- Incorporate the vanilla extract, lemon juice, sour cream, and flour into the cream cheese mixture. Beat on low speed until everything is well combined and the batter is smooth. Be sure to scrape down the sides of the bowl to ensure that all ingredients are evenly distributed.
- Using a large serving spoon, carefully fill each of the individual graham cracker crusts with the cheesecake batter. Fill them almost to the top, leaving a little space for the cheesecakes to rise slightly during baking.
- Carefully place the filled crusts on a baking sheet. This makes it easier to transfer them to and from the oven, and it also provides a stable surface for even baking.
- Place the baking sheet with the filled cheesecakes on the middle rack of the oven, above the water bath.
- Bake for approximately 50 minutes, or until the cheesecakes are firm around the edges but still have a slight jiggle in the center. The internal temperature should reach around 150-155°F (65-68°C).
- Once baked, remove the cheesecakes from the oven and carefully transfer them to a wire rack to cool completely. As they cool, they will set further and the jiggle will disappear.
- Once the cheesecakes are completely cool, you can top them with your favorite toppings. Fresh or frozen fruit, warmed jam, or canned pie filling (such as strawberry or blueberry) are all excellent choices.
- Another option is to create a “turtle” cheesecake. Before filling the crusts with batter, add a layer of caramel sauce to the bottom. Once the cheesecakes are baked and slightly cooled, spread the tops with warmed hot fudge sauce, drizzle with thin lines of caramel sauce (ice cream topping works well), and sprinkle with chopped pecans or walnuts.
Expert Tips & Tricks
- Don’t overbake! Overbaking is the most common mistake when making cheesecake. It will result in a dry, cracked cheesecake. It’s better to err on the side of slightly underbaked, as the cheesecakes will continue to set as they cool.
- Use room temperature ingredients. This will help the ingredients blend together smoothly and prevent lumps in the batter.
- Water bath is key. The water bath provides gentle, even heat and prevents the cheesecakes from cracking.
- For a smoother texture, you can strain the cheesecake batter through a fine-mesh sieve before filling the crusts.
- If your cheesecakes do crack, don’t worry! You can easily cover them with toppings.
- To prevent a soggy crust, you can brush the inside of the graham cracker crusts with melted chocolate before filling them.
Serving & Storage Suggestions
These individual cheesecakes are best served chilled. They can be stored in the refrigerator for up to 5 days. To prevent them from drying out, store them in an airtight container.
These cheesecakes can also be frozen. Wrap them individually in plastic wrap and then place them in a freezer-safe container. They can be frozen for up to 2 months. To thaw, place them in the refrigerator overnight.
While these cheesecakes are delicious on their own, they also pair well with fresh berries, whipped cream, or a scoop of vanilla ice cream. A light dessert wine or coffee also complements the rich flavor of the cheesecake.
Nutritional Information
| Nutrient | Amount per Serving | % Daily Value |
|---|---|---|
| Calories | 283 kcal | N/A |
| Calories from Fat | 174 g | 62% |
| Total Fat | 19.4 g | 29% |
| Saturated Fat | 9.4 g | 47% |
| Cholesterol | 107.7 mg | 35% |
| Sodium | 235.3 mg | 9% |
| Total Carbohydrate | 22.7 g | 7% |
| Dietary Fiber | 0.4 g | 1% |
| Sugars | 14.3 g | 57% |
| Protein | 5.2 g | 10% |
Note: Nutritional information is an estimate and may vary based on specific ingredients and portion sizes.
Variations & Substitutions
- Gluten-Free: Use gluten-free graham cracker crusts or make your own crust using gluten-free flour and butter.
- Dairy-Free: Substitute the cream cheese and sour cream with dairy-free alternatives. Be sure to choose brands that are specifically designed for baking, as some dairy-free options may not perform as well in the oven.
- Flavor Variations: Experiment with different extracts, such as almond, coconut, or peppermint. You can also add citrus zest or spices like cinnamon or nutmeg to the batter.
- Chocolate Cheesecake: Add melted chocolate or cocoa powder to the batter for a chocolatey twist.
- Seasonal Fruit: Use seasonal fruits for toppings, such as peaches in the summer or cranberries in the fall.
FAQs (Frequently Asked Questions)
Q: Can I use pre-made cheesecake filling instead of making my own?
A: While you could, the taste and texture of homemade cheesecake filling are far superior. Pre-made fillings often contain artificial ingredients and lack the richness of a homemade batter.
Q: What if I don’t have a 9×13 inch baking pan for the water bath?
A: Any oven-safe pan that is large enough to hold the water and accommodate the baking sheet will work. You can also use a roasting pan.
Q: How can I tell if the cheesecakes are done without a thermometer?
A: The cheesecakes are done when the edges are firm and the center has a slight jiggle. They will continue to set as they cool.
Q: Can I make these ahead of time?
A: Yes, these cheesecakes can be made up to 3 days in advance. Store them in the refrigerator in an airtight container.
Q: What is the best way to prevent cracks in my cheesecakes?
A: The water bath is the best way to prevent cracks. Also, avoid overbaking and allow the cheesecakes to cool slowly in the oven with the door slightly ajar.
Final Thoughts
These individual cheesecakes are a delightful treat that’s perfect for any occasion. Whether you’re looking for a simple dessert to impress guests or just want to indulge in a little bit of heaven, this recipe is sure to satisfy. Don’t be afraid to experiment with different toppings and flavor variations to create your own signature cheesecake. And most importantly, enjoy the process of baking and sharing these delicious treats with loved ones!