
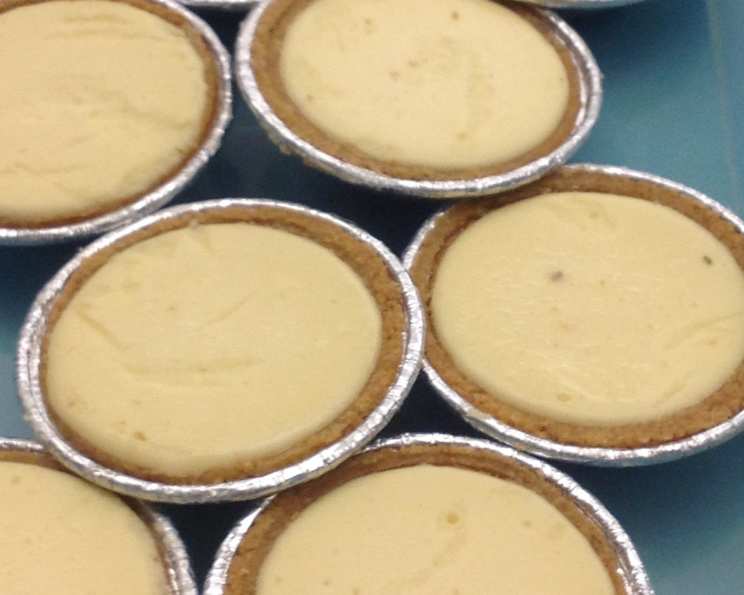
Individual Cheesecakes: A Slice of New York in Every Bite
The first time I tasted a proper New York-style cheesecake, I was a wide-eyed kid visiting my aunt in the city. We walked into this little bakery, the air thick with the scent of vanilla and butter, and there it was, glistening under the warm lights: a slice of cheesecake taller than my hand. That first bite was pure magic—the creamy, tangy filling melting on my tongue, the buttery graham cracker crust providing the perfect counterpoint. It was a moment frozen in time, a taste of pure happiness I’ve been chasing ever since. This individual cheesecake recipe is my attempt to capture that memory, to bring a little piece of that New York magic into your own kitchen.
Recipe Overview
- Prep Time: 15 minutes
- Cook Time: 25-30 minutes
- Total Time: 1 hour 45 minutes (includes cooling and chilling)
- Servings: 6-8
- Yield: 6-8 individual cheesecakes
- Dietary Type: Not suitable for Vegan, Gluten-Free or Dairy-Free
Ingredients
- 6-8 mini graham cracker tart crusts (store-bought)
For the Filling:
- 2 bars (8oz each) cream cheese, softened
- 1/3 cup sugar
- 1/2 cup sugar
- 1/8 cup cornstarch
- 1/8 cup heavy whipping cream
- 1/4 cup heavy whipping cream
- 1 1/2 teaspoons vanilla extract
- 1 egg
Equipment Needed
- Food processor or mixer
- Baking sheet
- Large roasting pan (for water bath)
- Measuring cups and spoons
- Mixing bowls
Instructions
- Preheat your oven to 350°F (175°C).
- Prepare the first part of the filling: In a food processor or mixer, combine one bar of cream cheese, 1/3 cup of sugar, and 1/8 cup of cornstarch. Mix until just combined and smooth. Be careful not to overmix at this stage, as overmixing can incorporate too much air and lead to cracks in the cheesecake.
- Add the second bar of cream cheese to the mixture and combine until smooth. Again, mix until just combined.
- In a separate bowl, whisk together 1/8 cup plus 1/4 cup of heavy whipping cream, 1/2 cup of sugar, and 1 1/2 teaspoons of vanilla extract.
- Add the cream mixture to the cream cheese mixture. Mix until just combined and smooth, ensuring all ingredients are well incorporated.
- Finally, add the egg to the mixture and combine until just incorporated. It’s important not to overmix after adding the egg, as this can affect the texture of the final cheesecake.
- Arrange the store-bought individual graham cracker crusts on a baking sheet.
- Pour the cream cheese mixture into the graham cracker crusts, filling them almost to the top.
- Prepare a water bath: Place the baking sheet with the filled cheesecakes inside a large roasting pan. Carefully pour hot water into the roasting pan until it reaches about halfway up the sides of the tart crusts. The water bath helps to create a moist environment in the oven, which prevents the cheesecakes from cracking and ensures even baking.
- Bake in the preheated oven for 25-30 minutes. The cheesecakes are done when the edges are set, but the center still has a slight jiggle.
- Turn off the oven and crack the oven door open slightly. Allow the cheesecakes to cool in the oven for about an hour. This gradual cooling process helps to prevent cracking.
- Remove the cheesecakes from the water bath and let them cool completely to room temperature on a wire rack.
- Once cooled to room temperature, refrigerate the cheesecakes for at least 1 hour before serving. This chilling time allows the cheesecakes to fully set and develop their characteristic creamy texture.
Expert Tips & Tricks
- Don’t overmix! Overmixing the batter, especially after adding the egg, can lead to a tough cheesecake that cracks during baking.
- Water Bath is Key: The water bath is essential for a creamy, crack-free cheesecake. Make sure the water level is high enough.
- Cooling Gradually: Cooling the cheesecakes slowly in the oven with the door ajar helps prevent cracking.
- Softened Cream Cheese: Ensure your cream cheese is properly softened. This will prevent lumps and ensure a smooth batter. Leave it at room temperature for at least an hour before starting.
- Even Baking: For even baking, rotate the baking sheet halfway through the baking time.
- Checking for Doneness: The cheesecakes are done when the edges are set but the center still has a slight jiggle. They will continue to set as they cool.
Serving & Storage Suggestions
These individual cheesecakes are perfect served chilled, straight from the refrigerator. You can garnish them with fresh berries, a drizzle of chocolate sauce, or a dollop of whipped cream for an extra touch. They also pair beautifully with a cup of strong coffee or a dessert wine.
To store leftovers, keep them refrigerated in an airtight container. They will last for up to 3-4 days. You can also freeze these cheesecakes for longer storage. Wrap them individually in plastic wrap and then place them in a freezer-safe container. Frozen cheesecakes will last for up to 2-3 months. Thaw them in the refrigerator overnight before serving.
Nutritional Information
| Nutrient | Amount per Serving | % Daily Value |
|---|---|---|
| Calories | 732.8 kcal | N/A |
| Calories from Fat | 305 g | 42% |
| Total Fat | 34 g | 52% |
| Saturated Fat | 9.5 g | 47% |
| Cholesterol | 51.4 mg | 17% |
| Sodium | 653.2 mg | 27% |
| Total Carbohydrate | 103.3 g | 34% |
| Dietary Fiber | 1.7 g | 6% |
| Sugars | 70.5 g | 282% |
| Protein | 6 g | 12% |
Note: Nutritional information is an estimate and may vary based on specific ingredients and portion sizes.
Variations & Substitutions
- Lemon Zest: Add a teaspoon of lemon zest to the filling for a bright, citrusy flavor.
- Chocolate Swirl: Drizzle melted chocolate over the top of the cheesecakes before baking and swirl with a toothpick for a marbled effect.
- Berry Swirl: Puree your favorite berries and swirl into the batter before baking.
- Different Crust: While graham cracker crusts are classic, you could experiment with other crusts, such as shortbread or chocolate wafers.
- Espresso Cheesecake: Add a teaspoon or two of espresso powder to the batter for a coffee-flavored cheesecake.
- Salted Caramel: Drizzle salted caramel sauce over the finished cheesecakes for a decadent treat.
FAQs (Frequently Asked Questions)
Q: Why did my cheesecakes crack?
A: Cracking is usually caused by rapid temperature changes or overbaking. Make sure to use a water bath, cool the cheesecakes gradually in the oven, and avoid overmixing the batter.
Q: Can I make these ahead of time?
A: Absolutely! In fact, cheesecakes are often better the next day after the flavors have had time to meld. Just make sure to store them properly in the refrigerator.
Q: Can I use low-fat cream cheese?
A: While you can use low-fat cream cheese, it will affect the texture and richness of the cheesecake. For the best results, use full-fat cream cheese.
Q: My store was out of the mini graham cracker crusts. Can I use a regular pie crust?
A: Yes, you can use a regular graham cracker pie crust. Adjust the baking time accordingly. You may need to bake it a bit longer. Or, you can also make your own from scratch and press it into muffin tins!
Q: How do I know when the cheesecakes are done?
A: The edges of the cheesecakes should be set, but the center should still have a slight jiggle. They will continue to set as they cool.
Final Thoughts
These individual cheesecakes are a delightful treat that’s perfect for any occasion. The creamy, tangy filling and the buttery graham cracker crust create a symphony of flavors that will leave you wanting more. Don’t be intimidated by the water bath—it’s the secret to a perfectly smooth and creamy cheesecake. So, gather your ingredients, preheat your oven, and get ready to bake a little bit of New York magic. I encourage you to try this recipe and share your feedback! Why not serve with a raspberry coulis for a burst of fresh flavor? Happy baking!