
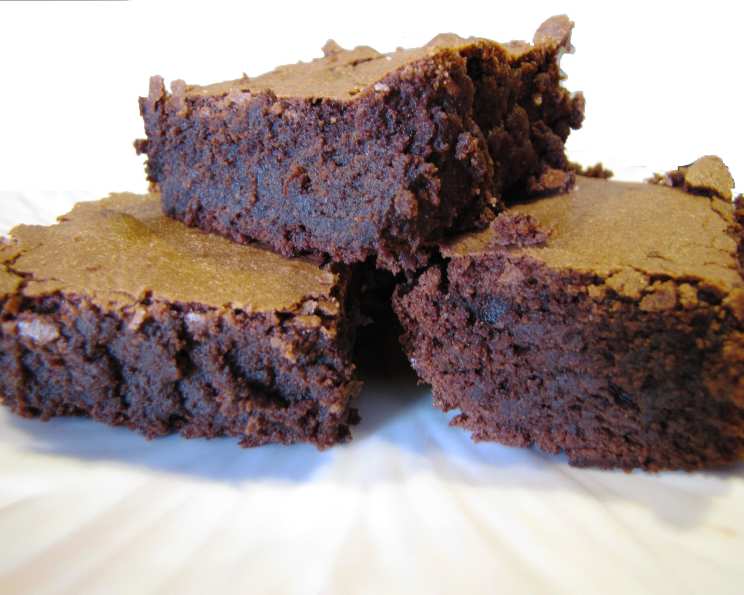
Intensely Deep Dark Chocolate Brownies
The memory still makes my mouth water. I was maybe ten years old, standing on a stool in my grandmother’s kitchen, the air thick with the scent of melting chocolate and vanilla. She’d just pulled a pan of brownies from the oven, their edges slightly crisp, the center still fudgy and yielding to the touch. She handed me a warm corner piece, and the intense, bittersweet chocolate flavor exploded on my tongue. Those brownies weren’t just dessert; they were pure, unadulterated comfort and a symbol of her love. Today, I share my version of those deeply dark, unforgettable brownies.
Recipe Overview
- Prep Time: 15 minutes
- Cook Time: 25-35 minutes
- Total Time: 40-50 minutes
- Servings: 32
- Yield: 32 brownies
- Dietary Type: Vegetarian
Ingredients
- 1 cup unsalted butter
- 8 ounces bittersweet chocolate (fine quality, no more than 60% cacao)
- 2 cups sugar
- 1 teaspoon vanilla extract
- 5 large eggs
- 2⁄3 cup all-purpose flour
- 1⁄3 cup unsweetened dutch cocoa
- 1⁄2 teaspoon salt
- 3⁄4 cup walnuts, chopped (optional)
Equipment Needed
- 3 qt heavy saucepan
- 13″ x 9″ baking pan
- Whisk
- Mixing bowl
Instructions
- Preheat your oven to 350 degrees F (175 degrees C) with a rack placed in the center position. This ensures even baking.
- Prepare your baking pan. Thoroughly butter a 13″ x 9″ pan, making sure to get into all the corners. Then, flour the pan, tapping out any excess. This will prevent the brownies from sticking and make them easy to remove once cooled.
- In a 3 qt heavy saucepan, combine the butter and bittersweet chocolate. Melt them over low heat, stirring constantly until the mixture is completely smooth. Be patient and avoid high heat, which can cause the chocolate to seize or burn.
- Remove the saucepan from the heat and allow the chocolate-butter mixture to cool to room temperature. This is a crucial step. Adding the sugar and eggs while the mixture is too hot can affect the texture of the brownies, potentially making them greasy.
- Once the chocolate mixture has cooled, whisk in the sugar and vanilla extract until well combined. The mixture should be smooth and glossy.
- Add the eggs one at a time, whisking thoroughly after each addition. Make sure each egg is fully incorporated before adding the next. This step is vital for creating a rich, emulsified batter. Set aside.
- In a separate mixing bowl, whisk together the Dutch process cocoa powder, flour, and salt. This ensures that the dry ingredients are evenly distributed, preventing clumps in the final batter.
- Gradually combine the dry ingredients with the chocolate-butter mixture. Whisk thoroughly until just combined. Be careful not to overmix, as this can lead to tough brownies.
- If using, gently fold in the chopped walnuts.
- Spread the brownie batter evenly into the prepared pan.
- Bake for 25-35 minutes. Begin checking for doneness at 25 minutes. The brownies are ready when a toothpick inserted into the center comes out with moist crumbs clinging to it. Be careful not to overbake, as this will result in dry brownies.
- Allow the brownies to cool completely in the pan before cutting and serving. This will allow them to set properly and prevent them from crumbling.
Expert Tips & Tricks
- For extra fudgy brownies: Slightly underbake them. Remove them from the oven when the center still seems a little soft. They will continue to set as they cool.
- Use high-quality chocolate: The quality of the chocolate significantly impacts the flavor of the brownies. Splurge on a good-quality bittersweet chocolate with a cacao percentage no higher than 60% for the best results.
- Dutch process cocoa: Using Dutch process cocoa gives the brownies a richer, deeper chocolate flavor and a darker color. If you only have natural cocoa powder, you can still use it, but the flavor and color will be slightly different.
- Room temperature ingredients: Making sure your butter and eggs are at room temperature will help them incorporate more easily into the batter, resulting in a smoother texture.
- Don’t overmix: Overmixing the batter develops the gluten in the flour, leading to tough brownies. Mix just until the ingredients are combined.
- Customize your brownies: Add chocolate chips, peanut butter chips, or a swirl of caramel to customize your brownies to your liking.
Serving & Storage Suggestions
These intensely dark chocolate brownies are delicious served on their own, warm or at room temperature. They are also fantastic with a scoop of vanilla ice cream or a dollop of whipped cream. For a truly decadent experience, try pairing them with a rich chocolate sauce or a sprinkle of sea salt.
To store, keep the brownies in an airtight container at room temperature for up to 3 days. For longer storage, refrigerate them for up to a week or freeze them for up to 3 months. To reheat, simply microwave them for a few seconds until warm.
Nutritional Information
| Nutrient | Amount per Serving | % Daily Value |
|---|---|---|
| Calories | 122 kcal | N/A |
| Calories from Fat | 59 kcal | N/A |
| Total Fat | 6.7 g | 10% |
| Saturated Fat | 4 g | 19% |
| Cholesterol | 44.3 mg | 14% |
| Sodium | 48.6 mg | 2% |
| Total Carbohydrate | 15.1 g | 5% |
| Dietary Fiber | 0.4 g | 1% |
| Sugars | 12.6 g | 50% |
| Protein | 1.5 g | 2% |
Note: Nutritional information is an estimate and may vary based on specific ingredients and portion sizes.
Variations & Substitutions
- Gluten-Free Brownies: Substitute the all-purpose flour with a gluten-free blend of your choice. A blend specifically designed for baking will yield the best results.
- Dairy-Free Brownies: Use a high-quality dairy-free butter alternative, such as coconut oil or a vegan butter stick. Ensure your bittersweet chocolate is also dairy-free.
- Nut-Free Brownies: Omit the walnuts. You can substitute them with seeds like pumpkin or sunflower seeds for a little added texture.
- Espresso Brownies: Add 1-2 teaspoons of instant espresso powder to the dry ingredients for a richer, more intense chocolate flavor with a hint of coffee.
- Peppermint Brownies: Add a few drops of peppermint extract to the batter and top with crushed peppermint candies after baking for a festive treat.
FAQs (Frequently Asked Questions)
Q: Why did my brownies turn out dry?
A: Overbaking is the most common cause of dry brownies. Be sure to check for doneness after 25 minutes and remove them from the oven when a toothpick inserted into the center comes out with moist crumbs.
Q: Can I use a different type of chocolate?
A: Yes, you can experiment with different types of chocolate, but keep in mind that the sweetness and flavor will change. Milk chocolate will result in sweeter brownies, while dark chocolate (70% cacao or higher) will be more intense and bitter.
Q: Can I make these brownies ahead of time?
A: Absolutely! Brownies are a great make-ahead dessert. Bake them a day or two in advance and store them in an airtight container at room temperature.
Q: My butter and chocolate seized when melting. What can I do?
A: Seizing can happen if the mixture gets too hot or if a small amount of water gets into the chocolate. Try adding a tablespoon of boiling water and whisking vigorously. This may help to loosen the mixture.
Q: Can I double the recipe?
A: Yes, you can easily double the recipe. Use a larger baking pan, such as a 15″ x 10″ pan, and increase the baking time accordingly.
Final Thoughts
These intensely dark chocolate brownies are a treat that’s truly simple to make, yet tastes like a gourmet masterpiece. So, I encourage you to preheat your oven, gather your ingredients, and bake up a batch of these decadent brownies. Share them with friends and family, or simply savor them yourself with a cup of coffee or a glass of milk. I hope these brownies become a cherished memory for you, just as my grandmother’s brownies are for me. Enjoy!