
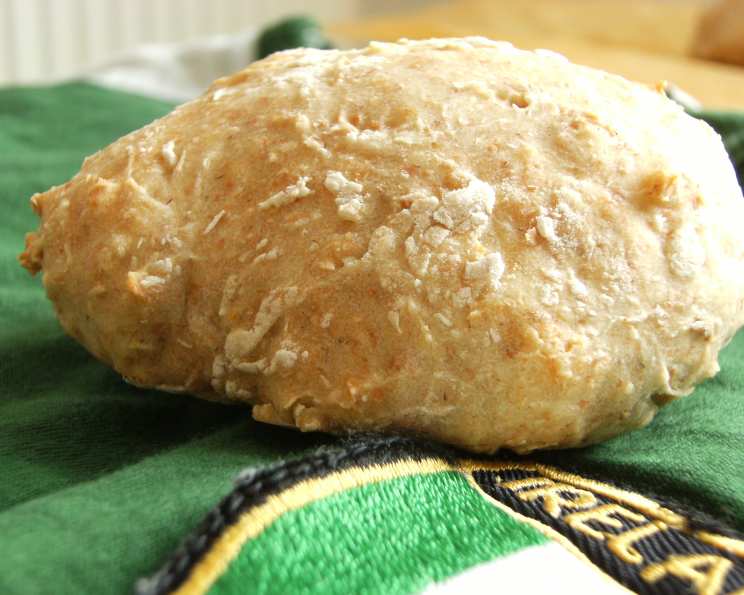
Irish and Scottish Gaelic Soda Bread Scones: A Taste of Home
The scent of baking soda bread always transports me back to my grandmother’s kitchen in the Scottish Highlands. Her sturdy hands, dusted with flour, would expertly knead the dough, humming a Gaelic tune. The warm scones, fresh from the oven, slathered with butter and homemade jam, were a staple of every visit, a simple yet profound expression of love and heritage that filled both my stomach and my soul. It’s a taste I try to recreate every time, a tiny bit of my history I get to share.
Recipe Overview
- Prep Time: 10 minutes
- Cook Time: 20 minutes
- Total Time: 30 minutes
- Yields: 8-10 scones
- Serves: 8-10
- Dietary Type: Vegetarian
Ingredients
- 275g wholemeal flour
- 275g plain white flour
- 1 teaspoon salt
- 1 teaspoon bicarbonate of soda
- 400-500ml buttermilk (14 to 18 fluid ozs)
Equipment Needed
- Large mixing bowl
- Measuring cups and spoons
- Floured surface
- 7.5cm/3in plain cutter
- Floured baking tray
- Wire rack
Instructions
-
Preheat your oven to 220C/450F (200C fan/Gas Mark 7). This high temperature is crucial for achieving that characteristic golden-brown crust and light, airy interior.
-
In a large bowl, meticulously combine all the dry ingredients. This means whisking together the wholemeal flour, plain white flour, salt, and bicarbonate of soda. Ensure the bicarbonate of soda is evenly distributed; this is your leavening agent and key to a successful rise.
-
Create a well in the centre of the flour mixture. This is where you’ll introduce the buttermilk. Start by adding the smaller quantity, 400ml or 14 fluid ozs.
-
Using your hands, gently mix the ingredients together. Gradually incorporate the flour into the buttermilk, adding more buttermilk if necessary. The goal is to achieve a soft dough that’s moist but not sticky. Be careful not to overmix at this stage, as it can lead to tough scones.
-
Lightly flour a clean work surface. Turn the dough out onto the floured surface and knead it very lightly. The kneading should be minimal, just enough to shape the dough into a round. Overworking the dough will develop the gluten too much, resulting in dense scones.
-
Flatten the dough to approximately 2.5cm/1in thick. Use a rolling pin if needed, but avoid pressing down too hard.
-
Using a 7.5cm/3in plain cutter, cut out the scones. Dip the cutter in flour between cuts to prevent sticking and ensure clean edges. You should get around 8-10 scones from this amount of dough. You can gently re-roll the scraps to cut out more scones.
-
Place the scones onto a floured baking tray. Ensure they have enough space around them to rise properly.
-
Bake for approximately 20 minutes, or until the scones are well risen and a beautiful golden brown. Keep an eye on them – oven temperatures can vary, so you might need to adjust the baking time slightly. A skewer inserted into the center of a scone should come out clean.
-
Once baked, transfer the scones to a wire rack to cool slightly. This allows air to circulate and prevents them from becoming soggy on the bottom.
-
Serve warm, ideally with butter, jam, clotted cream, or alongside hearty soups and stews.
Expert Tips & Tricks
- Don’t overmix the dough: This is the golden rule of soda bread and scone making. Overmixing develops the gluten, leading to tough, dense results. Mix just until the ingredients come together.
- Use cold buttermilk: Cold buttermilk helps to keep the butter in the flour from melting before baking, which contributes to a flakier, more tender scone. If you don’t have buttermilk, you can substitute with milk mixed with a tablespoon of lemon juice or vinegar – let it sit for 5 minutes to curdle.
- Bake at a high temperature: The high oven temperature ensures a good rise and a golden-brown crust.
- For extra flavor: Add a handful of rolled oats, chopped herbs (like rosemary or thyme), or a sprinkle of cheese to the dough.
- Cutting the scones: Press straight down with the cutter, avoiding twisting. Twisting seals the edges and prevents the scones from rising fully.
- Make ahead: The dry ingredients can be mixed ahead of time and stored in an airtight container. When ready to bake, simply add the buttermilk.
- Glaze for shine: Before baking, brush the tops of the scones with a little milk or beaten egg for a glossy finish.
Serving & Storage Suggestions
These Irish and Scottish Gaelic Soda Bread Scones are best enjoyed warm, straight from the oven. Slice them in half horizontally and spread generously with butter, jam, honey, clotted cream, or your favorite toppings. They are a delightful accompaniment to hearty soups, stews, or a traditional Irish or Scottish breakfast.
To store leftovers, place the scones in an airtight container at room temperature for up to 2 days. For longer storage, freeze them for up to 2 months. To reheat, thaw the scones completely and warm them in a low oven (around 150C/300F) for 5-10 minutes, or until heated through. You can also briefly microwave them, but be careful not to overheat, as they can become tough.
Nutritional Information
| Nutrient | Amount per Serving (estimated) | % Daily Value* |
|---|---|---|
| Calories | 250 kcal | 13% |
| Total Fat | 5g | 8% |
| Saturated Fat | 2g | 10% |
| Cholesterol | 5mg | 2% |
| Sodium | 400mg | 17% |
| Total Carbohydrate | 45g | 15% |
| Dietary Fiber | 3g | 12% |
| Sugars | 3g | – |
| Protein | 7g | 14% |
*Percent Daily Values are based on a 2,000 calorie diet. Your daily values may be higher or lower depending on your calorie needs.
Variations & Substitutions
- Sweet Soda Bread Scones: Add 2-3 tablespoons of sugar to the dry ingredients, along with a handful of raisins, currants, or dried cranberries.
- Savory Soda Bread Scones: Incorporate grated cheese (cheddar, Parmesan, or Gruyere), chopped herbs (chives, parsley, or dill), or crumbled bacon into the dough.
- Gluten-Free: Use a gluten-free flour blend suitable for baking, and add a teaspoon of xanthan gum to help bind the ingredients. Be aware that the texture may be slightly different from traditional scones.
- Dairy-Free: Substitute the buttermilk with a plant-based milk alternative, such as almond milk or soy milk, mixed with a tablespoon of lemon juice or vinegar.
- Spiced Soda Bread Scones: Add 1/2 teaspoon of ground cinnamon, nutmeg, or mixed spice to the dry ingredients for a warm, festive flavor.
FAQs (Frequently Asked Questions)
Q: Why are my scones flat and not rising properly?
A: This is often due to using old or inactive bicarbonate of soda, overmixing the dough, or not baking at a high enough temperature. Make sure your bicarbonate of soda is fresh and follow the recipe instructions carefully.
Q: Can I use self-raising flour instead of plain flour and bicarbonate of soda?
A: While you can, the texture may be slightly different. If using self-raising flour, omit the bicarbonate of soda and reduce the amount of salt slightly.
Q: How do I prevent the scones from drying out?
A: Avoid overbaking them. Remove them from the oven as soon as they are golden brown and a skewer inserted into the center comes out clean. Cool them on a wire rack to prevent them from steaming.
Q: Can I freeze the dough before baking?
A: Yes, you can. Shape the dough into scones, place them on a baking sheet, and freeze until solid. Then, transfer them to a freezer bag. Bake from frozen, adding a few extra minutes to the baking time.
Q: What’s the best way to reheat scones?
A: The best way is in a preheated oven at a low temperature (around 150C/300F) for 5-10 minutes. This will warm them through without drying them out. You can also use a microwave for a quicker option, but they may become slightly chewier.
Final Thoughts
These Irish and Scottish Gaelic Soda Bread Scones are more than just a recipe; they’re a connection to history, family, and the simple pleasure of sharing homemade food. I encourage you to try this recipe and experience the warmth and comfort of these delicious scones for yourself. Feel free to experiment with different variations and substitutions to create your own unique twist. And don’t forget to share your creations and feedback! They’re just perfect with a steaming mug of tea, or perhaps a dram of whisky for a truly authentic taste of the Highlands. Enjoy!