
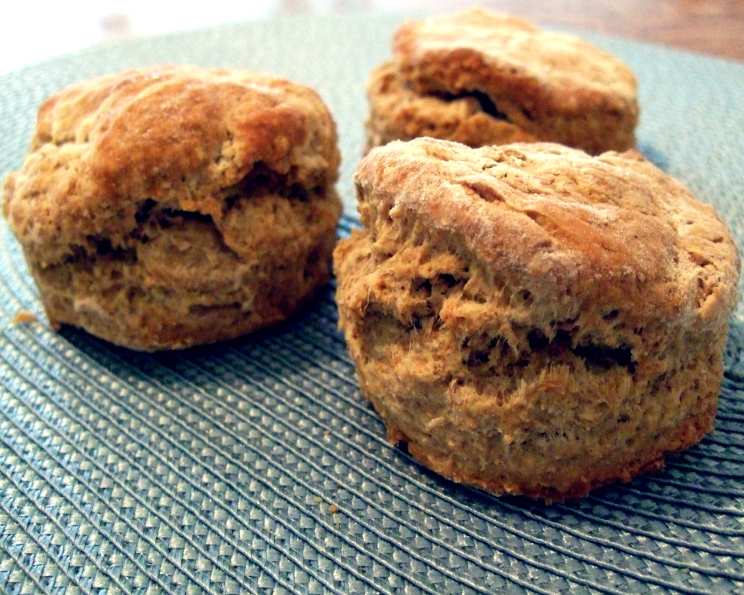
Irish Brown Scones: A Taste of Home
The aroma alone transports me back to my grandmother’s cozy kitchen in County Cork. Rain would be lashing against the windows, a turf fire crackling in the hearth, and the comforting scent of freshly baked brown scones filling the air. She’d serve them warm, slathered with butter and homemade raspberry jam, the perfect antidote to the blustery Irish weather. Each bite was a little hug from Granny, a taste of pure, unadulterated love.
Recipe Overview
- Prep Time: 10 minutes
- Cook Time: 15 minutes
- Total Time: 25 minutes
- Yields: 8 scones
- Serves: 8
- Dietary Type: Vegetarian
Ingredients
- 6 ounces whole wheat flour
- 6 ounces all-purpose flour
- 4 ounces wheat bran
- 1 teaspoon baking soda
- ⅛ teaspoon salt
- 2 ounces butter, cold and cubed
- 1 tablespoon brown sugar
- 7 fluid ounces buttermilk
Equipment Needed
- Large mixing bowl
- Baking sheet
- Round cookie cutter (optional)
- Wire rack
Instructions
-
Preheat your oven to 400°F (200°C). Lightly dust a baking sheet with some flour. This preheated baking sheet is key to a lovely textured bottom!
-
In a large mixing bowl, place the whole wheat flour and wheat bran.
-
Sift the all-purpose flour, salt, and baking soda into the bowl containing the whole wheat flour and wheat bran. Sifting ensures there are no clumps of baking soda and results in a lighter scone.
-
Using your fingertips, mix the dry ingredients together thoroughly. This ensures even distribution of the leavening agent (baking soda).
-
Add the cold, cubed butter to the flour mixture. Rub the butter into the flour using your fingertips until the mixture resembles coarse breadcrumbs, with the butter broken down into pea-sized pieces. The colder the butter, the better! Cold butter creates steam in the oven, resulting in flaky scones.
-
Mix in the brown sugar.
-
At this stage, place the lightly floured baking sheet into the preheating oven. This will ensure a crispy bottom to your scones, similar to cooking pancakes on a hot griddle.
-
Gradually stir in enough buttermilk to form a soft, but not sticky, dough. Start with about 6 fluid ounces and add more as needed until the dough just comes together. Be careful not to overmix!
-
Turn the dough out onto a lightly floured surface. Gently knead for just a few seconds – only until it comes together. Over-kneading will result in tough scones.
-
Roll the dough out to about ¾ inch thickness. Use a round cookie cutter to cut out scones, or use a sharp knife to cut into squares or triangles. If you don’t have a cutter, don’t worry – rustic shapes are just as delicious!
-
Carefully remove the preheated baking sheet from the oven. Place the scones onto the hot baking sheet.
-
Bake for approximately 15 minutes, or until the scones have risen and are a golden brown color. Keep a close eye on them, as oven temperatures can vary.
-
Once baked, remove the scones from the oven and transfer them to a wire rack to cool slightly.
Expert Tips & Tricks
- Cold is Key: Using cold butter and buttermilk is crucial for achieving a light and flaky texture. Consider chilling the flour mixture as well.
- Don’t Overmix: Overmixing the dough develops the gluten, leading to tough scones. Mix just until the ingredients are combined.
- Preheat the Baking Sheet: This step is non-negotiable! The hot baking sheet ensures a crispy bottom.
- Egg Wash for Shine: For a beautiful, golden-brown sheen, brush the tops of the scones with a beaten egg or milk before baking.
- Buttermilk Substitute: If you don’t have buttermilk, you can make a quick substitute by adding 1 tablespoon of lemon juice or white vinegar to regular milk and letting it sit for 5 minutes.
Serving & Storage Suggestions
Irish brown scones are best enjoyed warm, straight from the oven. Serve them with generous dollops of butter, clotted cream, jam, or even honey. They also pair wonderfully with savory dishes like soups and stews.
Store leftover scones in an airtight container at room temperature for up to 2 days. For longer storage, freeze them in a freezer-safe bag or container for up to 2 months. To reheat, simply warm them in a low oven or microwave until heated through. You can also split them and toast them for a crispy treat.
Nutritional Information
| Nutrient | Amount per Serving | % Daily Value |
|---|---|---|
| Calories | 249 kcal | 12% |
| Total Fat | 7.2g | 11% |
| Saturated Fat | 4g | 19% |
| Cholesterol | 16.3mg | 5% |
| Sodium | 264.5mg | 11% |
| Total Carbohydrate | 44.1g | 14% |
| Dietary Fiber | 9.3g | 37% |
| Sugars | 3.1g | 12% |
| Protein | 8.3g | 16% |
Variations & Substitutions
- Sweet Scones: Add a handful of raisins, currants, or dried cranberries to the dough for a sweeter treat.
- Savory Scones: Incorporate grated cheese, chopped herbs (such as rosemary or thyme), or sun-dried tomatoes for a savory twist.
- Gluten-Free: Substitute the all-purpose flour with a gluten-free blend, but be sure to add a binding agent like xanthan gum to help hold the scones together.
- Dairy-Free: Use a plant-based butter alternative and non-dairy milk (such as almond or soy milk) in place of butter and buttermilk.
- Spiced Scones: Add a pinch of cinnamon, nutmeg, or mixed spice to the dry ingredients for a warm, comforting flavor.
- Orange Zest: Add the zest of one orange to the dry ingredients for a bright, citrusy flavor.
FAQs (Frequently Asked Questions)
Q: Why are my scones flat and dense?
A: This is often due to overmixing the dough, using warm butter, or not using enough leavening agent. Be sure to follow the recipe carefully and use cold ingredients!
Q: Can I make the dough ahead of time?
A: Yes, you can prepare the dough ahead of time and store it in the refrigerator for up to 24 hours. However, keep in mind that the baking soda will start to react, so the scones may not rise as much if you wait too long.
Q: How do I prevent the scones from drying out?
A: Avoid overbaking the scones. They should be golden brown but still slightly soft to the touch. Store them in an airtight container to prevent them from drying out.
Q: Can I freeze the baked scones?
A: Yes, you can freeze the baked scones. Allow them to cool completely before wrapping them individually in plastic wrap and placing them in a freezer-safe bag or container.
Q: Why is preheating the baking sheet so important?
A: Preheating the baking sheet creates a hot surface that helps the scones rise quickly and develop a crispy bottom. It’s similar to cooking pancakes on a hot griddle, resulting in a more even and delicious texture.
Final Thoughts
These Irish brown scones are more than just a baked good; they’re a taste of tradition, a connection to heritage, and a warm embrace in every bite. Don’t be intimidated – they’re surprisingly simple to make, and the results are incredibly rewarding. So, gather your ingredients, preheat your oven, and transport yourself to the heart of Ireland with this delightful recipe. I encourage you to experiment with variations, share your creations with loved ones, and let the comforting aroma of freshly baked scones fill your home. Sláinte!