
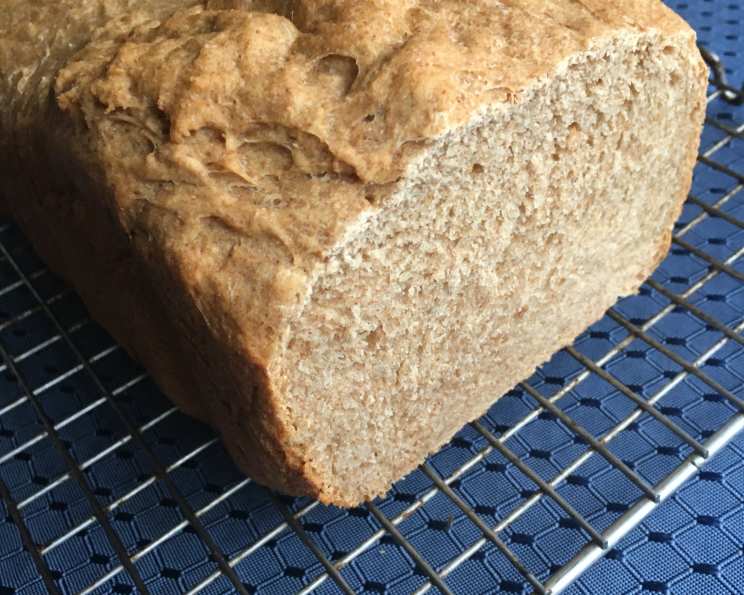
Irish Potato Brown Bread (Bread Machine)
The smell of baking bread has always transported me back to my grandmother’s kitchen. She wasn’t Irish, mind you, but she had a knack for adapting recipes and making them her own. I remember the first time I tasted her version of potato bread; the subtle earthy sweetness, the slightly chewy texture, it was unlike anything I’d ever had. It wasn’t just bread, it was a hug in every slice, a taste of home and comfort that lingered long after the meal was finished. I’ve tweaked it over the years, simplifying the process with a bread machine, but always striving to recapture that unforgettable flavor and feeling.
Recipe Overview
- Prep Time: 10 minutes
- Cook Time: Varies by bread machine cycle
- Total Time: Approximately 3 hours (including rising/baking)
- Servings: About 12 slices
- Yield: 1 1/2 pound loaf
- Dietary Type: Vegetarian
Ingredients
- 1 1/4 cups water
- 3 tablespoons butter, cut into pieces
- 2 tablespoons honey
- 2 cups whole wheat flour
- 1 cup bread flour
- 1/4 cup instant potato flakes
- 1 tablespoon gluten, plus 2 teaspoons gluten
- 1 1/2 teaspoons salt
- 2 teaspoons rapid acting yeast (or 2 1/2 teaspoons bread machine yeast)
Equipment Needed
- Bread Machine
- Measuring cups and spoons
- Cooling rack
Instructions
- Add the water to the bread machine pan.
- Add the butter pieces on top of the water. This helps to prevent the yeast from activating prematurely.
- Pour in the honey.
- Add the whole wheat flour, making sure it covers the liquids.
- Add the bread flour on top of the whole wheat flour.
- Sprinkle the instant potato flakes evenly over the flour.
- Add 1 tablespoon of gluten, then add the additional 2 teaspoons of gluten. Gluten is important for the structure of the bread, especially with whole wheat flour, as it can be heavier.
- Add the salt, making sure it doesn’t directly touch the yeast. Salt can inhibit yeast activity.
- Finally, add the rapid acting yeast (or bread machine yeast) to the pan.
- Set the bread machine to the Whole Wheat cycle and select a medium crust.
- Press Start.
- When the baking cycle ends, immediately remove the bread from the pan. Use oven mitts, as the pan will be hot.
- Place the bread on a cooling rack to cool completely before slicing. This prevents the bottom crust from becoming soggy.
- Let the bread cool to room temperature. This is essential for a good texture and easier slicing.
Expert Tips & Tricks
- Bloom the Yeast (Optional): While rapid-rise yeast doesn’t need to be bloomed, you can proof it in a small amount of warm water with a pinch of sugar for 5-10 minutes to ensure it’s active. If it doesn’t foam, your yeast might be old.
- Flour Power: The amount of flour might need slight adjustments depending on humidity. Watch the dough during the kneading phase. If it seems too wet and sticky, add a tablespoon of flour at a time until it forms a smooth ball.
- Butter Temperature: Using softened, but not melted, butter can help with the bread’s texture. It incorporates into the dough more evenly.
- Honey Substitute: If you don’t have honey, maple syrup or molasses can be used as a substitute, but it will slightly alter the flavor profile.
- Resting Period After Baking: If you want to ensure that the top crust doesn’t sink or wrinkle as it cools, turn off the oven when there are just 5 minutes left in the baking cycle, then crack open the oven door and let the bread sit inside the oven for 10-15 minutes with the oven turned off.
Serving & Storage Suggestions
This Irish potato brown bread is delicious served warm with a pat of butter or a drizzle of olive oil. It’s fantastic for sandwiches, especially with corned beef or turkey. It also pairs well with hearty soups and stews.
To store, keep the bread in an airtight container at room temperature for up to 3 days. For longer storage, slice the bread and freeze it in a freezer-safe bag for up to 3 months. To reheat, thaw the slices at room temperature or toast them directly from frozen. You can also reheat the entire loaf, wrapped in foil, in a low oven (300°F/150°C) for about 15-20 minutes.
Nutritional Information
| Nutrient | Amount per Serving | % Daily Value |
|---|---|---|
| Calories | 147 kcal | 7% |
| Total Fat | 2.9g | 4% |
| Saturated Fat | 1.7g | 8% |
| Cholesterol | 7.6mg | 3% |
| Sodium | 314mg | 14% |
| Total Carbohydrate | 24.8g | 9% |
| Dietary Fiber | 2.9g | 10% |
| Sugars | 3.0g | – |
| Protein | 4.2g | 8% |
Note: Nutritional information is an estimate and may vary based on specific ingredients and serving sizes.
Variations & Substitutions
- Spiced Up: Add 1 teaspoon of caraway seeds or fennel seeds for a more traditional Irish flavor. A pinch of cinnamon or nutmeg can also add warmth.
- Sweet Potato Variation: Substitute half of the instant potato flakes with sweet potato flakes for a slightly sweeter and more vibrant bread.
- Dairy-Free: Replace the butter with a dairy-free butter alternative or olive oil.
- Seed Sensations: Add 1/4 cup of sunflower seeds, pumpkin seeds, or flax seeds for added texture and nutrition.
- Herby Goodness: Incorporate 1-2 tablespoons of chopped fresh rosemary, thyme, or chives for a savory twist.
FAQs (Frequently Asked Questions)
Q: Can I use regular potato flakes instead of instant potato flakes?
A: While you can use regular potato flakes, instant potato flakes are recommended because they absorb the liquid more readily and evenly, resulting in a better texture.
Q: My bread is dense and doesn’t rise much. What could be the problem?
A: This could be due to several factors, including old yeast, not enough gluten, or too much flour. Make sure your yeast is fresh, and consider adding a bit more gluten if you’re using a particularly heavy whole wheat flour.
Q: Can I make this recipe without a bread machine?
A: Yes, you can adapt this recipe for a traditional oven. Mix the ingredients, knead the dough, let it rise, shape the loaf, and bake at 375°F (190°C) for about 30-35 minutes, or until golden brown.
Q: The crust is too hard. How can I soften it?
A: Brush the top of the loaf with melted butter or olive oil immediately after removing it from the bread machine. You can also store the bread in a plastic bag to soften the crust.
Q: My bread machine has different cycle options. Which one should I use if it doesn’t have a “Whole Wheat” cycle?
A: If your machine lacks a dedicated “Whole Wheat” setting, opt for the “Basic” or “Rapid” cycle but keep a close watch. Whole wheat bread often needs a longer rise, so the “Basic” cycle might be better.
Final Thoughts
There’s something incredibly satisfying about baking your own bread, and this Irish Potato Brown Bread is a particularly rewarding recipe. The subtle sweetness of the honey, the earthy notes from the potato flakes, and the wholesome goodness of the whole wheat flour all combine to create a loaf that is both comforting and delicious. So, pull out your bread machine, gather your ingredients, and get ready to fill your home with the irresistible aroma of freshly baked bread. I encourage you to experiment with the variations, make it your own, and share the warmth of this homemade bread with family and friends. And be sure to let me know how it turns out!