
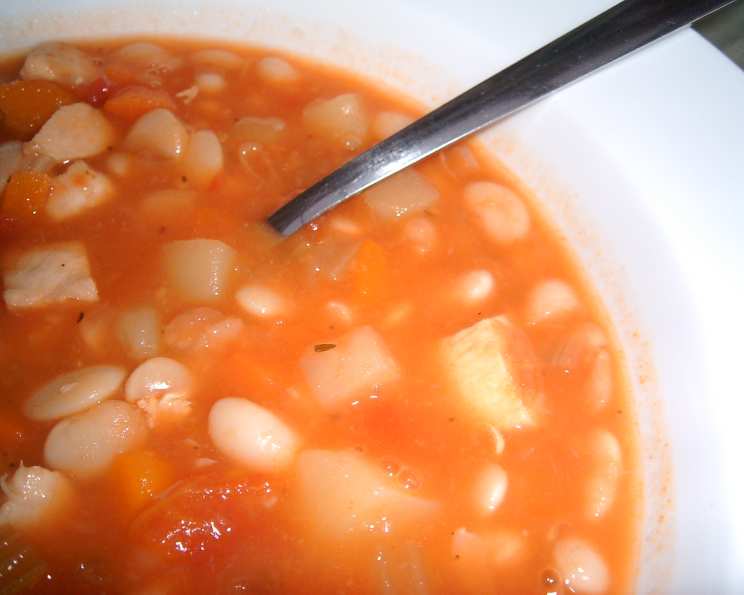
Israeli Bean Soup: A Taste of Home
The scent of simmering beans always takes me back to my grandmother’s kitchen. I can almost see her now, a whirlwind of warmth and wisdom, stirring a pot just like this one. Sunlight streamed through the window, illuminating the steam rising from the fragrant broth. This Israeli Bean Soup, a humble yet hearty dish, was a staple at her table – a testament to the simple beauty of fresh ingredients and slow-cooked flavors. It’s more than just a recipe; it’s a memory, a tradition, and a taste of home I’m excited to share.
Recipe Overview
- Prep Time: 24 hours, plus 20 minutes (includes soaking)
- Cook Time: 1 hour 35 minutes
- Total Time: 1 hour 55 minutes
- Servings: 12
- Yield: Large pot of soup
- Dietary Type: Vegan
Ingredients
- 2 cups small white beans (navy beans, etc.)
- 6 cups cold water, for soaking the beans
- 1 tablespoon olive oil
- 3 onions, chopped
- 3 celery ribs, chopped
- 3-4 garlic cloves, minced
- 3 carrots, chopped
- 6 1⁄2 cups water
- 2 potatoes, peeled and cut into small chunks
- 1-2 bay leaf
- 1 teaspoon dried thyme
- 1 teaspoon cumin
- 28 ounces crushed tomatoes
- 2 tablespoons tomato paste
- Salt and pepper to taste
- 1⁄4 – 1⁄2 cup fresh cilantro, minced
Equipment Needed
- Large heavy-bottomed soup pot
- Measuring cups and spoons
- Chopping board
- Knife
Instructions
-
Begin by soaking the beans overnight in the 6 cups of cold water. This is crucial for softening the beans and reducing cooking time. Make sure the beans are fully submerged; add more water if necessary.
-
The next day, drain and rinse the soaked beans thoroughly. Discard the soaking water and give the beans a good rinse under cold running water to remove any impurities.
-
In a large, heavy-bottomed soup pot, heat the olive oil over medium heat. The heavy bottom of the pot will prevent the soup from scorching.
-
Add the chopped onions and celery to the pot and sauté for about 5 minutes, until the onions turn golden and translucent. Stir frequently to prevent sticking and ensure even cooking.
-
Next, add the chopped carrots and minced garlic to the pot and continue to sauté for another 5 minutes. The garlic should become fragrant, and the carrots should start to soften slightly.
-
Pour in the 6 1/2 cups of water, then add the drained and rinsed beans, potatoes, bay leaf, dried thyme, and cumin. Stir to combine all the ingredients.
-
Bring the soup to a boil, then reduce the heat to low, cover the pot, and simmer for 1 hour. Simmering allows the flavors to meld together beautifully and ensures the beans cook evenly.
-
After simmering for an hour, add the crushed tomatoes, tomato paste, salt, and pepper to the soup. Stir well to incorporate the tomato paste and distribute the seasonings.
-
Continue to cook for another 30 minutes, or until the beans are tender. Check the beans periodically to ensure they are cooked to your liking. If they are still too firm, continue to simmer for longer.
-
Once the beans are tender, stir in the minced fresh cilantro. The cilantro adds a burst of freshness to the soup.
-
Finally, taste the soup and adjust the seasoning with salt and pepper as needed. If the soup is too thick, thin it with a little water until you reach your desired consistency.
Expert Tips & Tricks
- Soaking is Key: Don’t skip the overnight soaking! It significantly reduces cooking time and makes the beans more digestible.
- Aromatics First: Sautéing the onions, celery, carrots, and garlic at the beginning builds a flavorful base for the soup. Take your time with this step – don’t rush it!
- Spice it Up: For a spicier soup, add a pinch of red pepper flakes along with the cumin.
- Bay Leaf Removal: Don’t forget to remove the bay leaf before serving.
- Make Ahead: This soup is even better the next day, as the flavors have more time to meld. Prepare it a day in advance for optimal taste.
- Thickening the Soup: If you prefer a thicker soup, mash some of the potatoes against the side of the pot with a spoon. This will release their starch and thicken the broth naturally. Alternatively, you can blend a cup or two of the soup with an immersion blender and then return it to the pot.
Serving & Storage Suggestions
Serve the Israeli Bean Soup hot, garnished with a sprig of fresh cilantro and a drizzle of olive oil, if desired. A crusty bread on the side is perfect for soaking up the delicious broth.
Leftover soup can be stored in an airtight container in the refrigerator for up to 3-4 days. For longer storage, freeze the soup in freezer-safe containers for up to 2-3 months.
To reheat, simply bring the soup to a simmer on the stovetop or microwave it in a microwave-safe bowl until heated through. If the soup has thickened during storage, add a little water or vegetable broth to thin it out before reheating.
Nutritional Information
| Nutrient | Amount per Serving | % Daily Value |
|---|---|---|
| Calories | 128.9 kcal | N/A |
| Calories from Fat | 13 g | N/A |
| Total Fat | 1.5 g | 2% |
| Saturated Fat | 0.2 g | 1% |
| Cholesterol | 0 mg | 0% |
| Sodium | 192.2 mg | 8% |
| Total Carbohydrate | 25.4 g | 8% |
| Dietary Fiber | 5 g | 19% |
| Sugars | 5.1 g | N/A |
| Protein | 5.1 g | 10% |
Note: Nutritional information is an estimate and may vary based on specific ingredients and portion sizes.
Variations & Substitutions
- Bean Variations: Feel free to experiment with different types of beans, such as cannellini beans, Great Northern beans, or even a mix of beans.
- Vegetable Additions: Add other vegetables like zucchini, bell peppers, or spinach for extra nutrients and flavor.
- Herb Swaps: If you don’t have cilantro, parsley or dill are good substitutes.
- Spice it Up: Add a pinch of chili powder or a dash of hot sauce for a spicier kick.
- Smoked Flavor: For a deeper flavor, add a smoked paprika or a smoked turkey leg while simmering. Remember to remove the turkey leg before serving.
FAQs (Frequently Asked Questions)
Q: Can I use canned beans instead of dried beans?
A: Yes, you can use canned beans in a pinch. However, the flavor and texture will be slightly different. Use about 4 cups of canned beans, rinsed and drained, and reduce the initial cooking time by about 30 minutes.
Q: Do I have to soak the beans overnight?
A: While not absolutely essential, soaking the beans overnight is highly recommended. It helps to soften the beans, reduce cooking time, and improve their digestibility.
Q: Can I make this soup in a slow cooker?
A: Yes, this soup is perfect for the slow cooker. Sauté the onions, celery, carrots, and garlic as directed, then transfer everything to the slow cooker along with the remaining ingredients. Cook on low for 6-8 hours or on high for 3-4 hours.
Q: How do I know when the beans are done?
A: The beans are done when they are tender and easily mashed with a fork. Cooking time may vary depending on the type of bean and the age of the beans.
Q: Can I freeze this soup?
A: Yes, this soup freezes well. Allow it to cool completely before transferring it to freezer-safe containers. It can be stored in the freezer for up to 2-3 months.
Final Thoughts
I hope this recipe inspires you to create your own comforting bowl of Israeli Bean Soup. It’s a dish that’s as versatile as it is delicious, and it’s sure to warm you from the inside out. Don’t be afraid to experiment with different ingredients and seasonings to make it your own. And please, share your creations and feedback – I’d love to hear how it turns out! Pair this hearty soup with a simple green salad and a glass of dry red wine for a complete and satisfying meal. Enjoy!