
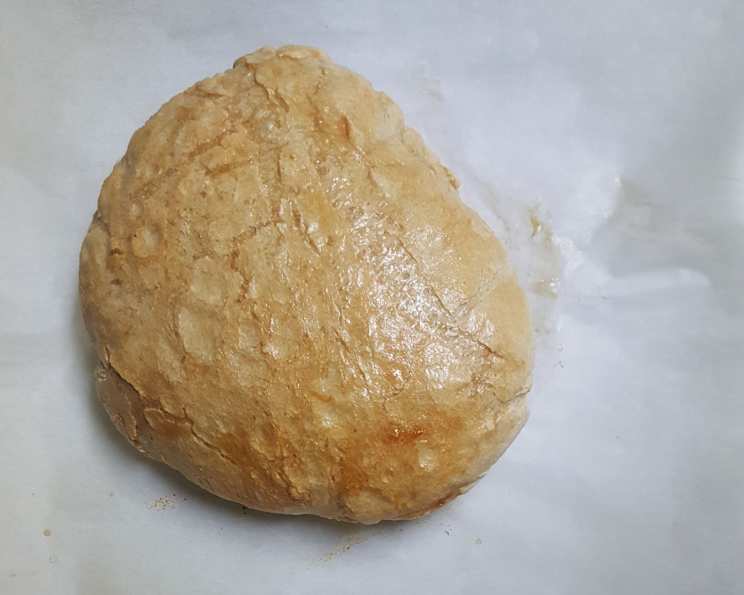
Cozy Up with Homemade Italian Bread Bowls
There’s something profoundly comforting about the aroma of baking bread filling a kitchen on a chilly day. I remember, as a child, visiting my grandmother’s small apartment, the air thick with the yeasty scent of her Sunday bread. The best part? Those weren’t just loaves; sometimes, they were bread bowls! The anticipation of dipping warm, crusty bread into a steaming bowl of minestrone… it’s a flavor memory etched into my soul. Now, recreating that experience in my own kitchen always brings a smile to my face, and I’m thrilled to share this recipe with you.
Recipe Overview
- Prep Time: 45 minutes
- Cook Time: 25-30 minutes
- Total Time: 2 hours 15 minutes (includes rising time)
- Servings: 8
- Yields: 8 Bread Bowls
- Dietary Type: Vegetarian
Ingredients
- 2 tablespoons active dry yeast
- 2 1/2 cups warm water (110 degrees F/45 degrees C)
- 2 teaspoons salt
- 2 tablespoons vegetable oil
- 7 cups all-purpose flour, plus extra for dusting
- 1 tablespoon cornmeal
- 1 egg white
- 1 tablespoon water
Equipment Needed
- Large mixing bowl
- Measuring cups and spoons
- Electric mixer (optional, but recommended)
- Lightly oiled large bowl
- Damp cloth
- Baking sheets
- Small bowl
- Pastry brush
- Wire racks
Instructions
-
In a large bowl, dissolve the yeast in the warm water. Let stand until creamy, about 10 minutes. This step activates the yeast, ensuring your bread rises beautifully. The water should feel comfortably warm to the touch, not scalding.
-
Add the salt, oil, and 4 cups of the flour to the yeast mixture; beat well, using an electric mixer if you have one. This combines the wet and dry ingredients and starts developing the gluten in the flour.
-
Stir in the remaining flour, ½ cup at a time, beating well with an electric mixer at medium speed after each addition. Continue until the dough starts to pull away from the sides of the bowl.
-
When the dough has pulled together into a ball, turn it out onto a lightly floured surface and knead until smooth and elastic, about 6 minutes. Kneading develops the gluten further, resulting in a chewy and satisfying bread. If the dough is too sticky, add a little more flour, a tablespoon at a time.
-
Lightly oil a large bowl, place the dough in the bowl and turn to coat with oil. This prevents the dough from drying out during its first rise.
-
Cover with a damp cloth and let rise in a warm place until doubled in size, about 40 minutes. The damp cloth helps create a humid environment, which is ideal for rising. Avoid placing the dough in direct sunlight or near a draft.
-
Punch the dough down to release the air. Then, divide it into 8 equal portions.
-
Shape each portion into a 4-inch round loaf. The size doesn’t have to be exact, but aim for consistency.
-
Place the loaves on lightly greased baking sheets sprinkled with cornmeal. The cornmeal will give the bottom of the bread bowls a lovely texture and prevent them from sticking to the pan.
-
Cover and let rise in a warm place, free from drafts, until doubled in bulk, about 35 minutes. This is the second rise, which contributes to the bread’s light and airy texture.
-
Preheat oven to 400 degrees F (200 degrees C). Make sure your oven is fully preheated before baking.
-
In a small bowl, beat together the egg white and 1 tablespoon water to create an egg wash.
-
Lightly brush the loaves with half of this egg wash. The egg wash adds shine and color to the crust.
-
Bake in preheated oven for 15 minutes.
-
Brush with remaining egg mixture, and bake for 10 to 15 more minutes or until golden brown. Keep a close eye on them during this final baking period to prevent them from burning. The color should be a deep golden brown.
-
Cool on wire racks. This allows air to circulate around the bread bowls, preventing them from becoming soggy.
-
To make the bowls: Cut a ½ inch thick slice from the top of each loaf; scoop out the centers, leaving ¾-inch-thick shells. Use a serrated knife to carefully cut out the tops and a spoon or your hands to scoop out the insides. You can save the scooped-out bread for croutons or breadcrumbs!
-
Fill the bread bowls with hot soup and serve immediately.
Expert Tips & Tricks
- For a richer flavor: Substitute half of the water with milk or beer.
- Crispy crust: Place a pan of hot water on the bottom rack of the oven while baking. The steam will help create a crispier crust.
- Don’t over-knead: Over-kneading can result in tough bread. Aim for a smooth and elastic dough, but don’t continue kneading beyond that point.
- Troubleshooting rising: If your dough isn’t rising, make sure your yeast is still active. You can test it by adding a pinch of sugar to the yeast and water mixture. If it doesn’t foam after 10 minutes, the yeast is likely dead.
- Flavor Boost: Brush the insides of the bread bowls with garlic butter before filling with soup for an extra layer of flavor.
Serving & Storage Suggestions
Serve these bread bowls immediately after filling them with your favorite hot soup. They are fantastic with creamy tomato soup, hearty chili, or even a rich seafood chowder. For leftovers, store the bread bowls in an airtight container at room temperature for up to 2 days, or freeze them for up to 1 month. To reheat, bake in a preheated oven at 350 degrees F (175 degrees C) for 5-10 minutes, or until warmed through. If frozen, thaw completely before reheating. The scooped-out bread can be toasted and used for dipping!
Nutritional Information
| Nutrient | Amount per Serving | % Daily Value |
|---|---|---|
| Calories | 443 kcal | 22% |
| Total Fat | 4.7g | 6% |
| Saturated Fat | 0.7g | 4% |
| Cholesterol | 2mg | 1% |
| Sodium | 595mg | 26% |
| Carbohydrates | 85.5g | 31% |
| Fiber | 3.8g | 14% |
| Sugar | 0.3g | 0% |
| Protein | 13g | 26% |
Variations & Substitutions
- Whole Wheat Bread Bowls: Substitute up to half of the all-purpose flour with whole wheat flour for a nuttier flavor and added fiber.
- Garlic & Herb Bread Bowls: Add 2 tablespoons of minced garlic and 1 tablespoon of dried Italian herbs to the dough for a savory twist.
- Gluten-Free Bread Bowls: Use a gluten-free all-purpose flour blend and follow the recipe instructions, but be aware that the texture may be slightly different.
- Sourdough Bread Bowls: Substitute part of the yeast with a sourdough starter for a tangy flavor.
- Mini Bread Bowls: Divide the dough into smaller portions (e.g., 16) for individual appetizer-sized bread bowls.
FAQs (Frequently Asked Questions)
Q: Can I make the dough ahead of time?
A: Yes, you can make the dough ahead of time and store it in the refrigerator for up to 24 hours. Punch it down before shaping and baking.
Q: How do I prevent the bread bowls from getting soggy?
A: Make sure to scoop out enough of the inside to create a good barrier. Also, serve the soup immediately after filling the bowls.
Q: Can I use a bread machine for this recipe?
A: While this recipe is designed for traditional baking, you can use a bread machine to prepare the dough. Just use the dough setting, then remove the dough, shape it into bowls, and bake as directed.
Q: What kind of soup goes best with bread bowls?
A: Creamy soups, stews, and chili are all great options. The possibilities are endless!
Q: How can I make sure the crust is extra crispy?
A: Brush the bread bowls with egg wash twice during baking, and consider adding a pan of hot water to the oven to create steam.
Final Thoughts
I hope this recipe brings you as much joy as it brings me. There’s something truly special about creating something from scratch, and these Italian bread bowls are a testament to that. Don’t be afraid to experiment with different soups and flavors, and most importantly, enjoy the process! I encourage you to give this recipe a try and share your creations with friends and family. Nothing beats a warm bowl of soup nestled in a freshly baked bread bowl on a cozy evening. Buon appetito!