
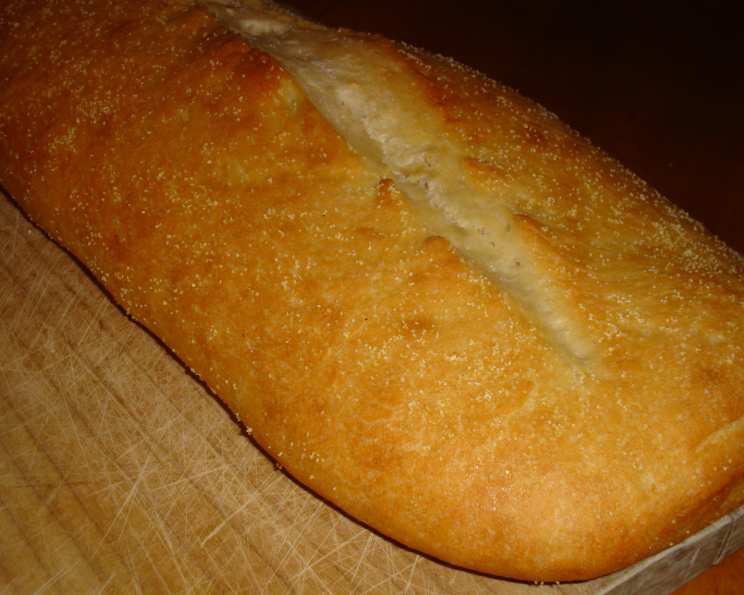
Mastering the Art of Italian Bread: A Timeless Recipe
The scent of freshly baked bread is a universal comfort, but for me, it’s intrinsically linked to my childhood. I remember, as a young child, the aroma wafting from my grandmother’s kitchen – a symphony of yeast, warmth, and the faintest hint of olive oil. She would bake Italian bread every Sunday, its crust crackling under the slightest pressure, the inside soft and airy. It wasn’t just bread; it was a symbol of family, tradition, and the simple joy of sharing a meal together. Recreating that taste and feeling is my mission today.
Recipe Overview
- Prep Time: 2 hours 30 minutes (includes rising time)
- Cook Time: 50-60 minutes
- Total Time: 3 hours 20 minutes
- Yields: 2 loaves
- Dietary Type: Vegetarian
Ingredients
- 1 (1/4 ounce) package active dry yeast
- 1 cup warm water (for dissolving yeast)
- 2 cups warm water (for dough)
- 1 tablespoon salt
- 6-7 cups flour, plus extra for dusting
- Cornmeal, for dusting the baking stone
- Melted butter, for brushing (optional)
Equipment Needed
- Large mixing bowl
- Measuring cups and spoons
- Clean kitchen towels
- Baking stone or baking sheet
- Greased bowl
- Slashing tool or sharp knife
Instructions
- Preheat your oven to 375°F (190°C). This temperature provides the perfect balance for achieving a golden crust and a thoroughly baked interior.
- Dissolve the yeast: In a small bowl, dissolve the active dry yeast in 1 cup of warm water. Let it stand for five minutes. This step is crucial to ensure the yeast is alive and active, which is essential for a good rise. You’ll know it’s ready when it foams up slightly.
- Prepare the salt solution: In a separate bowl, dissolve the salt in 2 cups of warm water. This helps to evenly distribute the salt throughout the dough.
- Combine ingredients: In a large bowl, place 5 cups of flour. Add the yeast mixture and the salt solution. Mix well to combine.
- Add remaining flour: Gradually add the remaining flour, one cup at a time, until the dough forms and becomes workable. You may not need all of the flour. The goal is to have a dough that is slightly sticky but not overly wet.
- Knead the dough: Turn the dough out onto a lightly floured surface. Knead for 10 minutes, or until the dough is smooth and elastic. Kneading develops the gluten, which gives the bread its structure. If the dough sticks too much, add a little more flour, but avoid adding too much, as this can make the bread dense.
- First rise: Place the dough in a greased bowl, turning to coat all sides. Cover with a clean kitchen towel and allow to rise in a warm place until doubled in bulk, about 1 to 1.5 hours. The warmer the environment, the faster the rise.
- Punch down and second knead: Once the dough has doubled, punch it down to release the air. Knead again for 5 minutes. This step helps to redistribute the yeast and create a more even texture.
- Divide and shape: Divide the dough into two equal balls. Return them to the greased bowl, cover, and let rise until doubled in size again, about 45 minutes to an hour.
- Form the loaves: Separate the pieces of dough and roll each into an oblong shape. The final shape contributes to the bread’s texture and appearance.
- Prepare for baking: Sprinkle cornmeal onto a baking stone or baking sheet. The cornmeal prevents the loaves from sticking and adds a subtle, rustic flavor to the bottom crust. Place the two loaves on the stone or sheet. Cover lightly and allow to rise until doubled in size, about 30-45 minutes.
- Prepare for baking: Brush the tops of the loaves with melted butter (optional). This gives the crust a beautiful golden color and a richer flavor.
- Slash the loaves: Using a sharp knife or slashing tool, make one long slash about one inch deep and almost the entire length of each loaf. This allows the bread to expand during baking and prevents it from cracking unevenly.
- Bake: Bake in the preheated oven for 50 to 60 minutes, or until the loaves are golden brown and sound hollow when tapped on the bottom. The baking time may vary depending on your oven, so keep a close eye on them.
- Cool: Remove the loaves from the oven and let them cool on a wire rack before slicing and serving. This allows the bread to finish baking and prevents it from becoming soggy.
Expert Tips & Tricks
- Water Temperature: Using water that is too hot can kill the yeast, while water that is too cold will not activate it properly. Aim for lukewarm water, around 105-115°F (40-46°C).
- Proofing Environment: A warm, draft-free environment is ideal for proofing the dough. You can create a proofing box by placing the dough in a slightly warmed oven (turned off) or in a microwave with a cup of hot water.
- Scoring Depth: Make sure your slash is deep enough; otherwise, the loaf may still crack unpredictably. A lame (bread scoring knife) makes this process easier.
- Oven Humidity: For a crispier crust, create steam in your oven by placing a pan of hot water on the bottom rack during the first half of the baking time. Be careful when handling hot water in the oven.
- Dough Consistency: The dough should be slightly sticky, but manageable. Avoid adding too much flour, as this can result in a dense, dry bread.
Serving & Storage Suggestions
Serve the Italian bread warm, sliced with a drizzle of olive oil and a sprinkle of sea salt. It’s delicious alongside pasta dishes, soups, or salads, or simply enjoyed as a snack.
- Room Temperature: Store cooled loaves in a bread box or wrapped in a clean kitchen towel at room temperature for up to 2-3 days.
- Refrigerator: For longer storage, wrap the loaves tightly in plastic wrap and store them in the refrigerator for up to a week.
- Freezer: Freeze the loaves whole or sliced for up to 2-3 months. Thaw at room temperature before reheating.
To reheat, wrap the bread in foil and bake in a preheated oven at 350°F (175°C) for 10-15 minutes, or until warm. You can also slice the bread and toast it for a quick and easy snack.
Nutritional Information
| Nutrient | Amount per Serving | % Daily Value |
|---|---|---|
| Calories | 688 kcal | 34% |
| Total Fat | 2g | 3% |
| Saturated Fat | 0g | 0% |
| Cholesterol | 0mg | 0% |
| Sodium | 1752mg | 73% |
| Total Carbohydrate | 144g | 48% |
| Dietary Fiber | 5g | 20% |
| Sugars | 1g | 2% |
| Protein | 20g | 40% |
Note: Nutritional information is an estimate and may vary based on specific ingredients and preparation methods.
Variations & Substitutions
- Whole Wheat Italian Bread: Substitute up to half of the all-purpose flour with whole wheat flour for a nuttier flavor and increased fiber content.
- Herb-Infused Italian Bread: Add 1-2 tablespoons of dried herbs, such as rosemary, thyme, or oregano, to the dough for a fragrant and flavorful twist.
- Garlic Italian Bread: Mix minced garlic with olive oil and brush it over the loaves before baking for a delicious garlic bread variation.
- Seed-Topped Italian Bread: Sprinkle sesame seeds, poppy seeds, or sunflower seeds over the loaves before baking for added texture and flavor.
FAQs (Frequently Asked Questions)
Q: Why is my bread dense and not rising properly?
A: This could be due to several factors, including using expired yeast, water that is too hot or too cold, or not kneading the dough enough. Make sure your yeast is fresh, use lukewarm water, and knead the dough for the full recommended time.
Q: Can I use bread flour instead of all-purpose flour?
A: Yes, bread flour can be used and will result in a chewier texture. You may need to adjust the amount of water slightly.
Q: How do I know when the bread is done baking?
A: The bread is done when it is golden brown and sounds hollow when tapped on the bottom. You can also use a food thermometer to check the internal temperature, which should be around 200-210°F (93-99°C).
Q: Can I make the dough ahead of time and bake it later?
A: Yes, you can refrigerate the dough after the first rise for up to 24 hours. Let it come to room temperature before shaping and baking.
Q: What can I use instead of a baking stone?
A: If you don’t have a baking stone, you can use a baking sheet. Preheat the baking sheet in the oven for best results.
Final Thoughts
Baking Italian bread is a rewarding experience that fills your kitchen with warmth and the irresistible aroma of homemade goodness. Don’t be intimidated by the process; with a little practice, you’ll be creating loaves that rival those of any bakery. So, gather your ingredients, roll up your sleeves, and embark on this culinary adventure. And please, share your success (or learning experiences!)– I love hearing about your bread-baking journey. This bread pairs perfectly with a hearty bowl of minestrone soup or a simple Caprese salad! Buon appetito!