
Italian Breaded Chicken Breasts: A Family Favorite
The aroma of frying chicken, mingled with garlic and Romano cheese, is practically woven into my childhood memories. My Nonna Emilia, a powerhouse in the kitchen, would make these Italian breaded chicken breasts almost every Sunday. The sound of her pounding the chicken cutlets thin, followed by the satisfying sizzle in the pan, signaled that a feast was about to begin. The best part? Grabbing a piece straight from the pan, burning my fingers slightly, and savoring that crispy, cheesy, savory goodness. This recipe is my tribute to her and her incredible cooking.
Recipe Overview
- Prep Time: 15 minutes
- Cook Time: 8 minutes
- Total Time: 23 minutes
- Servings: 4
- Dietary Type: Dairy-Possible
Ingredients
- 4 boneless, skinless chicken breasts
- 1 cup dry breadcrumbs
- ½ cup grated Romano cheese (or Parmesan cheese)
- 2 tablespoons chopped parsley (fresh is best, but dried works in a pinch)
- ½ cup flour
- Salt and pepper to taste
- ¼ teaspoon garlic powder
- 1 egg
- 2-3 tablespoons olive oil
Equipment Needed
- Cutting board
- Meat mallet
- 3 shallow bowls or plates
- Wax paper
- Large skillet
Instructions
-
Begin by preparing the chicken breasts. Clean them of any visible fat or tendons. Place each breast between two sheets of plastic wrap or in a resealable plastic bag. Using the flat side of a meat mallet, pound each breast until it’s evenly ¼ inch thick. This tenderizes the chicken and ensures even cooking. If you have very large chicken breasts, you may want to cut them in half after pounding.
-
Prepare your breading station. In a shallow bowl or plate, mix together the dry breadcrumbs, grated Romano cheese (or Parmesan cheese), and chopped parsley. This is your flavorful coating.
-
In another shallow bowl, combine the flour, salt, pepper, and garlic powder. This seasoned flour will help the egg adhere to the chicken.
-
In a third shallow bowl, beat the egg until it’s lightly frothy.
-
Now, it’s time to bread the chicken. Dredge each pounded chicken breast in the flour mixture, ensuring it’s fully coated. Shake off any excess flour.
-
Next, dip the floured chicken into the beaten egg, making sure it’s completely covered. Allow any excess egg to drip off.
-
Finally, transfer the chicken to the breadcrumb mixture. Press the chicken firmly into the breadcrumbs, ensuring it’s thoroughly coated on both sides.
-
Place the breaded chicken cutlets on a piece of wax paper and let them rest for about 5 minutes. This allows the breading to adhere better to the chicken, preventing it from falling off during cooking.
-
Heat the olive oil in a large skillet over medium heat. Make sure the pan is hot before adding the chicken; the oil should shimmer.
-
Carefully place the breaded chicken cutlets in the hot skillet. Do not overcrowd the pan; you may need to cook the chicken in batches.
-
Cook the chicken for about 4 minutes per side, or until it’s nicely browned and cooked through. The internal temperature of the chicken should reach 165°F (74°C). Use a meat thermometer to ensure accuracy.
-
Remove the cooked chicken from the skillet and place it on a plate lined with paper towels to absorb any excess oil.
Expert Tips & Tricks
- Pounding the chicken is key to achieving a tender and evenly cooked result. Don’t skip this step!
- Using fresh parsley adds a vibrant flavor, but dried parsley works well in a pinch. Just use about half the amount of dried parsley as you would fresh.
- Don’t be afraid to adjust the seasoning to your liking. If you prefer a spicier flavor, add a pinch of red pepper flakes to the breadcrumb mixture.
- To prevent the breading from becoming soggy, make sure the oil is hot before adding the chicken. Also, avoid overcrowding the pan.
- For extra crispy chicken, consider doing a double dredge. After the initial breading, dip the chicken back into the egg and then back into the breadcrumbs.
- To avoid burning the breadcrumbs before the chicken is cooked through, reduce the heat to medium-low if necessary.
- You can prepare the breaded chicken breasts ahead of time and store them in the refrigerator for up to 24 hours before cooking. This is a great time-saver for busy weeknights.
Serving & Storage Suggestions
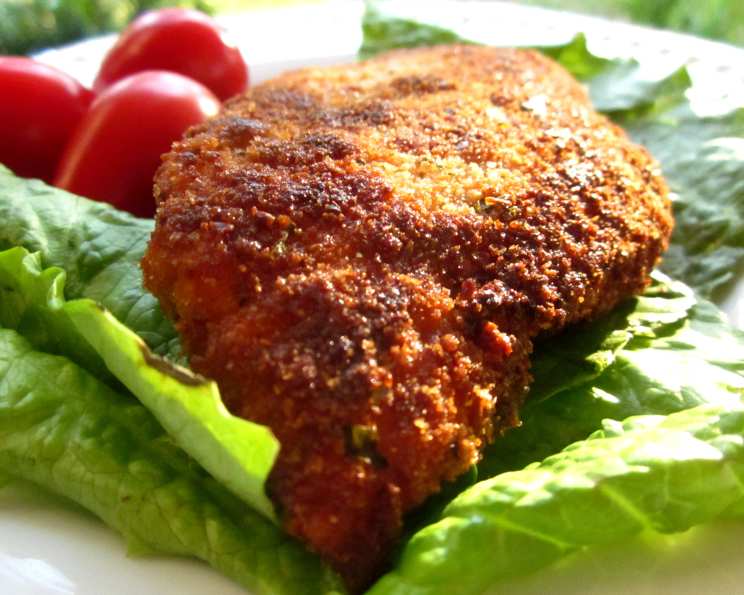
These Italian breaded chicken breasts are incredibly versatile. Serve them as a main course with a side of rice and a vegetable, such as steamed broccoli or green beans. For a classic Italian meal, top them with tomato sauce and mozzarella cheese and bake them briefly until the cheese is melted and bubbly.
They also make fantastic sandwiches. Place a chicken cutlet in Italian bread with or without cheese, and add your favorite toppings, such as tomato sauce, pesto, or mayonnaise.
Leftover chicken breasts can be stored in an airtight container in the refrigerator for up to 3 days. To reheat, bake them in a preheated oven at 350°F (175°C) until heated through. You can also reheat them in a skillet over medium heat, but be careful not to burn the breading. Avoid microwaving them, as this can make the breading soggy. These chicken breasts are best enjoyed fresh, but freezing is possible. Freeze cooked and cooled chicken breasts in a freezer-safe bag for up to 2 months. Thaw overnight in the refrigerator before reheating.
Nutritional Information
| Nutrient | Amount per Serving | % Daily Value |
|---|---|---|
| Calories | 418.1 kcal | N/A |
| Calories from Fat | 139 g | 33% |
| Total Fat | 15.5 g | 23% |
| Saturated Fat | 4.2 g | 20% |
| Cholesterol | 133.1 mg | 44% |
| Sodium | 481.7 mg | 20% |
| Total Carbohydrate | 32.1 g | 10% |
| Dietary Fiber | 1.7 g | 6% |
| Sugars | 1.9 g | 7% |
| Protein | 35.3 g | 70% |
Variations & Substitutions
- For a gluten-free option, use gluten-free breadcrumbs and gluten-free flour.
- To make this recipe dairy-free, use Parmesan substitute or omit the cheese altogether.
- Add a pinch of red pepper flakes to the breadcrumb mixture for a spicy kick.
- Experiment with different types of cheese, such as provolone or asiago.
- Use Italian-seasoned breadcrumbs for an extra layer of flavor.
- Try adding a tablespoon of lemon zest to the breadcrumb mixture for a bright, citrusy flavor.
FAQs (Frequently Asked Questions)
Q: Can I use chicken thighs instead of chicken breasts?
A: Yes, you can use boneless, skinless chicken thighs. They will require slightly longer cooking time, so be sure to check the internal temperature.
Q: Can I bake these chicken breasts instead of frying them?
A: Yes, you can bake them. Place the breaded chicken breasts on a baking sheet lined with parchment paper and bake at 375°F (190°C) for about 20-25 minutes, or until cooked through.
Q: How can I prevent the breading from falling off?
A: Make sure to thoroughly coat the chicken in the flour, egg, and breadcrumb mixtures. Also, allowing the breaded chicken to rest for a few minutes before cooking helps the breading adhere better.
Q: What if I don’t have Romano cheese?
A: Parmesan cheese is a great substitute for Romano cheese. You can also use a blend of Parmesan and Pecorino Romano.
Q: Can I make this recipe ahead of time?
A: Yes, you can prepare the breaded chicken breasts ahead of time and store them in the refrigerator for up to 24 hours before cooking.
Final Thoughts
These Italian breaded chicken breasts are a testament to the simple joys of cooking and the power of family recipes. They are easy to make, incredibly delicious, and sure to become a family favorite. So gather your ingredients, put on some music, and get ready to create a meal that will transport you to Nonna Emilia’s kitchen. Don’t forget to share your culinary creations and feedback with me – Buon Appetito!