
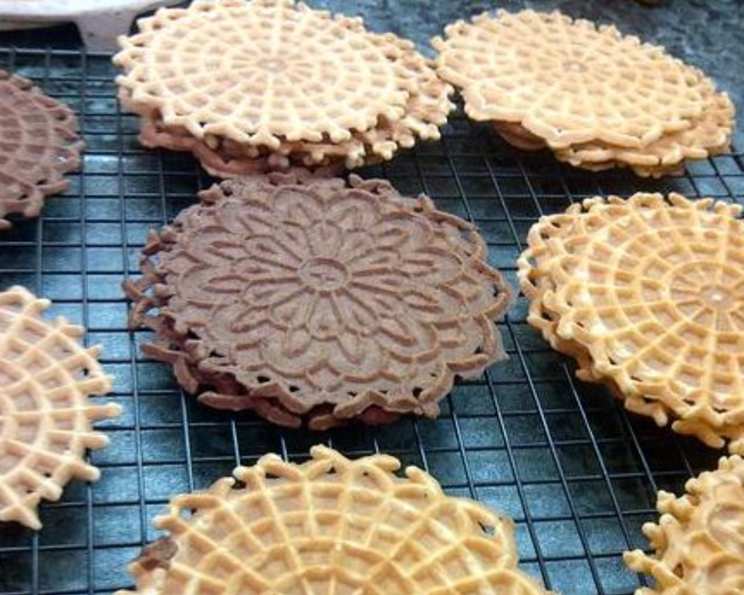
Italian Classic Pizzelles: A Taste of Tradition
The scent of anise always transports me back to my Nonna’s kitchen. Every Christmas Eve, amidst the chaos of a dozen relatives vying for her attention, she’d stand calmly by her ancient pizzelle iron, turning out delicate, lacy cookies. The gentle hiss of the iron, the sweet perfume filling the air, and the eagerly outstretched hands waiting for a warm pizzelle were all part of the magic. These weren’t just cookies; they were edible heirlooms, tiny discs of love and tradition passed down through generations.
Recipe Overview
- Prep Time: 15 minutes
- Cook Time: 35 minutes
- Total Time: 50 minutes
- Yields: 60 pizzelles
- Dietary Type: Not specified
Ingredients
- 6 eggs, room temperature
- 1 1/2 cups granulated sugar
- 2 tablespoons vanilla extract or 2 tablespoons anise flavoring
- 1 cup melted margarine, cooled
- 3 1/2 cups all-purpose flour
- 4 teaspoons baking powder
For Chocolate Pizzelles (Optional):
- 1/2 cup cocoa
- 1/2 cup sugar
- 1/2 teaspoon baking powder
Equipment Needed
- Pizzelle Iron
- Mixing Bowls
- Electric Mixer (handheld or stand mixer)
- Cookie Scoop
- Cooling Rack
- Cooking Spray
Instructions
-
In a large mixing bowl, beat the eggs until light and frothy. Gradually add the granulated sugar, beating continuously until the mixture is smooth and slightly thickened. This step is crucial for achieving the right texture, so take your time and ensure the sugar is fully incorporated.
-
Add the cooled, melted margarine and vanilla extract (or anise flavoring) to the egg mixture. Mix well until everything is evenly combined. Make sure the margarine isn’t too hot, or it could partially cook the eggs.
-
In a separate bowl, sift together the all-purpose flour and baking powder. Sifting ensures there are no lumps and helps create a lighter pizzelle.
-
Gradually blend the dry ingredients into the wet ingredients, mixing until a smooth batter forms. The dough will be fairly sticky – this is perfectly normal. It should be easily dropped from a spoon without being runny. Don’t overmix the batter, as this can develop the gluten in the flour and result in tougher pizzelles.
-
Heat your pizzelle maker according to the manufacturer’s instructions. Most pizzelle makers have an indicator light that will signal when it’s ready.
-
Lightly grease a small cookie scoop with cooking spray. This will prevent the dough from sticking and ensure consistent pizzelle sizes.
-
Scoop the cookie dough and place it just past the center of the pizzelle form, towards the back of the maker. The exact placement may vary depending on your iron, so experiment with the first few pizzelles.
-
Lock the pizzelle maker and set a timer for 26 seconds. This is a good starting point, but cooking time can vary depending on your pizzelle maker and desired level of browning.
-
Cook the pizzelles longer if you prefer them darker and crispier. Keep a close eye on them to prevent burning.
-
Carefully remove the cooked pizzelles and place them on a cooling rack. They will crisp up as they cool. Be gentle, as they are delicate when warm.
To Make Chocolate Pizzelles:
-
Sift together the cocoa, additional sugar, and baking powder with the dry ingredients (flour) for the classic pizzelle recipe.
-
Blend the chocolate-infused dry ingredients into the egg mixture until smooth.
-
Proceed with steps 5-10 as described above.
Expert Tips & Tricks
- Room Temperature Eggs: Using room temperature eggs helps them incorporate more easily into the batter, resulting in a smoother texture.
- Cool Melted Margarine: Allow the melted margarine to cool slightly before adding it to the egg mixture. This prevents the heat from cooking the eggs and creating a lumpy batter.
- Don’t Overfill: Avoid overfilling the pizzelle maker with dough, as this can cause the pizzelles to be too thick or to spill over the edges.
- Adjust Cooking Time: Cooking times may vary depending on your pizzelle maker. Experiment with the first few pizzelles to find the perfect cooking time for your desired level of browning.
- Make Ahead: The pizzelle batter can be made ahead of time and stored in the refrigerator for up to 24 hours. This is a great way to save time when you’re preparing for a party or gathering.
- Shaping Warm Pizzelles: If you want to create pizzelle cones or cannoli shells, do it while the pizzelles are still warm and pliable. They will harden quickly as they cool.
Serving & Storage Suggestions
Pizzelles are delicious served warm or at room temperature. They can be enjoyed on their own, dusted with powdered sugar, or used as a base for ice cream sandwiches. For a festive touch, dip them in melted chocolate and sprinkle with nuts or sprinkles.
Store completely cooled pizzelles in an airtight container at room temperature. They will stay fresh for up to a week, though they are best enjoyed within the first few days. They can also be frozen for longer storage. Place them in a single layer in a freezer-safe container or bag, separating layers with parchment paper to prevent sticking. Frozen pizzelles can last for up to 2 months. Thaw them at room temperature before serving. Reheating is not generally necessary, but you can warm them in a low oven for a few minutes if desired.
Nutritional Information
Note: Nutritional information is an estimate and may vary based on specific ingredients and portion sizes.
| Nutrient | Amount per Serving | % Daily Value |
|---|---|---|
| Calories | 91 kcal | N/A |
| Calories from Fat | 32 kcal | 36% |
| Total Fat | 3.6 g | 5% |
| Saturated Fat | 0.8 g | 4% |
| Cholesterol | 18.6 mg | 6% |
| Sodium | 70 mg | 2% |
| Total Carbohydrate | 12.8 g | 4% |
| Dietary Fiber | 0.3 g | 1% |
| Sugars | 6.8 g | N/A |
| Protein | 1.6 g | 3% |
Variations & Substitutions
- Gluten-Free Pizzelles: Substitute the all-purpose flour with a gluten-free blend. You may need to add a binder like xanthan gum to improve the texture.
- Dairy-Free Pizzelles: Ensure your margarine is dairy-free. You can also experiment with coconut oil or other plant-based oils as a substitute, but the flavor and texture may be slightly different.
- Lemon Pizzelles: Add lemon zest to the batter for a bright, citrusy flavor.
- Almond Pizzelles: Use almond extract instead of vanilla or anise flavoring for a nutty twist.
- Spiced Pizzelles: Add a pinch of cinnamon, nutmeg, or cardamom to the batter for a warm, cozy flavor.
FAQs (Frequently Asked Questions)
Q: Why are my pizzelles sticking to the iron?
A: Make sure your pizzelle iron is properly greased with cooking spray before each batch. Also, ensure the iron is hot enough before adding the batter.
Q: My pizzelles are too soft. How can I make them crispier?
A: Cook them for a longer period of time in the pizzelle iron. Remember that they also crisp up as they cool on the rack.
Q: Can I use butter instead of margarine?
A: Yes, you can substitute melted butter for the margarine, but be sure to cool it before adding to the egg mixture. The flavor will be slightly richer.
Q: How do I prevent my pizzelles from burning?
A: Keep a close eye on the pizzelles while they’re cooking and adjust the cooking time as needed. If your pizzelle maker tends to run hot, you may need to reduce the temperature slightly.
Q: Can I add food coloring to the batter?
A: Yes, you can add a few drops of food coloring to the batter for a festive touch. Gel food coloring is recommended as it is more concentrated and won’t affect the batter’s consistency as much as liquid food coloring.
Final Thoughts
These classic pizzelles are more than just a cookie; they’re a taste of tradition, a connection to family, and a little piece of Italian heritage. Whether you stick to the original recipe or experiment with different flavors and variations, I encourage you to try making these delicate treats. Don’t be afraid to put your own spin on them and create new memories with your loved ones. Buon appetito!