
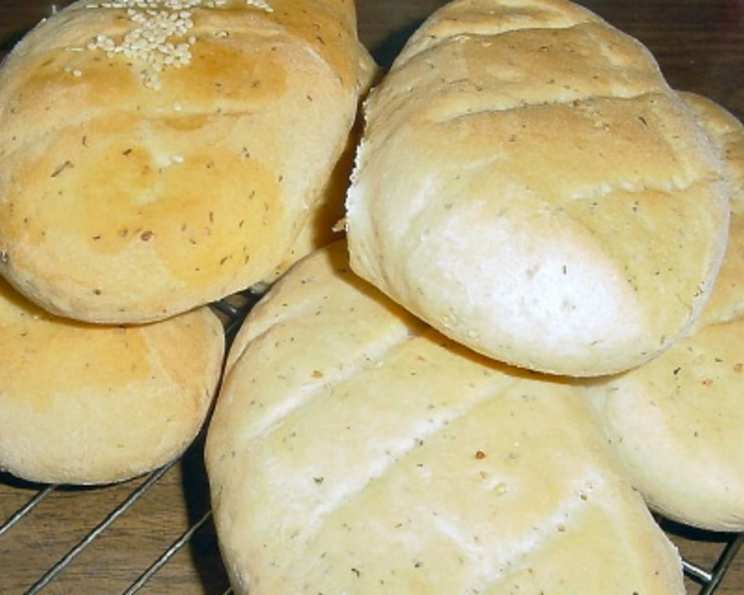
Italian Herb Rolls: A Taste of Homemade Heaven
My grandmother, Nonna Emilia, always said, “The heart of the home is in the aroma of bread.” I remember, as a child, the yeasty, comforting scent that perpetually filled her tiny kitchen. While Nonna’s specialty was a crusty sourdough, these Italian Herb Rolls evoke a similar feeling of warmth and love. My daughter-in-law first made these for me hoping to impress and she certainly did. Each bite is a reminder of her thoughtfulness and the simple pleasures of sharing good food with family.
Recipe Overview
- Prep Time: 30 minutes
- Cook Time: 25-30 minutes
- Total Time: 1 hour 25 minutes
- Yields: 12 rolls
- Dietary Type: Vegetarian
Ingredients
- 7-9 ounces water (I started with 8 oz. and ended up adding a little bit more)
- 1 teaspoon salt
- 1 1/2 teaspoons vegetable oil
- 3 cups bread flour
- 1/2 tablespoon dried parsley
- 2 teaspoons sugar
- 2 teaspoons dried onion flakes
- 1 teaspoon basil
- 1/2 teaspoon garlic powder
- 1 3/4 teaspoons yeast
Equipment Needed
- Bread Machine
- Baking Sheet
Instructions
-
Prepare the Dough: Add all ingredients to your bread machine in the order recommended by the manufacturer’s instructions. This usually means liquids first, followed by dry ingredients, with the yeast added last.
-
Start the Bread Machine: Set your bread machine to the dough setting. This setting will mix the ingredients, knead the dough, and allow it to rise once. The process usually takes around 1 hour and 30 minutes to 2 hours, depending on your machine.
-
Check the Dough: After the dough cycle is complete, check the dough. It should have doubled in size and be soft and slightly sticky. If the dough seems too dry, add a tablespoon of water at a time until it reaches the right consistency. If it’s too sticky, add a tablespoon of bread flour at a time. Remember, it seemed that the dough was not very elastic and I was worried about it being too dense but it does turn out ok.
-
Shape the Rolls: Gently turn the dough out onto a lightly floured surface. Divide the dough into 12 equal pieces. Shape each piece into a round roll. You can do this by gently pulling the edges of the dough towards the center and then turning the roll over and cupping your hand around it to create a smooth, round shape.
-
Arrange on Baking Sheet: Place the shaped rolls onto a baking sheet lined with parchment paper, spacing them about 1 inch apart.
-
Bake the Rolls: Preheat your oven to 350°F (175°C). Bake the rolls for 25-30 minutes, or until they are golden brown on top and sound hollow when tapped on the bottom.
-
Cool and Serve: Remove the rolls from the oven and let them cool on a wire rack for a few minutes before serving. Enjoy them warm with butter, olive oil, or your favorite dipping sauce.
Expert Tips & Tricks
- Enhance the Herb Flavor: For a more intense herb flavor, lightly toast the dried parsley, dried onion flakes, basil, and garlic powder in a dry skillet over medium heat for a minute or two before adding them to the bread machine. Be careful not to burn them.
- Adding Fresh Herbs: While the recipe calls for dried herbs, you can certainly incorporate fresh herbs for a brighter flavor. Use about twice the amount of fresh herbs as dried. Chop them finely before adding them to the dough.
- Dough Consistency: The amount of water needed may vary depending on the humidity and the type of bread flour you are using. Start with the smaller amount of water and add more as needed until the dough comes together.
- Make-Ahead Option: You can prepare the dough ahead of time and store it in the refrigerator for up to 24 hours. Punch down the dough before shaping it into rolls. The baking time may need to be adjusted slightly if the dough is cold.
- Shiny Crust: For a shiny crust, brush the tops of the rolls with melted butter or an egg wash (1 egg beaten with 1 tablespoon of water) before baking.
- Troubleshooting Density: While the original recipe creator worried about density due to the dough’s lack of elasticity, trust the process. The rolls will rise during baking and develop a light, airy texture.
- Flavor Boost: A pinch of red pepper flakes can add a subtle kick to these herb rolls.
Serving & Storage Suggestions
These Italian Herb Rolls are best served warm, straight from the oven. They make a wonderful addition to any meal, from soups and salads to pasta dishes and barbecues. Serve them with a pat of butter, a drizzle of olive oil and balsamic vinegar, or your favorite dipping sauce.
To store leftover rolls, place them in an airtight container at room temperature for up to 2 days. For longer storage, freeze them for up to 2 months. To reheat, wrap the rolls in foil and bake in a preheated oven at 350°F (175°C) for 10-15 minutes, or until heated through. You can also microwave them for a few seconds, but be careful not to overcook them, as they can become tough.
Nutritional Information
| Nutrient | Amount per Serving | % Daily Value |
|---|---|---|
| Calories | 124.4 kcal | N/A |
| Calories from Fat | 8 g | 7% |
| Total Fat | 0.9 g | 1% |
| Saturated Fat | 0.1 g | 0% |
| Cholesterol | 0 mg | 0% |
| Sodium | 195.4 mg | 8% |
| Total Carbohydrate | 25.1 g | 8% |
| Dietary Fiber | 1 g | 4% |
| Sugars | 0.9 g | N/A |
| Protein | 3.5 g | 7% |
Note: Nutritional information is an estimate and may vary depending on the exact ingredients used.
Variations & Substitutions
- Gluten-Free: Substitute the bread flour with a gluten-free bread flour blend. You may need to adjust the amount of liquid to achieve the right dough consistency.
- Vegan: This recipe is already vegan! Just ensure your sugar is processed without bone char.
- Cheese Rolls: Add 1/2 cup of grated Parmesan or Asiago cheese to the dough for a cheesy twist.
- Garlic Herb Butter: Melt butter with minced garlic and fresh herbs like rosemary and thyme, and brush over the warm rolls after baking.
- Sweet Herb Rolls: Add a tablespoon of honey or maple syrup to the dough for a touch of sweetness.
FAQs (Frequently Asked Questions)
Q: Can I use all-purpose flour instead of bread flour?
A: While bread flour is recommended for its higher protein content (which results in a chewier texture), you can use all-purpose flour in a pinch. The rolls may be slightly less chewy.
Q: Do I have to use a bread machine?
A: No, you can make the dough by hand or with a stand mixer. Just combine the ingredients and knead for about 8-10 minutes until smooth and elastic. Allow the dough to rise in a warm place until doubled in size before shaping and baking.
Q: Can I freeze the unbaked rolls?
A: Yes, you can freeze the shaped rolls before baking. Place them on a baking sheet lined with parchment paper and freeze until solid. Then, transfer them to a freezer bag. When ready to bake, let them thaw completely and rise before baking as directed.
Q: What can I serve with these rolls?
A: These rolls pair well with a variety of dishes, including soups, stews, salads, pasta, and roasted meats. They are also delicious on their own with butter or olive oil.
Q: How do I know when the rolls are done?
A: The rolls are done when they are golden brown on top and sound hollow when tapped on the bottom. You can also check the internal temperature with a thermometer; it should be around 200°F (93°C).
Final Thoughts
These Italian Herb Rolls are more than just bread; they’re a taste of home, a symbol of warmth, and a reminder of the joy of sharing good food. I encourage you to try this recipe and experience the satisfaction of baking your own delicious, homemade rolls. Don’t be afraid to experiment with different herbs and flavors to create your own unique version. And most importantly, share your creations with loved ones and savor the simple pleasure of good food and good company. Serve with a hearty minestrone soup for a truly comforting meal.