
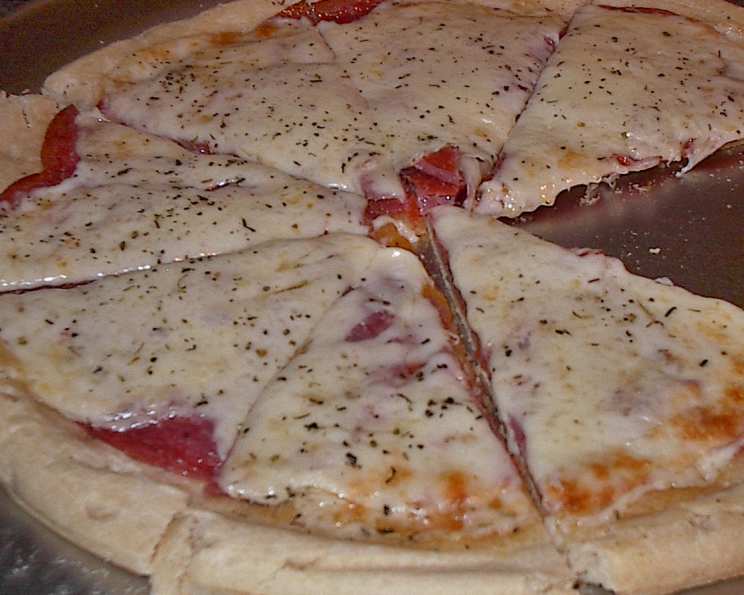
Italian Sub Pizza: A Culinary Fusion
I have vivid memories of my childhood summers spent at my Nonna’s house. The aroma of garlic, oregano, and bubbling cheese perpetually permeated the air. While she was a purist when it came to classic Neapolitan pizza, there were days when even Nonna craved something…different. I remember one sweltering afternoon when she declared, “Oggi, we make a pizza like a sandwich!” She then proceeded to artfully arrange layers of her favorite cured meats and cheeses onto a pre-made crust, creating something truly special. It was an unexpected, joyful collision of Italian-American flavors, and it’s a dish I’ve cherished and refined ever since.
Recipe Overview
- Prep Time: 15 minutes
- Cook Time: 12 minutes
- Total Time: 27 minutes
- Servings: 6
- Yield: 1 pizza
- Dietary Type: None Specified
Ingredients
- 1 prepared pizza crust
- 1 tablespoon olive oil
- 1 teaspoon dried Italian seasoning
- 1/4 lb pepperoni
- 1/4 lb salami
- 6 slices provolone cheese
Equipment Needed
- Oven
- Pizza cutter or large knife
- Baking sheet (optional, if crust isn’t pre-prepared on one)
Instructions
-
Preheat your oven to 450 degrees Fahrenheit (232 degrees Celsius). It’s crucial that the oven is fully preheated for optimal crust crispness. A pizza stone, if you have one, can be preheated in the oven as well for an even crispier base.
-
Drizzle the prepared pizza crust with 1 tablespoon of olive oil. Use a pastry brush or your fingertips to evenly distribute the oil across the surface. This will help create a golden-brown crust and prevent it from becoming soggy.
-
Sprinkle 1 teaspoon of dried Italian seasoning evenly over the oiled crust. Make sure to distribute it thoroughly to ensure every bite is packed with flavor. I like to gently press the seasoning into the oil with my fingers to help it adhere.
-
Arrange the 1/4 lb of pepperoni and 1/4 lb of salami on the crust. Leave approximately a 1-inch border around the edge. This border will become the handle of your pizza. You can layer the meats in any pattern you like, but I prefer to overlap them slightly for maximum coverage and flavor in every slice. Feel free to tear larger slices for even distribution.
-
Top the meats with 6 slices of provolone cheese, also leaving a 1-inch border. Arrange the cheese so it covers the meats as much as possible. You can tear the slices to fit, creating a melted blanket of cheesy goodness.
-
Bake for 10-12 minutes, or until the crust is light brown and the cheese is bubbly and slightly golden. Keep a close eye on the pizza during the last few minutes of baking, as ovens can vary. The crust should be crisp but not burnt, and the cheese should be melted and starting to brown.
-
Remove the pizza from the oven and let it cool for a few minutes before slicing and serving. This allows the cheese to set slightly, preventing it from sliding off when you cut it.
Expert Tips & Tricks
- Elevate Your Oil: Infuse the olive oil with garlic, chili flakes, or fresh herbs for an extra layer of flavor. Gently heat the oil with your chosen ingredients for a few minutes before drizzling it over the crust. Strain if desired.
- Cheese Consistency: For a richer, meltier cheese experience, use shredded provolone or a combination of provolone and mozzarella.
- Meat Matters: Don’t be afraid to experiment with different Italian deli meats. Spicy capicola, mortadella, or even a little prosciutto can add a unique twist. Just remember to adjust the quantities to your liking.
- Crust Control: If you’re using a particularly thin crust, consider par-baking it for a few minutes before adding the toppings. This will help prevent it from becoming soggy.
- Prevent Burning: If your crust starts to brown too quickly, tent the pizza with foil for the remaining baking time.
- Crispy Bottom: Place a pizza stone in the oven while it preheats. The stone will retain heat and help create a crispy crust. If you don’t have a pizza stone, you can also use an inverted baking sheet.
- Adding Fresh Herbs: Fresh basil or oregano can be added after baking for a burst of fresh flavor.
Serving & Storage Suggestions
Serve the Italian Sub Pizza hot and fresh, ideally within minutes of removing it from the oven. Garnish with a sprinkle of fresh parsley or a drizzle of balsamic glaze for an extra touch of elegance. Pair it with a crisp green salad or a side of roasted vegetables for a complete meal.
Leftovers can be stored in an airtight container in the refrigerator for up to 3 days. To reheat, preheat your oven to 350°F (175°C) and bake for 5-10 minutes, or until heated through and the crust is crispy. You can also reheat individual slices in a microwave, but the crust will be softer. Freezing is not recommended, as the crust and cheese can become soggy upon thawing.
Nutritional Information
| Nutrient | Amount per Serving | % Daily Value |
|---|---|---|
| Calories | 508 kcal | 25% |
| Total Fat | 43 g | 66% |
| Saturated Fat | 20 g | 100% |
| Cholesterol | 110 mg | 37% |
| Sodium | 1590 mg | 66% |
| Total Carbohydrate | 3 g | 1% |
| Dietary Fiber | 1 g | 4% |
| Sugars | 1 g | 2% |
| Protein | 27 g | 54% |
Note: Nutritional information is an estimate and may vary based on specific ingredients and portion sizes.
Variations & Substitutions
- Spicy Kick: Add a pinch of red pepper flakes to the Italian seasoning or use spicy salami for an extra kick.
- Vegetarian Option: Replace the meats with roasted vegetables like bell peppers, onions, and mushrooms. Add a sprinkle of Parmesan cheese for extra flavor.
- Gluten-Free: Use a gluten-free pizza crust. Many excellent options are available in grocery stores today.
- Different Cheeses: Experiment with other cheeses like mozzarella, fontina, or asiago. A blend of cheeses can create a more complex flavor profile.
- Herbed Crust: Mix finely chopped fresh herbs like rosemary or thyme into the olive oil before drizzling it over the crust.
FAQs (Frequently Asked Questions)
Q: Can I use a homemade pizza crust for this recipe?
A: Absolutely! A homemade crust will add an even more personal touch to your Italian Sub Pizza. Just be sure to adjust the baking time as needed, depending on the thickness of the crust.
Q: Can I prepare the pizza ahead of time and bake it later?
A: It’s best to bake the pizza immediately after assembling it. However, you can prepare the crust and toppings ahead of time and store them separately in the refrigerator. Assemble the pizza just before baking.
Q: What if my provolone cheese doesn’t melt well?
A: Ensure the cheese is at room temperature before topping the pizza. You can also add a small amount of mozzarella cheese, which melts more readily, to help the provolone melt smoothly.
Q: Can I use different types of Italian seasoning?
A: Yes, feel free to experiment with different Italian seasoning blends. Some blends may be saltier than others, so adjust the amount accordingly.
Q: My crust is getting too brown before the cheese is melted. What should I do?
A: Tent the pizza loosely with aluminum foil to prevent the crust from browning further while the cheese continues to melt.
Final Thoughts
This Italian Sub Pizza is more than just a recipe; it’s a journey back to my Nonna’s kitchen, a celebration of simple pleasures, and a testament to the magic that happens when you dare to blend culinary traditions. I encourage you to try this recipe, make it your own, and share it with those you love. Feel free to experiment with different toppings and flavors to create your perfect Italian Sub Pizza masterpiece. And most importantly, don’t forget to savor every delicious bite!