
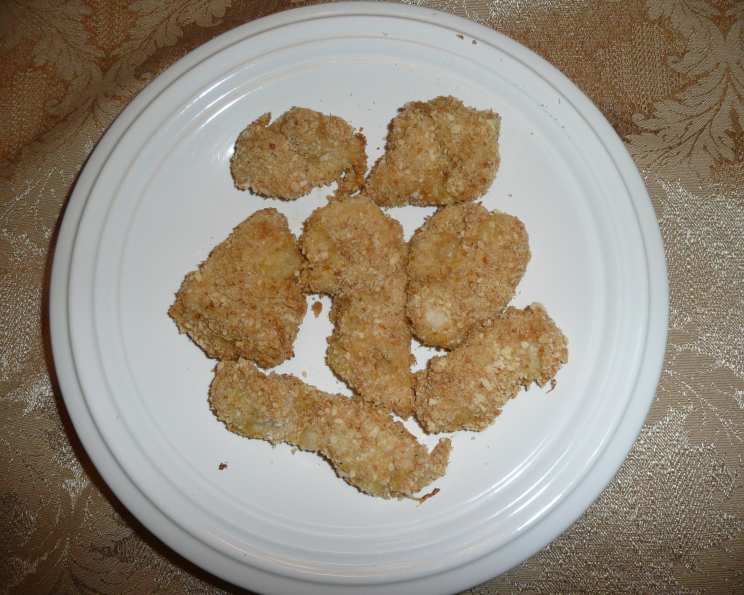
Jamie Oliver’s Crunchy Garlic Chicken Nuggets: A Flavor Revolution
There’s a certain magic to transforming simple ingredients into something truly special, and that’s exactly what Jamie Oliver’s Crunchy Garlic Chicken Nuggets achieve. I remember the first time I made these – a weeknight dinner rush with two hungry kids clamoring for something, anything, that wasn’t the usual. I was skeptical, but the speed and simplicity of the recipe, combined with the promise of incredible flavor, drew me in. The aroma of garlic, lemon, and parsley filled the kitchen as the chicken sizzled in the pan, and the kids, surprisingly, stopped fighting and started sniffing. The first bite sealed the deal. Crispy, juicy, and bursting with flavor, these nuggets were a total game-changer, elevating a humble weeknight meal to a culinary experience.
Recipe Overview
- Prep Time: 10 minutes
- Cook Time: 15 minutes
- Total Time: 25 minutes
- Servings: 2
- Yield: Variable depending on chicken breast size
- Dietary Type: Not Gluten-Free
Ingredients
- 1 garlic clove
- 1 lemon
- 6 cream crackers or 6 plain crackers, such as Jacob’s
- 2 tablespoons butter
- 4 sprigs fresh Italian parsley
- Sea salt
- Freshly ground black pepper
- 1 tablespoon all-purpose flour
- 1 large egg, preferably free-range
- 2 skinless chicken breast fillets, preferably free-range
- Olive oil
Equipment Needed
- Food processor
- Plate
- Small bowl
- Fork
- Plastic wrap
- Frying pan or baking sheet
Instructions
- Prepare the Garlic Lemon Crumb: Peel the garlic and zest the lemon.
- Create the Crumb Mixture: Place the crackers into a food processor with the butter, garlic, parsley sprigs, lemon zest, and a pinch of sea salt and freshly ground black pepper.
- Pulse to Fine Crumbs: Process the mixture until it is very fine.
- Transfer to Plate: Pour the resulting crumbs onto a plate. This ensures easy coating of the chicken later.
- Flour Station: Sprinkle the all-purpose flour onto a second plate. This helps the egg adhere better.
- Egg Wash: Crack the egg into a small bowl and beat it lightly with a fork.
- Prepare the Chicken: Lightly score the underside of the chicken breasts. This will help the chicken cook evenly and absorb the flavors.
- Flatten the Chicken: Place a square of plastic wrap over each chicken breast and gently bash it a few times with the bottom of a pan until the breasts are flattened out a bit. This helps to tenderize the chicken and allows it to cook more quickly and evenly.
- Coating the Chicken: Dip the chicken into the flour, ensuring both sides are completely coated. Shake off any excess flour.
- Egg Dip: Dip the floured chicken into the egg wash, again ensuring both sides are well coated. Let the excess egg drip off.
- Crumb Coating: Finally, dip the chicken into the flavored crumbs, pressing the crumbs onto the chicken breasts so they stick. You want the meat to be totally coated for maximum flavor and crunch.
- Cooking Options: You can either bake or fry the chicken. Both methods yield delicious results, so choose the one that best suits your preferences and equipment.
- Baking Instructions: If baking, preheat your oven to its highest temperature (475°F or 245°C).
- Bake: Place the chicken on a sheet pan and cook for 15 minutes, or until cooked through and golden brown.
- Frying Instructions: If frying, place a frying pan on a medium heat and add a few generous lugs of olive oil.
- Fry: Cook the chicken breasts for 4 to 5 minutes on each side, until cooked through, golden, and crisp. Ensure the internal temperature reaches 165°F (74°C).
- Serving: Either serve the chicken breasts whole or cut them into strips and pile them on a plate. Garnish with a lemon wedge for squeezing over, and a tiny sprinkling of sea salt.
Expert Tips & Tricks
- Even Flattening: When flattening the chicken, ensure you apply even pressure to avoid creating overly thin or uneven sections.
- Crispy Crust: For an extra crispy crust, chill the crumbed chicken in the refrigerator for 15-20 minutes before cooking. This helps the crumbs adhere better and prevents them from becoming soggy.
- Don’t overcrowd the pan: When frying, avoid overcrowding the pan, as this will lower the oil temperature and result in soggy, less crispy chicken. Work in batches if necessary.
- Lemon Zest: Don’t skimp on the lemon zest! It adds a bright, zesty flavor that complements the garlic and parsley beautifully.
- Checking for Doneness: If baking, use a meat thermometer to ensure the chicken reaches an internal temperature of 165°F (74°C). If frying, pierce the chicken with a fork; the juices should run clear.
Serving & Storage Suggestions
Serve these delicious chicken nuggets immediately while they are still warm and crispy. They pair beautifully with a variety of sides, such as a fresh salad, simply dressed veggies, or even some homemade potato wedges.
Leftover chicken can be stored in an airtight container in the refrigerator for up to 3 days. To reheat, bake in a preheated oven at 350°F (175°C) for about 10-15 minutes, or until heated through. Reheating in a skillet with a little oil can also help to restore some of the crispiness. I don’t recommend microwaving as it can make the chicken soggy.
Nutritional Information
| Nutrient | Amount per Serving | % Daily Value |
|---|---|---|
| Calories | 162.6 kcal | N/A |
| Calories from Fat | 126 g | 78% |
| Total Fat | 14 g | 21% |
| Saturated Fat | 8.1 g | 40% |
| Cholesterol | 123.5 mg | 41% |
| Sodium | 138.9 mg | 5% |
| Total Carbohydrate | 6.4 g | 2% |
| Dietary Fiber | 1 g | 4% |
| Sugars | 0.9 g | 3% |
| Protein | 4.1 g | 8% |
Variations & Substitutions
- Gluten-Free: For a gluten-free version, use gluten-free crackers or breadcrumbs instead of regular crackers. You can also substitute the all-purpose flour with a gluten-free flour blend.
- Spicy Kick: Add a pinch of red pepper flakes to the crumb mixture for a touch of heat.
- Herb Variations: Experiment with different herbs in the crumb mixture. Thyme, rosemary, or oregano would all be delicious additions.
- Cheese Crumb: Add a tablespoon of grated Parmesan cheese to the crumb mixture for a cheesy flavor boost.
- Pork or Cod: This crumbing technique is incredibly versatile and can be used with pork or cod fillets instead of chicken. Adjust the cooking time accordingly.
FAQs (Frequently Asked Questions)
Q: Can I make these ahead of time?
A: Yes, you can prepare the chicken up to the point of cooking and store it in the refrigerator for a few hours. However, it’s best to cook them just before serving for optimal crispiness.
Q: Can I use pre-made breadcrumbs instead of crackers?
A: While you can, the crackers provide a unique texture and slightly sweeter flavor. If you do use breadcrumbs, consider adding a bit of sugar to mimic the sweetness of the crackers.
Q: How do I prevent the crumbs from falling off during cooking?
A: Ensure each layer (flour, egg, crumbs) is applied evenly and thoroughly. Press the crumbs firmly onto the chicken to help them adhere better.
Q: What if I don’t have fresh parsley?
A: You can use dried parsley as a substitute, but fresh parsley provides a brighter, more vibrant flavor. Use about 1 teaspoon of dried parsley for every 4 sprigs of fresh parsley.
Q: Can I freeze these chicken nuggets?
A: Yes, you can freeze the cooked chicken nuggets. Let them cool completely before placing them in a freezer-safe bag or container. Reheat in the oven for best results.
Final Thoughts
Jamie Oliver’s Crunchy Garlic Chicken Nuggets are more than just a recipe; they’re an invitation to rediscover the joy of simple, flavorful cooking. Don’t be afraid to experiment with the variations and make them your own. Whether you’re a seasoned chef or a beginner in the kitchen, these nuggets are guaranteed to be a crowd-pleaser. So, grab your ingredients, preheat your oven (or fire up your frying pan), and get ready to experience a flavor revolution! And please, share your creations and feedback. I’m eager to hear how you’ve made this recipe your own. They pair perfectly with a crisp glass of Sauvignon Blanc, so consider that as a delightful addition to your meal.