
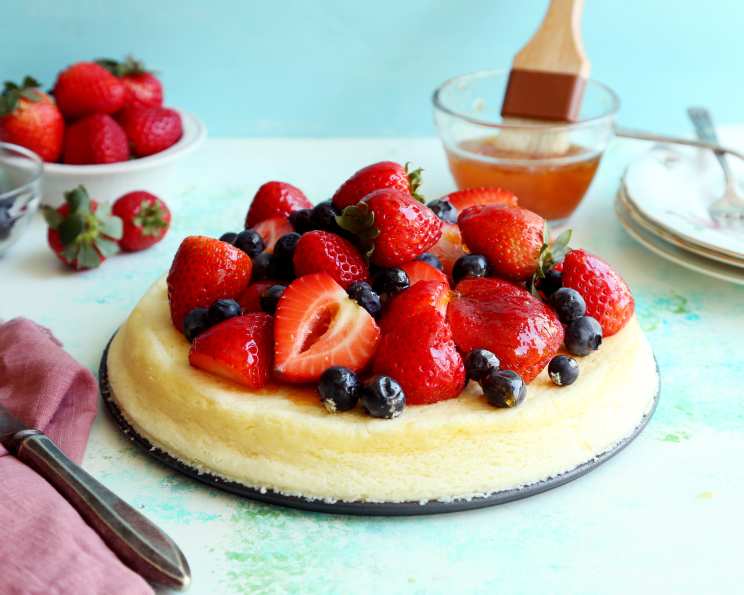
The Light-as-Air Magic of Japanese Cheesecake
The first time I tasted Japanese cheesecake, it was a revelation. I was in Kyoto, wandering through a small, unassuming bakery, when the fluffy, golden disc caught my eye. One bite and I was hooked – the delicate sweetness, the almost ethereal texture, it was unlike any cheesecake I’d ever had. It tasted like a cloud made of dreams, a perfect harmony of richness and lightness. It instantly became my mission to recreate this magic at home.
Recipe Overview
- Prep Time: 20 minutes
- Cook Time: 35-40 minutes
- Total Time: 1 hour
- Servings: 6-8
- Yield: 1 cake
- Dietary Type: Not Gluten-Free
Ingredients
- 7 ounces cream cheese, at room temperature
- 1⁄4 cup whole milk
- 1⁄2 cup superfine sugar (caster sugar)
- 3 eggs, separated
- 1⁄4 cup cornstarch (don’t use flour)
- 2 tablespoons lemon juice
- 1⁄2 teaspoon cream of tartar
- 2 1⁄2 cups boiling water
For the glazing:
- 2 tablespoons jam (Apricot or Strawberry)
- 1⁄2 tablespoon water
Equipment Needed
- 9-inch cake tin
- Cooking oil spray
- Mixer (hand mixer or stand mixer)
- Two mixing bowls
- Rubber spatula
- Roasting pan
- Saucepan
Instructions
-
Begin by preheating your oven to 350 degrees Fahrenheit (175 degrees Celsius). This initial temperature sets the stage for the gentle bake that gives this cheesecake its signature texture.
-
Prepare a 9-inch cake tin by spraying it generously with cooking oil spray. This will prevent the cheesecake from sticking and ensure a clean release after baking.
-
In a mixing bowl, beat the cream cheese with the milk until it softens and becomes smooth. Room temperature cream cheese is crucial for this step; it will incorporate much more easily.
-
Add half of the superfine sugar, the egg yolks, cornstarch, and lemon juice to the cream cheese mixture. Continue to beat until everything is thoroughly combined and the batter is smooth. The lemon juice not only adds a subtle tang but also helps to stabilize the egg whites later on.
-
In a separate, impeccably clean bowl, beat the egg whites until they become foamy. This is best achieved with a mixer – either a hand mixer or a stand mixer.
-
Gradually add the remaining superfine sugar and cream of tartar to the egg whites. Continue beating on high speed until soft peaks form, approximately 8-10 minutes. The cream of tartar acts as a stabilizer, helping the egg whites to hold their structure. The mixture should be glossy and able to hold a gentle peak when the beaters are lifted.
-
Gently fold the beaten egg whites into the cream cheese mixture. This is a crucial step that requires a delicate touch. Use a rubber spatula and fold in the egg whites in batches, being careful not to deflate them. This process incorporates air into the batter, creating the light and airy texture that defines Japanese cheesecake.
-
Pour the batter into the prepared cake pan and smooth the surface. Ensure the batter is evenly distributed for even baking.
-
Place the cake pan into a larger roasting pan and then position it on the lower rack of the oven. This creates a water bath, which is essential for the moist and delicate texture of the cheesecake.
-
Pour enough boiling water into the roasting pan to come halfway up the side of the cake pan. The steam from the water bath prevents the cheesecake from drying out and cracking.
-
Bake for 35-40 minutes, or until a pick inserted into the middle of the center comes out clean. Keep a close eye on the cheesecake during baking. If the top starts to brown too quickly, you can cover it with a piece of tin foil.
-
Once baked, you can enjoy the cheesecake as is, or enhance it with a simple glaze.
-
To make the glaze, put the jam in a saucepan with the water on low heat and warm up until it’s melted and smooth. Apricot or strawberry jam works particularly well.
-
Spread the glaze on top of the cake while it’s still warm. The glaze adds a touch of sweetness and a beautiful sheen to the finished cheesecake.
Expert Tips & Tricks
- Don’t overmix the batter: Overmixing can develop gluten (even though we are using cornstarch), leading to a denser cheesecake.
- Perfecting the egg whites: Ensure your mixing bowl and beaters are completely clean and free of grease before whipping the egg whites. Even a trace of fat can prevent them from forming stiff peaks.
- Water bath is key: The water bath is crucial for a moist, crack-free cheesecake. Make sure to use boiling water to start with.
- Patience is a virtue: Allow the cheesecake to cool completely in the oven with the door slightly ajar to prevent it from collapsing.
Serving & Storage Suggestions
Serve the Japanese cheesecake slightly warm or chilled. Dusting it with powdered sugar before serving adds a lovely touch.
Store leftover cheesecake in an airtight container in the refrigerator. It will keep well for up to 3 days. It’s not recommended to freeze this type of cheesecake, as it can affect the delicate texture.
Nutritional Information
| Nutrient | Amount per Serving | % Daily Value |
|---|---|---|
| Calories | 260 kcal | 13% |
| Total Fat | 14g | 18% |
| Saturated Fat | 7g | 35% |
| Cholesterol | 130mg | 43% |
| Sodium | 152mg | 7% |
| Total Carbohydrate | 29g | 10% |
| Dietary Fiber | 0g | 0% |
| Sugars | 22g | – |
| Protein | 6g | 12% |
Note: Nutritional information is an estimate and may vary based on specific ingredients and portion sizes.
Variations & Substitutions
- Citrus Zest: Add a teaspoon of lemon or orange zest to the cream cheese mixture for an extra burst of flavor.
- Matcha: For a Japanese twist, whisk 1-2 teaspoons of matcha powder into the dry ingredients.
- Vanilla Extract: A dash of vanilla extract can enhance the overall flavor profile.
- Different Jams: Experiment with different types of jam for the glaze, such as raspberry, blueberry, or even yuzu marmalade.
FAQs (Frequently Asked Questions)
Q: Why is a water bath necessary for Japanese cheesecake?
A: The water bath creates a humid environment in the oven, which helps the cheesecake bake evenly and prevents it from cracking or drying out.
Q: Can I use regular sugar instead of superfine sugar?
A: Superfine sugar dissolves more easily, resulting in a smoother batter. If you use regular sugar, make sure to beat the mixture well to ensure it dissolves completely.
Q: How do I prevent the cheesecake from collapsing after baking?
A: Cooling the cheesecake gradually in the oven with the door slightly ajar helps to prevent it from collapsing. This allows the cheesecake to slowly adjust to the temperature change.
Q: Can I make this cheesecake gluten-free?
A: You can try substituting the cornstarch with a gluten-free cornstarch alternative. However, the texture might be slightly different.
Q: My cheesecake browned too quickly on top. What can I do?
A: If the surface becomes too dark while baking, cover it loosely with a piece of tin foil, but be careful not to open the oven door until it has been in the oven for at least 20 minutes.
Final Thoughts
This Japanese cheesecake recipe is more than just a dessert; it’s an experience. The delicate, cloud-like texture and the subtle sweetness make it a truly special treat. I encourage you to try this recipe and bring a little bit of Japanese bakery magic into your own kitchen. Don’t be intimidated by the water bath or the careful folding of egg whites – the results are well worth the effort. And if you do give it a try, I’d love to hear about your experience and any creative variations you come up with. Enjoy!