
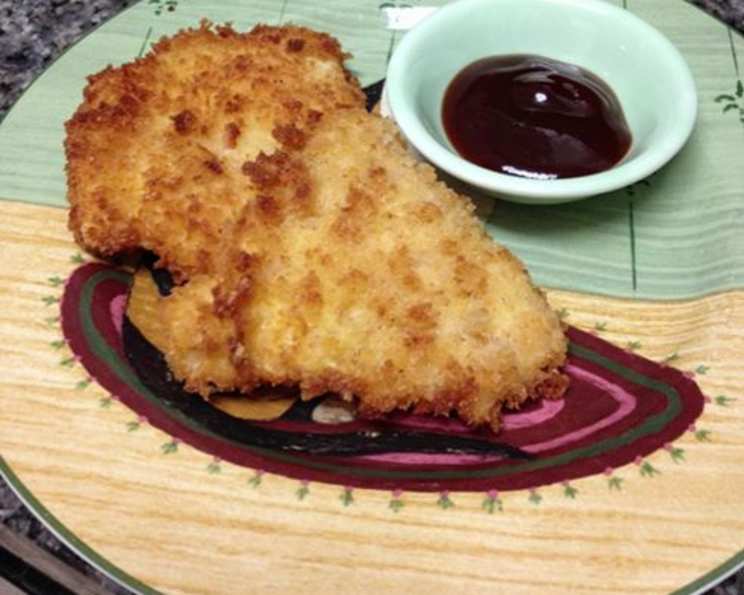
Japanese Chicken Katsu with Lighter Tonkatsu Sauce
The first time I tasted Chicken Katsu, I was a broke college student, far from home and craving comfort food. A tiny Japanese diner, tucked away on a side street, became my sanctuary. The gentle sizzle of the chicken frying, the sweet and tangy aroma of the Tonkatsu sauce, and the satisfying crunch with each bite – it was more than just a meal; it was a warm hug on a cold day. That memory, and the craving for that perfect crispy chicken, has stayed with me, inspiring me to recreate that experience in my own kitchen, albeit with a slightly lighter twist!
Recipe Overview
- Prep Time: 15 minutes
- Cook Time: 12 minutes
- Total Time: 27 minutes
- Servings: 2-4
- Yield: Varies based on chicken breast size
- Dietary Type: Can be made Gluten-Free with gluten-free breadcrumbs and soy sauce
Ingredients
- 1 lb chicken breast
- 1/2 cup flour
- 1 cup panko breadcrumbs
- 1/4 cup breadcrumbs
- 1/4 cup fat-free egg substitute
- 1 cup canola oil
- 1/2 cup Worcestershire sauce
- 1/2 cup ketchup
- 1 tablespoon light soy sauce
Equipment Needed
- Large frying pan
- Tongs
- Thermometer
- Shallow dishes or bowls for breading
- Paper towels
Instructions
- Begin by preparing the chicken. Cut the chicken breast into flat, thin pieces. This ensures even cooking and maximum crispiness. Aim for pieces that are about 1/4 to 1/2 inch thick.
- In a shallow dish, mix 1 tablespoon of the flour with the panko breadcrumbs and regular breadcrumbs. This mixture will form the crispy outer layer. Reserve the remaining flour in a separate dish. You might need more of the breadcrumb mixture depending on the size of your chicken.
- Place the remaining flour in a second shallow dish and the fat-free egg substitute in a third shallow dish.
- Now it’s time to bread the chicken. First, dip a piece of chicken into the plain flour, ensuring it’s lightly coated on all sides. Shake off any excess flour.
- Next, dip the floured chicken into the egg substitute, making sure it’s fully coated.
- Finally, dredge the egg-coated chicken in the panko/breadcrumb/flour mixture, pressing gently to ensure the crumbs adhere well to the chicken.
- Heat the canola oil in a large frying pan. You’ll need enough oil to cover about 1/4 inch of the pan’s surface. Heat the oil over medium-high heat until it reaches 350 degrees Fahrenheit (175 degrees Celsius). Using a thermometer is crucial to maintaining a consistent temperature.
- Carefully place the breaded chicken pieces into the hot oil, being careful not to overcrowd the pan. Overcrowding will lower the oil temperature and result in soggy, not crispy, katsu.
- Fry the chicken on each side until golden brown and cooked through. This usually takes about 2-3 minutes per side, but use a thermometer to ensure the internal temperature of the chicken reaches 165 degrees Fahrenheit (74 degrees Celsius). Maintain the oil temperature between 340-360 degrees Fahrenheit (170-180 degrees Celsius). Adjust the heat as needed.
- Once cooked, remove the chicken katsu from the pan with tongs and place it on paper towels to drain excess oil.
- To make the Tonkatsu Sauce, simply mix together the Worcestershire sauce, ketchup, and light soy sauce in a small bowl. Stir until well combined.
Expert Tips & Tricks
- Panko Power: Don’t skimp on the panko! Its coarse texture is what gives katsu that signature crunch.
- Temperature is Key: Maintaining the oil temperature is vital for crispy katsu. If the oil is too hot, the outside will burn before the inside cooks. If it’s not hot enough, the katsu will be greasy.
- Double Dredge: For an extra crispy crust, consider double-dredging the chicken. After the first coating of flour, egg, and panko, repeat the process for a thicker, more satisfying crunch.
- Flavor Boost: For extra flavor, add a pinch of dried garlic powder or onion powder to the flour mixture.
- Resting Time: Let the katsu rest for a minute or two after frying. This allows the juices to redistribute, resulting in a more tender and flavorful chicken.
Serving & Storage Suggestions
Serve the Chicken Katsu immediately while it’s still hot and crispy. Traditionally, it’s served with shredded cabbage, steamed rice, and a generous drizzle of the Tonkatsu Sauce. You can also serve it with a side of Japanese potato salad or miso soup.
Leftover Chicken Katsu can be stored in an airtight container in the refrigerator for up to 3 days. However, keep in mind that the crust will lose some of its crispness. To reheat, bake in a preheated oven at 350°F (175°C) for about 10-15 minutes, or until heated through. Avoid microwaving, as it will make the crust soggy.
Nutritional Information
| Nutrient | Amount per Serving (estimated) | % Daily Value (approx.) |
|---|---|---|
| Calories | 450 kcal | 23% |
| Total Fat | 25g | 38% |
| Saturated Fat | 3g | 15% |
| Cholesterol | 75mg | 25% |
| Sodium | 800mg | 33% |
| Total Carbohydrate | 30g | 10% |
| Dietary Fiber | 2g | 8% |
| Sugars | 10g | – |
| Protein | 30g | 60% |
Nutritional information is an estimate and can vary based on specific ingredients and portion sizes.
Variations & Substitutions
- Gluten-Free Katsu: Use gluten-free flour and gluten-free panko breadcrumbs. Tamari can be used as a substitute for the soy sauce.
- Pork Katsu (Tonkatsu): Replace the chicken breast with pork cutlets for a classic Tonkatsu.
- Baked Katsu: For a healthier option, bake the breaded chicken instead of frying. Place the breaded chicken on a baking sheet and bake at 400°F (200°C) for about 20-25 minutes, or until golden brown and cooked through. You may need to spray the chicken with cooking oil for extra crispness.
- Spicy Katsu: Add a pinch of cayenne pepper or a dash of hot sauce to the flour mixture for a spicy kick.
- Different Sauces: Experiment with different sauces, such as a spicy mayo, a sweet chili sauce, or even a simple lemon-soy sauce dressing.
FAQs (Frequently Asked Questions)
Q: Can I use olive oil instead of canola oil?
A: While you can, canola oil has a higher smoke point, making it better suited for frying at higher temperatures without burning. Olive oil might impart a slightly different flavor as well.
Q: How do I keep the breading from falling off the chicken?
A: Make sure to press the breadcrumbs firmly onto the chicken after dredging. Also, avoid overcrowding the pan, as this can cause the breading to steam and detach.
Q: Can I prepare the chicken ahead of time?
A: Yes, you can bread the chicken ahead of time and store it in the refrigerator for up to 24 hours. However, it’s best to fry it just before serving for optimal crispness.
Q: How do I know when the chicken is cooked through?
A: The internal temperature of the chicken should reach 165°F (74°C). Use a meat thermometer to check.
Q: Can I freeze the Chicken Katsu?
A: Yes, you can freeze cooked Chicken Katsu. Let it cool completely, then wrap it tightly in plastic wrap and foil, or place it in an airtight freezer bag. It can be stored in the freezer for up to 2 months. Reheat in the oven for best results.
Final Thoughts
So, there you have it – a slightly lighter take on a classic comfort food. Don’t be intimidated by the breading process; it’s simpler than it looks, and the reward is well worth the effort. I encourage you to give this recipe a try, put your own spin on it, and share the deliciousness with friends and family. Maybe serve it with a crisp Japanese beer or a refreshing glass of iced green tea. Let me know what you think! Happy cooking!