
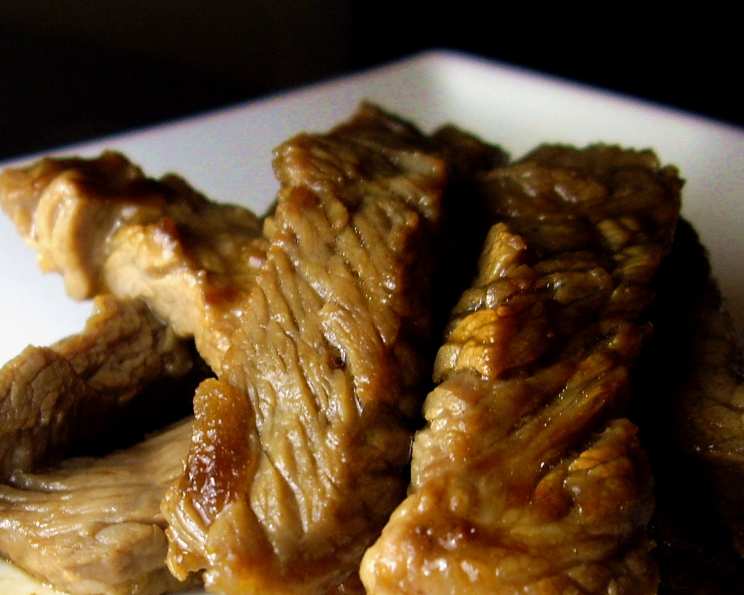
Japanese Style Beef Rib Eye BBQ – Beef Yakiniku
The first time I experienced yakiniku was in a tiny, smoke-filled restaurant tucked away in a bustling Tokyo alley. The air buzzed with conversation and the sizzle of meat hitting the hot grill. We huddled around a small charcoal grill, tongs in hand, carefully cooking each thin slice of beef to perfection. The communal atmosphere, the fragrant aromas, and the explosion of flavor with every bite created a culinary memory I cherish to this day. This recipe aims to recreate that experience, bringing the joy of Japanese BBQ right to your table.
Recipe Overview
- Prep Time: 15 minutes + 6-8 hours marinating
- Cook Time: 2-4 minutes
- Total Time: 6 hours 17 minutes – 8 hours 19 minutes
- Servings: 2
- Dietary Type: Not specified
Ingredients
- ½ lb beef rib eye roast (about 230 grams) or ½ lb prime rib roast (about 230 grams)
- 3 tablespoons soy sauce
- 3 tablespoons sake or 3 tablespoons sherry wine
- 1 ½ tablespoons sesame oil
- 1 ½ tablespoons sugar
- ½ apple, grated to release juice
- 2 tablespoons roasted and partially ground sesame seeds
- 2 garlic cloves, minced
- ¼ teaspoon dry mustard
Equipment Needed
- Cutting board
- Sharp knife
- Small frying pan
- Mortar and pestle or coffee grinder
- Mixing bowl
- Refrigerator
- Grill (indoor or outdoor)
- Tongs
Instructions
-
Begin by preparing the beef. Using a sharp knife and a steady hand, slice the beef rib eye roast or prime rib against the grain into thin slices. Each slice should be approximately 2 ½ to 3 inches long, 1 ¼ to 1 ½ inches wide, and ¼ inch thick. The thinner the slices, the quicker they will cook on the grill.
-
Next, prepare the sesame seeds. Heat a small frying pan over medium heat. Add the sesame seeds and roast them, stirring frequently to prevent burning. Listen carefully; when you hear 2-3 pops, immediately remove the pan from the heat. The seeds should be lightly golden and fragrant.
-
Once the sesame seeds have cooled slightly, partially grind them. You can use a mortar and pestle for a more rustic texture, or a coffee grinder for a finer grind. The goal is not to create a powder, but to break the seeds open and release their oils.
-
Now, it’s time to create the marinade. In a mixing bowl, combine the soy sauce, sake (or sherry wine), sesame oil, and sugar. Stir well until the sugar is fully dissolved.
-
Add the grated apple (including the juice), the partially ground sesame seeds, the minced garlic cloves, and the dry mustard to the marinade. Mix thoroughly to combine all the ingredients. The apple adds a subtle sweetness and enzymatic action to tenderize the beef.
-
Add the sliced beef to the marinade, ensuring that each slice is well-coated. Gently massage the marinade into the beef to ensure even distribution of flavors.
-
Cover the bowl tightly and refrigerate for at least 6-8 hours, or even overnight. This marinating time allows the beef to absorb the flavors of the marinade and become incredibly tender.
-
When you are ready to cook, remove the beef slices from the marinade. Allow any excess marinade to drip off. While the marinade adds flavor, too much can cause flare-ups on the grill.
-
Preheat your grill to medium heat. Whether you’re using an indoor grill or an outdoor grill, ensure it is properly heated before adding the beef.
-
Grill the beef slices quickly, about 1 to 1 ½ minutes per side, or to your preferred level of doneness. The thin slices will cook rapidly, so keep a close eye on them to prevent overcooking. The goal is to achieve a beautiful sear on the outside while maintaining a tender, juicy interior. Use tongs to flip the beef slices.
-
Remove the grilled beef slices from the grill and serve immediately.
Expert Tips & Tricks
- Slicing the Beef: Freezing the beef for about 30 minutes before slicing makes it easier to cut thin, even slices.
- Apple Alternatives: If you don’t have an apple, you can substitute it with pear or nashi (Asian pear) for a similar flavor and tenderizing effect. Using just the juice is possible in a pinch, but the pulp helps the marinade adhere to the meat during grilling.
- Sesame Seed Roasting: Don’t skip the roasting step! Roasting the sesame seeds enhances their nutty flavor and makes them more fragrant.
- Marinade Adjustment: Adjust the sweetness of the marinade to your liking by adding more or less sugar.
- Grill Temperature: Experiment with different grill temperatures to find what works best for your equipment. A slightly higher heat will result in a more pronounced sear.
- Don’t overcrowd the grill: Grill the beef in batches to maintain a consistent temperature and prevent the meat from steaming instead of searing.
Serving & Storage Suggestions
Serve the grilled beef yakiniku immediately while it’s hot and juicy. It’s traditionally served with a side of steamed rice, a simple salad, and various dipping sauces, such as a spicy miso sauce or a ponzu sauce. You can also serve it with kimchi or other Korean side dishes.
If you have any leftover cooked beef yakiniku, store it in an airtight container in the refrigerator. It will keep for up to 2-3 days. Reheat gently in a pan over medium-low heat or in the microwave. Be careful not to overcook it during reheating, as it can become dry. It is not recommended to leave cooked meat at room temperature for more than two hours. Freezing cooked beef yakiniku is not ideal as it can affect the texture, but if necessary, store in a freezer-safe container for up to 1 month. Thaw completely before reheating.
Nutritional Information
| Nutrient | Amount per Serving | % Daily Value |
|---|---|---|
| Calories | 558.8 kcal | Not specified |
| Calories from Fat | 359 g | 64% |
| Total Fat | 39.9 g | 61% |
| Saturated Fat | 12.3 g | 61% |
| Cholesterol | 77.1 mg | 25% |
| Sodium | 1574 mg | 65% |
| Total Carbohydrate | 20.1 g | 6% |
| Dietary Fiber | 2.2 g | 8% |
| Sugars | 13.6 g | 54% |
| Protein | 24.8 g | 49% |
Note: Nutritional information is an estimate and may vary based on specific ingredients and preparation methods.
Variations & Substitutions
- Gluten-Free: Use tamari instead of soy sauce for a gluten-free option.
- Vegetarian “Yakiniku”: Substitute the beef with thick slices of portobello mushrooms marinated in the same sauce.
- Spicy Yakiniku: Add a tablespoon of gochujang (Korean chili paste) to the marinade for a spicy kick.
- Citrus Twist: Add a teaspoon of grated lemon or orange zest to the marinade for a bright, citrusy flavor.
- Different Cuts of Meat: While rib eye and prime rib are ideal, you can also use other tender cuts of beef, such as sirloin or tenderloin. Adjust cooking time accordingly.
FAQs (Frequently Asked Questions)
Q: Can I use a different type of cooking wine instead of sake or sherry?
A: Mirin, a sweet Japanese rice wine, could be a substitute, but reduce the amount of sugar in the marinade accordingly. Dry white wine can also work in a pinch, though it will slightly alter the flavor profile.
Q: How thin should I slice the beef?
A: Ideally, the beef should be about 1/4 inch thick. This allows it to cook quickly and evenly on the grill without becoming tough.
Q: Can I marinate the beef for longer than 8 hours?
A: While 6-8 hours is ideal, you can marinate the beef for up to 24 hours in the refrigerator. However, be mindful that prolonged marinating can sometimes make the meat too soft.
Q: What’s the best way to prevent the beef from sticking to the grill?
A: Make sure your grill is clean and well-oiled before grilling the beef. You can also use a non-stick grilling spray.
Q: Can I use an outdoor charcoal grill instead of an indoor grill?
A: Absolutely! A charcoal grill will impart a smoky flavor that enhances the yakiniku experience. Just be sure to control the heat carefully to prevent burning the meat.
Final Thoughts
Beef Yakiniku is more than just a meal; it’s an experience. The interactive cooking process, the tantalizing aromas, and the explosion of flavors create a dining experience that’s both fun and delicious. Gather your friends and family, fire up the grill, and embark on a culinary adventure to Japan. I encourage you to try this recipe and make it your own. Experiment with different variations, adjust the marinade to your liking, and most importantly, share your creations with those you love. Bon appétit, or as they say in Japan, Itadakimasu!