
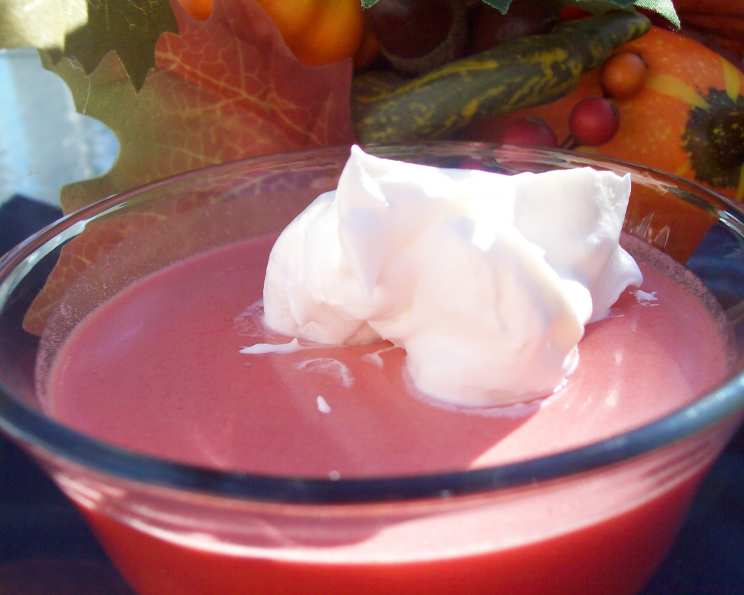
The Retro Magic of Jell-O 1-2-3 Dessert: A Culinary Time Machine
I remember summer afternoons at my grandmother’s house like they were yesterday. The humid air, the scent of honeysuckle drifting through the open windows, and the clatter of ice in her tall glasses. But the most vivid memory is always the anticipation of dessert. Not just any dessert, but Jell-O 1-2-3. It was a marvel of mid-century ingenuity, a dessert that magically separated into three distinct layers in the fridge. It was pure joy on a spoon, a testament to simple pleasures, and an edible science experiment all rolled into one. And even now, years later, I find myself craving its nostalgic charm.
Recipe Overview
- Prep Time: 10 minutes
- Chill Time: 20 minutes
- Total Time: 30 minutes
- Servings: 4
- Dietary Type: Not specified (contains gelatin and potentially dairy)
Ingredients
- 3 ounces strawberry gelatin (4-serving size)
- ¾ cup boiling water
- Ice cubes
- ½ cup cold water
- ½ cup thawed whipped topping
Equipment Needed
- Bowl
- Measuring cups
- Blender
- Dessert dishes (4)
Instructions
- In a bowl, dissolve the dry strawberry gelatin mix in the boiling water. Stir until the gelatin is completely dissolved.
- Add enough ice cubes to the cold water to measure 1 ¼ cups total. Add this iced water to the gelatin mixture.
- Transfer the gelatin mixture to a blender. Cover the blender securely and blend for 30 seconds.
- Add the thawed whipped topping to the blender. Cover again and blend until the mixture is completely smooth.
- Pour the mixture evenly into 4 dessert dishes.
- Refrigerate for at least 20 minutes, or until the dessert is set.
- Store any leftover dessert in the refrigerator.
Expert Tips & Tricks
The key to Jell-O 1-2-3’s signature layered effect is the temperature difference between the layers as they set. The initial blending creates a uniform mixture, but as it sits in the refrigerator, the ingredients separate due to density differences. The heavier gelatin sinks to the bottom, forming the base layer. The whipped topping, being lighter, rises to the top, creating a creamy layer. A slightly less dense, aerated gelatin layer forms in the middle.
- Don’t skimp on the blending: Ensure everything is completely smooth. Any undissolved gelatin or lumps of whipped topping will disrupt the layering process.
- Chilling is crucial: While the recipe calls for 20 minutes, I find that letting it chill for a full hour, or even longer, makes for even more distinct layers.
- Whipped topping consistency matters: Thawed whipped topping should be soft but not watery. If it’s too runny, it won’t separate properly. You can use homemade whipped cream, but be sure to use a stabilizer like cream of tartar to help it hold its shape.
- For a thicker bottom layer: You can bloom the gelatin in cold water for 5 minutes before dissolving it in the boiling water. This will help it set more firmly.
Serving & Storage Suggestions
Jell-O 1-2-3 is best served chilled, straight from the refrigerator. Its visual appeal is part of the fun, so present it in clear glass dishes to showcase the layers. A simple garnish of fresh strawberries or a sprig of mint adds a touch of elegance.
Leftovers can be stored in the refrigerator for up to 3 days. Be aware that the layers may become less distinct over time, as the ingredients continue to settle and meld together. I don’t recommend freezing Jell-O 1-2-3, as this will drastically alter the texture and ruin the layered effect.
Nutritional Information
Please note that the nutritional information is an estimate and may vary based on specific ingredients used.
| Nutrient | Amount per Serving | % Daily Value (approximate) |
|---|---|---|
| Calories | 100 kcal | 5% |
| Total Fat | 1.7 g | 2% |
| Saturated Fat | 1 g | 5% |
| Cholesterol | 5.7 mg | 1% |
| Sodium | 110 mg | 4% |
| Total Carbohydrate | 20 g | 7% |
| Dietary Fiber | 0 g | 0% |
| Sugars | 19 g | 75% |
| Protein | 2 g | 4% |
Variations & Substitutions
While the classic strawberry Jell-O 1-2-3 is a beloved treat, there are plenty of ways to put your own spin on it.
- Flavor variations: Experiment with different flavors of gelatin. Raspberry, lime, or orange would all be delicious.
- Fruit additions: Fold in small pieces of fresh fruit, like diced strawberries or blueberries, after blending. Be careful not to add too much, or it could disrupt the layering.
- Dairy-free option: Substitute the whipped topping with a dairy-free whipped topping alternative made from coconut cream or other plant-based ingredients.
- Layer enhancement: For a more defined bottom layer, try adding a small amount of plain gelatin to the gelatin mixture before blending. This will make the base layer firmer.
- Holiday twist: During the holidays, use a combination of cherry and lime gelatin for a festive red and green dessert.
FAQs (Frequently Asked Questions)
Q: Why does the dessert separate into three layers?
A: The separation occurs due to differences in density. The heavier gelatin settles at the bottom, the whipped topping rises to the top, and a lighter gelatin mixture forms in the middle.
Q: Can I use homemade whipped cream instead of whipped topping?
A: Yes, but stabilize the whipped cream with cream of tartar to prevent it from becoming too watery and disrupting the layering process.
Q: How long does it take for the Jell-O 1-2-3 to set?
A: The recipe suggests 20 minutes, but chilling for a full hour or longer will result in more distinct layers.
Q: Can I use sugar-free gelatin?
A: Yes, sugar-free gelatin will work, but the overall sweetness and texture of the dessert may be slightly different.
Q: What if my dessert doesn’t separate into three distinct layers?
A: This could be due to several factors, such as not blending the mixture thoroughly enough, using whipped topping that is too runny, or not chilling the dessert for a sufficient amount of time.
Final Thoughts
Jell-O 1-2-3 is more than just a dessert; it’s a trip down memory lane, a reminder of simpler times, and a testament to the enduring appeal of clever culinary creations. It’s surprisingly easy to make, a fun project to share with kids, and a guaranteed crowd-pleaser. So go ahead, try it out and recreate a little bit of that vintage magic. Share your results, your variations, and your own nostalgic memories. And maybe, just maybe, you’ll create some new ones along the way.