
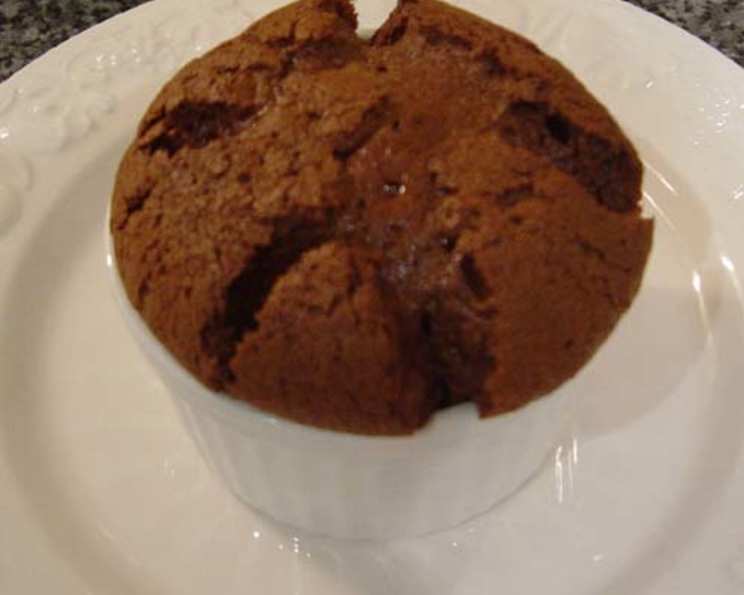
Jennifer Millar’s Decadent Chocolate Budini
I still remember the first time I tasted budini. It was at a small Italian trattoria, tucked away on a cobblestone street during a study abroad trip. The air was thick with the aroma of garlic and herbs, and the budini, served warm with a dollop of mascarpone, was an unexpected revelation. It was rich, intensely chocolatey, and utterly comforting. It was like a warm hug on a chilly Roman evening, and ever since, I’ve been chasing that perfect budini experience. Jennifer Millar’s version comes incredibly close and has become a staple in my kitchen for its simplicity and unparalleled chocolate intensity.
Recipe Overview
- Prep Time: 20 minutes
- Cook Time: 20-25 minutes
- Total Time: 40-45 minutes
- Servings: 6
- Yield: 6 individual budinis
- Dietary Type: Not specified, contains dairy and eggs.
Ingredients
- 6 ounces bittersweet chocolate, finely chopped
- 12 tablespoons unsalted butter, cut into bits
- ¾ cup sugar
- 1 pinch fine sea salt
- 3 large eggs, separated, at room temperature
- 1 teaspoon vanilla extract
- ⅛ teaspoon cream of tartar
- 1 pint coffee ice cream or 1 pint vanilla ice cream (for serving)
Equipment Needed
- Medium stainless-steel bowl
- Skillet
- Whisk
- Hand-held electric mixer
- 6 12- to 16-ounce oven-proof serving dishes
- Large baking sheet
- Toothpick
Instructions
-
Begin by positioning a rack in the lower third of your oven and preheating to 375°F (190°C). This lower rack position will help ensure even baking and prevent the tops from browning too quickly.
-
Next, we’ll create a double boiler to gently melt the chocolate and butter. In a medium stainless-steel bowl, combine the finely chopped bittersweet chocolate, butter cut into bits, 6 tablespoons of the sugar, and the pinch of fine sea salt. Place this bowl in a skillet filled with hot, but not simmering, water. The water should be hot enough to create steam, but not so hot that it’s aggressively boiling, as this can scorch the chocolate.
-
Stir the chocolate mixture frequently as it melts, ensuring that the chocolate and butter combine smoothly. Once completely melted and smooth, remove the bowl from the heat and allow it to cool slightly. A slight cooling will prevent the eggs from scrambling in the next step.
-
Once the chocolate mixture has cooled slightly, whisk in the egg yolks and vanilla extract until thoroughly combined. The mixture should be glossy and homogenous.
-
In a separate, clean medium bowl, combine the egg whites and cream of tartar. The cream of tartar helps stabilize the egg whites and creates a more voluminous meringue.
-
Using a hand-held electric mixer on high speed, beat the egg whites until soft peaks begin to form. This means that when you lift the beaters, the peaks of the egg whites will gently fold over.
-
Gradually add the remaining 6 tablespoons of sugar to the egg whites, beating constantly on high speed. Continue beating until the egg whites are stiff and glossy. This means that when you lift the beaters, the peaks will stand straight up and hold their shape. Be careful not to overbeat the egg whites, as this can make them dry and difficult to fold into the chocolate mixture.
-
Now, we’ll gently incorporate the meringue into the chocolate base. Start by folding ¼ of the beaten egg whites into the chocolate mixture. This lightens the chocolate mixture, making it easier to fold in the remaining egg whites without deflating them.
-
Scrape the chocolate mixture into the bowl of the remaining egg whites and fold gently just until combined. Be careful not to overmix; you want to retain as much air in the egg whites as possible. A few streaks of egg white are okay.
-
Divide the batter evenly among six 12- to 16-ounce oven-proof serving dishes. Don’t worry if the batter doesn’t fill the bowl completely; it will rise during baking, and you’ll want to leave enough room for ice cream or sauce later.
-
Place the bowls on a large baking sheet. This makes it easier to transfer them to and from the oven.
-
At this point, the budini can be prepared up to two days in advance. Simply cover them loosely and refrigerate until ready to bake. If refrigerating, allow them to come to room temperature for about 30 minutes before baking.
-
Bake the budini in the preheated oven until they are puffed with crusty, deeply cracked tops and a toothpick inserted in the centers comes out quite gooey, about 20 to 25 minutes. The toothpick test is crucial; you want the centers to be slightly underbaked, as they will continue to set as they cool.
-
Alternatively, the budini can be completely baked up to a day ahead, cooled, covered, and refrigerated. To reheat, bake in a hot, 375°F (190°C) oven until puffed, about 10 minutes.
-
Serve the budini within 10 minutes of removing them from the oven (they will sink slightly as they cool, but they’ll still be delicious), topping each serving with a scoop of coffee ice cream or vanilla ice cream.
Expert Tips & Tricks
- Chocolate Quality Matters: Use high-quality bittersweet chocolate for the best flavor. Chocolate with a cocoa content of 60-70% works well.
- Room Temperature Eggs: Room temperature eggs whip up to a greater volume, resulting in a lighter and airier budini.
- Gentle Folding: Be gentle when folding the egg whites into the chocolate mixture to avoid deflating them. This will ensure a light and airy texture.
- Doneness Check: The budini should be puffed and cracked on top with a gooey center. Don’t overbake them, or they will become dry.
- Individual Dishes: Using individual oven-safe dishes makes for an elegant presentation and prevents the budini from drying out.
Serving & Storage Suggestions
Serve the budini warm, straight from the oven, for the ultimate indulgence. The contrasting temperatures of the warm budini and cold ice cream create a delightful sensory experience. If you have leftover budini, store them in an airtight container in the refrigerator for up to 2 days. Reheat them in a preheated oven at 375°F (190°C) for about 10 minutes until warmed through.
Nutritional Information
| Nutrient | Amount per Serving | % Daily Value |
|---|---|---|
| Calories | 433.4 kcal | N/A |
| Calories from Fat | 272 g | 63% |
| Total Fat | 30.2 g | 46% |
| Saturated Fat | 18.4 g | 91% |
| Cholesterol | 169 mg | 56% |
| Sodium | 92.1 mg | 3% |
| Total Carbohydrate | 37.7 g | 12% |
| Dietary Fiber | 0.5 g | 2% |
| Sugars | 36.3 g | N/A |
| Protein | 5 g | 10% |
Variations & Substitutions
- Dairy-Free: Substitute the butter with a high-quality vegan butter alternative. Use your favorite non-dairy ice cream such as soy, almond, or coconut-based ice cream.
- Different Chocolate: Experiment with different types of chocolate, such as milk chocolate or dark chocolate, depending on your preference.
- Flavor Enhancements: Add a pinch of cinnamon or a dash of espresso powder to the chocolate mixture for a flavor boost. A splash of orange liqueur can also add a nice touch.
FAQs (Frequently Asked Questions)
Q: Can I make this budini ahead of time?
A: Yes, you can prepare the budini up to 2 days in advance and refrigerate it until ready to bake. Alternatively, you can bake them completely and reheat them before serving.
Q: Can I use a different size serving dish?
A: Yes, you can use one larger dish, but be aware that the baking time may need to be adjusted. Keep a close eye on it and check for doneness with a toothpick.
Q: What if I don’t have coffee ice cream?
A: Vanilla ice cream is a great alternative. You can also use other flavors like chocolate, salted caramel, or even a fruit-based ice cream.
Q: Why did my budini sink after baking?
A: This is normal! The budini will naturally sink slightly as they cool. Don’t worry, they’ll still taste delicious. Serving them within 10 minutes of baking minimizes the sinking.
Q: Can I freeze the budini?
A: It’s not recommended to freeze the budini after they are baked as the texture may change. However, you can freeze the unbaked batter for up to a month. Thaw overnight in the refrigerator before baking.
Final Thoughts
Jennifer Millar’s Chocolate Budini is a guaranteed crowd-pleaser, perfect for a special occasion or a simple weeknight treat. The combination of rich, decadent chocolate and light, airy meringue creates a truly unforgettable dessert experience. Don’t be afraid to experiment with different flavors and toppings to make it your own. I encourage you to try this recipe and share your creations with friends and family. Pair it with a glass of dessert wine or a strong cup of coffee for the ultimate indulgence!