
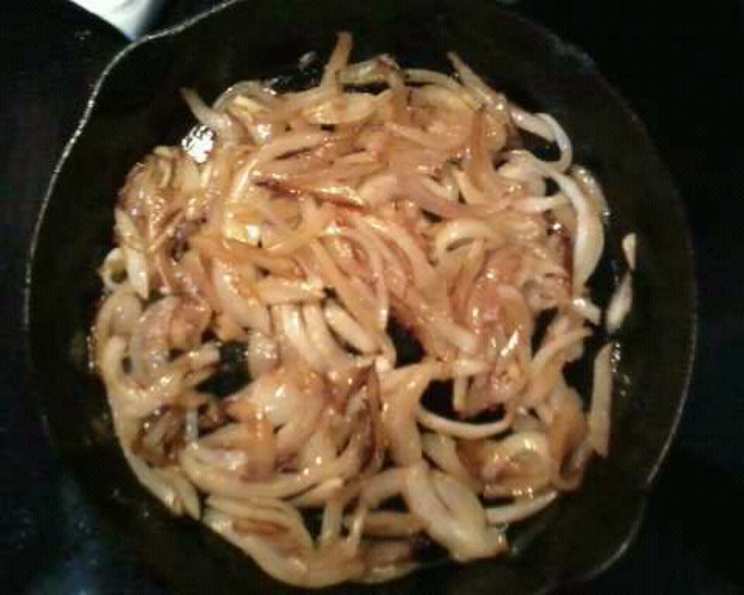
Joe’s Sautéed Onions: A Simple Pleasure
The aroma still takes me back. I can almost see my grandfather, Joe, standing over his well-worn cast iron skillet, a wooden spoon in hand, patiently coaxing sweetness from humble onions. The kitchen would fill with a savory, caramelized scent that promised comfort and flavor. These weren’t just onions; they were Joe’s Onions, a simple side dish elevated to pure deliciousness by his patient technique and a few key ingredients. The taste of these onions, spooned generously over everything from grilled steak to a simple piece of toast, are forever etched in my culinary memory.
Recipe Overview
- Prep Time: 10 minutes
- Cook Time: 30-60+ minutes
- Total Time: 40-70+ minutes
- Servings: 1-2
- Yields: 1 pan
- Dietary Type: Vegetarian, Vegan (if using olive oil only)
Ingredients
- 1-3 Vidalia onions
- Olive oil (approximately 1 teaspoon per onion)
- Salt
- Butter (optional)
- Sugar (optional)
- Water (as needed)
- Optional seasonings such as fajita or cajun seasoning
Equipment Needed
- Cutting board
- Knife
- Cast iron skillet (recommended) or other heavy-bottomed skillet
- Wooden spoon or spatula
- Fork
Instructions
-
Begin by preparing the onions. Slice off the root and top ends, then peel them. Cut each onion in half. Lay the halves cut-side down on your cutting board and slice them lengthwise to your desired thickness. I prefer mine to be about ¼ inch thick, but feel free to adjust this based on your preference.
-
Select your skillet. I highly recommend using a cast iron skillet for the best heat distribution and caramelization, as this is what Joe used. However, any heavy-bottomed skillet will work.
-
Coat the bottom of the skillet with olive oil, using approximately 1 teaspoon of olive oil per onion. Don’t be afraid to be generous – the oil helps the onions cook evenly and prevents sticking, especially at the beginning.
-
Heat the skillet over medium-high heat. You want the oil to shimmer but not smoke.
-
Add the sliced onions to the hot skillet and stir to coat them evenly with the oil. Spread the onions out in a single layer as much as possible. This will promote even browning.
-
Let the onions cook, stirring occasionally. Be patient! This initial stage is all about softening the onions and drawing out their moisture.
-
After about 10 minutes, sprinkle some salt over the onions. You can also add any other desired seasonings at this point, such as fajita or cajun seasoning for a flavor boost. If you want to encourage caramelization, you can also add a pinch of sugar.
-
If the onions start to dry out and stick to the pan before they begin to brown, add a tablespoon or two of water to the skillet. This will deglaze the pan and create some steam, helping the onions cook through without burning.
-
At this stage, you have the option to use butter instead of the olive oil, or a mixture of both. The butter will add richness and a deeper flavor to the onions. I typically use a combination of olive oil and butter.
-
Continue cooking the onions for 30 minutes to an hour or even longer, stirring them every few minutes. The longer they cook, the sweeter and more caramelized they will become. The cooking time will depend on how deeply caramelized you want them.
-
As the onions cook, they will start to stick to the pan. This is a good thing! Let them stick a little and brown, but be sure to stir them before they burn. A fork is your best friend here. It will help you scrape up the browned bits from the bottom of the skillet, which are packed with flavor.
-
After the first 20 to 30 minutes, you may want to lower the temperature to medium or medium-low, especially if the onions are browning too quickly. You may also need to add a little more oil or butter if you find the onions beginning to burn.
-
Continue to cook and scrape, cook and scrape, until the onions are a rich, browned color. This process can take time, but the results are well worth the effort. Remember to taste and adjust the seasoning with salt as needed.
-
Once the onions have reached your desired level of caramelization, remove them from the heat and serve immediately.
Expert Tips & Tricks
- Patience is key: Don’t rush the cooking process. Low and slow is the key to perfectly caramelized onions.
- Use a heavy-bottomed skillet: This will help to distribute the heat evenly and prevent the onions from burning.
- Don’t overcrowd the pan: Cook the onions in batches if necessary to avoid steaming them instead of browning them.
- Deglaze the pan: If the onions start to stick, add a splash of water to deglaze the pan and scrape up the browned bits.
- Adjust the seasoning to taste: Don’t be afraid to experiment with different seasonings to find your favorite flavor combination. Try adding a pinch of red pepper flakes for a touch of heat, or a splash of balsamic vinegar for a tangy flavor.
Serving & Storage Suggestions
Joe’s Sautéed Onions are incredibly versatile. Serve them as a side dish with grilled meats, roasted vegetables, or scrambled eggs. They’re also delicious on burgers, sandwiches, pizzas, or even stirred into pasta.
Leftover sautéed onions can be stored in an airtight container in the refrigerator for up to 3-4 days. To reheat, simply sauté them in a skillet over medium heat until warmed through. They can also be frozen for longer storage. Thaw them in the refrigerator overnight before reheating.
Nutritional Information
| Nutrient | Amount per Serving | % Daily Value |
|---|---|---|
| Calories | 44 kcal | N/A |
| Total Fat | 0.1 g | 0% |
| Saturated Fat | 0.1 g | 0% |
| Cholesterol | 0 mg | 0% |
| Sodium | 4.4 mg | 0% |
| Total Carbohydrate | 10.3 g | 3% |
| Dietary Fiber | 1.9 g | 7% |
| Sugars | 4.7 g | N/A |
| Protein | 1.2 g | 2% |
Note: Nutritional information is an estimate and may vary based on specific ingredients and portion sizes.
Variations & Substitutions
- Sweeten it up: Experiment with different types of sweeteners like honey, maple syrup, or brown sugar for a richer, more complex flavor.
- Add acidity: A splash of balsamic vinegar or sherry vinegar can add a tangy counterpoint to the sweetness of the onions.
- Spice it up: Incorporate a pinch of red pepper flakes or a dash of hot sauce for a spicy kick.
- Use different onions: While Vidalia onions are the classic choice for their sweetness, you can also use other types of onions like yellow, white, or red onions. Each variety will bring a slightly different flavor profile to the dish. Shallots are also a great option for a milder, more delicate flavor.
FAQs (Frequently Asked Questions)
Q: Can I use a different type of pan if I don’t have a cast iron skillet?
A: Yes, while a cast iron skillet is recommended for its even heat distribution, any heavy-bottomed skillet will work. Stainless steel or non-stick pans are good alternatives.
Q: How do I prevent the onions from burning?
A: Keep the heat at medium-high initially to soften the onions, then reduce it to medium or medium-low as they begin to brown. Stir them frequently and add a little water if they start to stick.
Q: Can I make these ahead of time?
A: Yes! These onions actually taste even better the next day. Store them in an airtight container in the refrigerator and reheat them before serving.
Q: How do I know when the onions are done?
A: The onions are done when they are a rich, browned color and have a soft, almost melting texture. Taste them to make sure they are sweet and caramelized to your liking.
Q: What are some good ways to use these onions?
A: Joe’s Sautéed Onions are incredibly versatile. They’re delicious on burgers, sandwiches, pizzas, tacos, stirred into omelets or scrambled eggs, or served as a side dish with grilled meats.
Final Thoughts
Joe’s Sautéed Onions are more than just a recipe; they’re a reminder that simple ingredients, cooked with patience and love, can create something truly special. I encourage you to try this recipe and experience the magic for yourself. Don’t be afraid to experiment with different seasonings and variations to make it your own. Share your creations and let me know what you think! These onions pair perfectly with a hearty steak or a simple glass of red wine. Enjoy!