
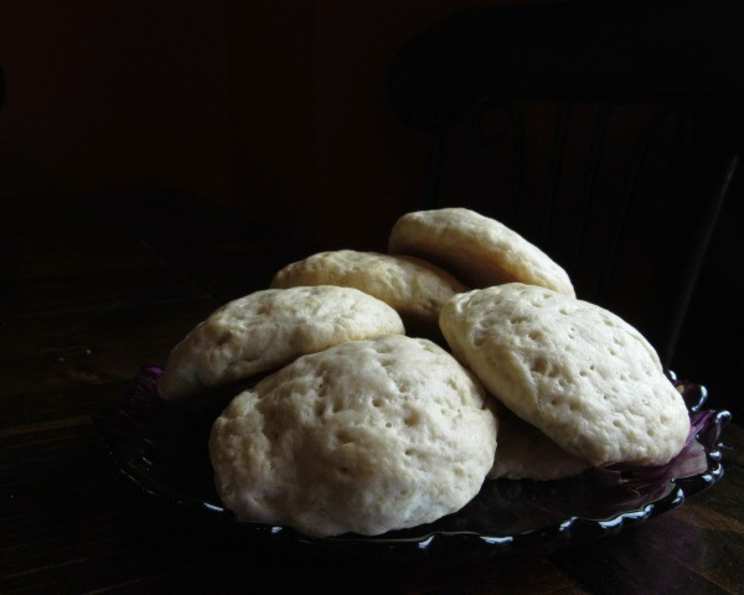
Journey Cakes: A Taste of the Caribbean in Every Bite
The scent of baking coconut and warm bread instantly transports me back to a small beachside cafe in Belize. The salty air mingled with the sweet aroma as I eagerly awaited my first taste of a Johnny Cake, fresh from the oven. These simple, golden rounds, served with a generous dollop of butter, were a revelation – a humble yet unforgettable taste of the Caribbean, a taste that continues to bring back feelings of warmth and happiness.
Recipe Overview
- Prep Time: 15 minutes
- Cook Time: 15-18 minutes
- Total Time: 30-33 minutes
- Yields: 12 Johnny cakes
- Dietary Type: Vegetarian (easily adaptable to vegan)
Ingredients
- 3 cups all-purpose flour
- 1 teaspoon salt
- 1 1/4 cups coconut milk, plus extra for brushing
- 3 teaspoons baking powder
- 4 tablespoons shortening or 4 tablespoons unsalted butter
- 2 tablespoons sugar (optional)
Equipment Needed
- Large mixing bowl
- Measuring cups and spoons
- Cookie sheet/baking tray
- Fork
- Floured board
- Oven
Instructions
-
Begin by preheating your oven to 375°F (190°C). This is crucial for even baking and achieving that perfect golden-brown crust.
-
In a large bowl, whisk together the all-purpose flour, sugar (if using), baking powder, and salt. This ensures that the leavening agent and seasonings are evenly distributed throughout the dough.
-
Add the shortening or butter to the flour mixture. Using your fingertips (or a pastry blender, if you prefer), rub the fat into the flour until the mixture resembles coarse pea-sized crumbles. This step is essential for creating a tender, flaky texture. The colder your fat, the better the results!
-
Gently stir in the coconut milk into the dry ingredients until everything is just moistened and the dough comes together to form a ball. Be careful not to overmix, as this can lead to tough Johnny Cakes.
-
Place the dough on a lightly floured board. Knead it for about a minute. This brief kneading helps to develop the gluten slightly, giving the Johnny Cakes a bit of structure without making them too chewy.
-
Divide the dough into approximately 12 equal pieces. Roughly shape each piece into a ball.
-
Flatten each ball to about ½ inch thick. You can use your hands or a rolling pin for this step. Don’t worry about making them perfectly round – a rustic shape adds to their charm.
-
Place the flattened dough rounds onto a cookie sheet or baking tray.
-
Using a fork, lightly poke the top of each Johnny Cake until they are covered with tiny holes. This prevents them from puffing up too much in the oven and helps them bake evenly.
-
Brush the tops of the Johnny Cakes with a little extra coconut milk. This will give them a beautiful golden-brown color and a subtle coconut flavor.
-
Bake at 375°F (190°C) for 15-18 minutes, or until they are lightly browned. Keep a close eye on them towards the end of the baking time to prevent burning. Ovens can vary, so adjust the baking time as needed.
-
Remove from the oven and serve warm. These are best enjoyed fresh!
Expert Tips & Tricks
- For a richer flavor: Consider using brown butter instead of regular butter. Simply melt the butter in a saucepan over medium heat and cook until it turns a nutty brown color. Let it cool slightly before adding it to the flour mixture.
- Make ahead: You can prepare the dough ahead of time and store it in the refrigerator for up to 24 hours. Just wrap it tightly in plastic wrap to prevent it from drying out. Let it come to room temperature slightly before rolling and baking.
- Even baking: Make sure your oven is properly calibrated for even heating.
- Vegan Version: Replace the butter with vegetable shortening or a vegan butter alternative to make this recipe fully vegan.
Serving & Storage Suggestions
Serve these warm with butter, jam, or honey. They’re also delicious alongside savory dishes like stews, soups, or grilled meats. Leftover Johnny Cakes can be stored in an airtight container at room temperature for up to 2 days, or in the refrigerator for up to 5 days. Reheat them in the oven or microwave before serving. You can also freeze them for longer storage. Wrap them individually in plastic wrap and then place them in a freezer bag. They can be frozen for up to 2 months. Thaw them overnight in the refrigerator before reheating.
Nutritional Information
| Nutrient | Amount per Serving | % Daily Value |
|---|---|---|
| Calories | 198.4 kcal | – |
| Calories from Fat | 86 kcal | – |
| Total Fat | 9.6 g | 14% |
| Saturated Fat | 5.6 g | 27% |
| Cholesterol | 0 mg | 0% |
| Sodium | 288.2 mg | 12% |
| Total Carbohydrate | 24.8 g | 8% |
| Dietary Fiber | 0.8 g | 3% |
| Sugars | 0.1 g | 0% |
| Protein | 3.7 g | 7% |
Note: Nutritional information is an estimate and can vary based on specific ingredients and portion sizes.
Variations & Substitutions
- Spicy Johnny Cakes: Add a pinch of cayenne pepper or a finely chopped jalapeño to the dough for a spicy kick.
- Sweet Johnny Cakes: Increase the amount of sugar to 4 tablespoons and add a teaspoon of vanilla extract to the dough. You can also add dried fruit, such as raisins or cranberries.
- Gluten-Free Johnny Cakes: Substitute the all-purpose flour with a gluten-free all-purpose flour blend. You may need to add a little extra liquid to achieve the right consistency.
- Different Milk: While coconut milk is traditional, you can substitute it with other non-dairy milks, such as almond milk or soy milk. The flavor will be slightly different, but the texture should be similar.
FAQs (Frequently Asked Questions)
Q: Why are they called Johnny Cakes or Journey Cakes?
A: The name “Journey Cakes” is believed to have originated from their suitability for travel. They keep well for several days, making them a convenient food source for long journeys.
Q: Can I use self-rising flour instead of all-purpose flour and baking powder?
A: While you can, it’s not recommended. Self-rising flour contains salt and baking powder, and the proportions might not be ideal for this recipe, potentially affecting the taste and texture. It’s best to stick to the recipe as written.
Q: How can I tell if the Johnny Cakes are done?
A: They are done when they are lightly browned and the bottoms sound hollow when tapped. You can also insert a toothpick into the center; it should come out clean.
Q: My Johnny Cakes are too dry. What did I do wrong?
A: Overbaking is the most common cause of dry Johnny Cakes. Also, make sure you’re not adding too much flour. Measure your flour accurately using the spoon and level method (spoon the flour into the measuring cup and then level it off with a knife).
Q: Can I freeze Johnny Cakes?
A: Yes, you can freeze them! Wrap them individually in plastic wrap and then place them in a freezer bag. They can be frozen for up to 2 months. Thaw them overnight in the refrigerator before reheating.
Final Thoughts
These Journey Cakes are more than just a recipe; they’re a taste of history, a piece of Caribbean sunshine, and a reminder that simple ingredients, prepared with care, can create something truly special. I encourage you to try this recipe and experience the unique flavor and texture of these beloved cakes. Feel free to experiment with variations to suit your taste, and don’t hesitate to share your feedback. Consider pairing them with a cup of hot coffee or a refreshing glass of fruit punch for the perfect Caribbean-inspired treat!