
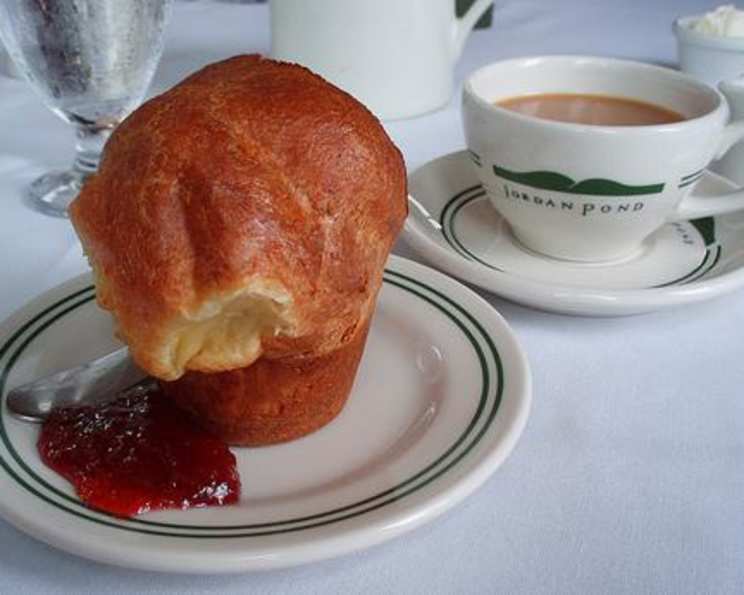
Jordan Pond Popovers: A Taste of Acadia
The first time I tasted a Jordan Pond Popover, I was hiking in Acadia National Park, the salty Maine air stinging my cheeks. After a long trek up Cadillac Mountain, we stumbled upon the Jordan Pond House, its lawn sloping gently towards the serene water. The warm, buttery popovers, served with homemade strawberry jam, were a revelation. The airy, almost ethereal texture against the tangy sweetness of the jam was pure magic. It was a moment that perfectly encapsulated the beauty and simplicity of Maine – and a taste I’ve been chasing ever since. Now, I can recreate a bit of that Acadia magic in my own kitchen.
Recipe Overview
- Prep Time: 20 minutes
- Cook Time: 30 minutes
- Total Time: 50 minutes
- Servings: Variable (depends on cup size)
- Yield: 6-12 popovers (depending on cup size)
- Dietary Type: Vegetarian
Ingredients
- 2 large eggs
- 1 cup whole milk
- 1 cup all-purpose flour, sifted (very important)
- ½ teaspoon salt
- ⅛ teaspoon baking soda
- Jam (optional), for serving
- Butter (optional), for serving
Equipment Needed
- Electric Mixer
- Sifter
- Rubber Spatula
- Fine-mesh Screen Strainer
- Popover cups or Custard cups (or muffin tin)
Instructions
-
Preheat your oven to 425 degrees Fahrenheit. This initial high heat is crucial for creating the steam that makes popovers “pop.”
-
In a mixing bowl, beat the eggs at high speed with an electric mixer for 3 minutes. You’re looking for the mixture to turn a lemon yellow color and become significantly lighter and fluffier. This incorporates air into the batter, which is essential for the popovers’ rise.
-
Reduce the mixer speed to its lowest setting. Carefully and slowly drizzle in ½ cup of the milk, taking approximately 20 seconds to pour it in a thin, steady stream. This gradual addition helps to prevent the mixture from curdling.
-
In a separate bowl, sift the flour. Sifting is incredibly important for achieving that light, airy texture. Once sifted, measure 1 cup of the sifted flour as precisely as possible. Add the salt and baking soda to the sifted flour, and sift the mixture again. This ensures even distribution of the leavening agents.
-
With the mixer still running on its lowest speed, gradually add the dry ingredients to the egg and milk mixture.
-
Turn the mixer off. Use a rubber spatula to gently scrape the sides and bottom of the bowl, ensuring that all of the flour is fully incorporated into the liquid. You want to avoid over-mixing at this stage; just make sure there are no streaks of dry flour remaining.
-
Set the mixer to medium speed and slowly drizzle in the remaining milk. Blend for 1 minute. This final addition of milk helps to create a smooth, pourable batter.
-
Increase the mixer speed to its highest setting and beat for 10 minutes. If you are using a Kitchen-Aid style mixer with a wire whip, beat for only 5 minutes. This extended beating develops the gluten in the flour, which provides structure for the popovers. Don’t worry about over-beating at this stage; extra beating won’t hurt.
-
Filter the batter through a fine-mesh screen strainer to remove any lumps. This step is crucial for achieving a perfectly smooth and even texture in the final popovers.
-
Pour the batter into well-buttered popover cups or custard cups. If you’re using a muffin tin (not ideal, but it works in a pinch), fill only the corner cups. Filling only the corners allows for better air circulation and more even baking.
-
Bake at 425 degrees Fahrenheit for 15 minutes. This initial burst of high heat generates steam and causes the popovers to rapidly expand.
-
Without opening the oven door, reduce the heat to 350 degrees Fahrenheit and bake for an additional 15 minutes. If your oven door has a window, you may need to bake for 20 minutes at 350 degrees Fahrenheit. The lower temperature allows the popovers to set and dry out slightly, preventing them from collapsing.
Expert Tips & Tricks
- Temperature is key: The oven temperature needs to be accurate. An oven thermometer is a worthwhile investment.
- Don’t peek! Resist the urge to open the oven door during baking. The sudden temperature change can cause the popovers to deflate.
- Butter Generously: Generously buttering the popover cups prevents sticking and also contributes to the golden-brown color and crisp edges.
- Rest the batter: While not strictly necessary, letting the batter rest for 15-30 minutes can allow the gluten to relax, resulting in slightly more tender popovers.
- Piercing for Perfection: After baking, pierce each popover with a skewer or knife to release steam. This helps prevent them from becoming soggy.
Serving & Storage Suggestions
Serve the Jordan Pond Popovers immediately after baking for the best texture. They are delicious served warm with butter and your favorite jam. Leftover popovers can be stored at room temperature in an airtight container for up to 24 hours, but they are best enjoyed fresh. To reheat, place them in a preheated 350°F oven for a few minutes to crisp them up.
Nutritional Information
| Nutrient | Amount per Serving (estimated) | % Daily Value* |
|---|---|---|
| Calories | 200 kcal | 10% |
| Total Fat | 10g | 15% |
| Saturated Fat | 5g | 25% |
| Cholesterol | 100mg | 33% |
| Sodium | 200mg | 8% |
| Total Carbohydrate | 20g | 7% |
| Dietary Fiber | 1g | 4% |
| Sugars | 3g | – |
| Protein | 5g | 10% |
*Percent Daily Values are based on a 2,000 calorie diet. Your daily values may be higher or lower depending on your calorie needs.
Variations & Substitutions
- Gluten-Free Popovers: Substitute the all-purpose flour with a gluten-free all-purpose flour blend. Be sure to check the blend contains xanthan gum or add some to the batter as this is necessary for structure.
- Dairy-Free Popovers: Replace the whole milk with almond milk, soy milk, or oat milk.
- Savory Popovers: Omit the baking soda and add a pinch of garlic powder, onion powder, or dried herbs to the flour mixture for a savory twist.
- Cheese Popovers: Add ½ cup of shredded cheese (cheddar, Gruyere, or Parmesan) to the batter just before pouring it into the popover cups.
FAQs (Frequently Asked Questions)
Q: Why didn’t my popovers pop?
A: There are several reasons why popovers might not pop. The most common culprits are not using a hot enough oven, opening the oven door during baking, or using old baking soda.
Q: Can I make the batter ahead of time?
A: While it’s best to bake the popovers immediately after making the batter, you can prepare the batter up to an hour in advance and store it in the refrigerator. Just be sure to whisk it gently before pouring it into the popover cups.
Q: What if I don’t have popover cups?
A: Custard cups or a muffin tin can be used as a substitute. If using a muffin tin, fill only the corner cups to allow for better air circulation.
Q: Can I freeze popovers?
A: Yes, you can freeze popovers. Let them cool completely, then wrap them individually in plastic wrap and place them in a freezer bag. They can be stored in the freezer for up to 2 months. Reheat them in a preheated 350°F oven until warmed through.
Q: Why are my popovers soggy?
A: Soggy popovers can result from not baking them long enough or from letting them cool completely in the popover cups. Piercing them with a skewer after baking and allowing them to cool slightly on a wire rack can help prevent sogginess.
Final Thoughts
These Jordan Pond Popovers are more than just a recipe; they’re a little piece of New England charm that you can create in your own home. So go ahead, preheat your oven, sift your flour, and whisk your way to light, airy perfection. Share them with friends and family, and maybe even pair them with a steaming cup of tea for the ultimate cozy experience. And don’t forget the jam! I hope you’ll give these popovers a try and let me know what you think. Bon appétit!