
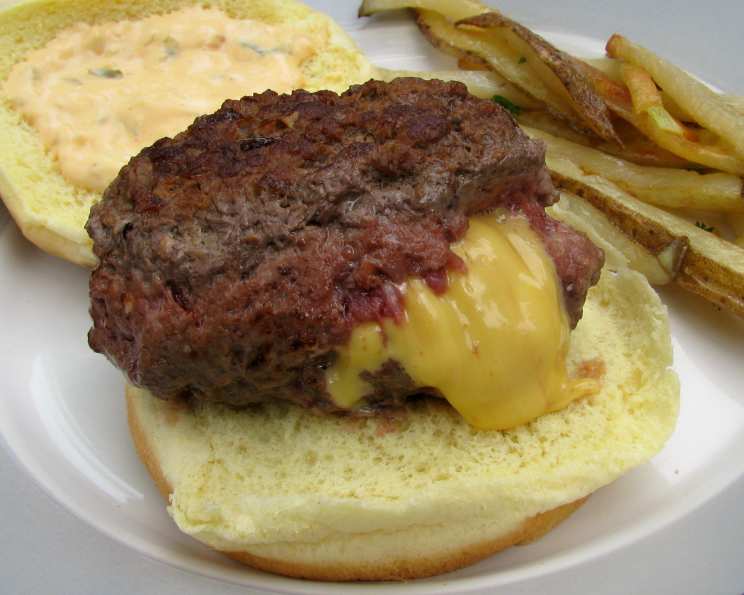
The Gloriously Gooey Jucy Lucy Cheeseburger
There are certain food memories that are etched into my mind, vivid and visceral. One such memory involves a road trip, a questionable map, and a desperate hunger that led me to a small, unassuming diner in Minneapolis. I ordered a burger I’d never heard of – a Jucy Lucy. The first bite was pure, unadulterated bliss: molten cheese oozing out from the center of a perfectly cooked patty. It wasn’t just a burger; it was an experience, a revelation. I’ve been chasing that perfect, cheesy center ever since. Today, I’m thrilled to share my take on this Midwestern masterpiece.
Recipe Overview
- Prep Time: 15 minutes
- Cook Time: 6-8 minutes
- Total Time: 23 minutes
- Servings: 4
- Yields: 4 patties
- Dietary Type: Not Gluten-Free
Ingredients
- 2 lbs ground beef, chilled
- 1 tablespoon Worcestershire sauce
- 2 teaspoons garlic powder
- 4 ounces American cheese, cut into roughly 1-inch squares (about 8 slices)
- Kosher salt
- Ground black pepper
- Burger Buns (for serving)
- Your Favorite Burger Condiments (for serving)
Equipment Needed
- Mixing bowl
- Cast-iron skillet or heavy-bottomed pan (or grill)
- Toothpicks (optional)
Instructions
-
Begin by preheating your grill to 400°F. Alternatively, you can use a cast iron skillet or heavy-bottomed pan on the stovetop.
-
In a large mixing bowl, gently combine the chilled ground beef, Worcestershire sauce, garlic powder, kosher salt, and ground black pepper. Be careful not to overmix, as this can result in a tough burger. Portion the mixture into eight equal units.
-
Shape each portion into a thin, round patty that is slightly larger in diameter than your American cheese squares. The patties need to be large enough to completely encase the cheese.
-
Fold each cheese slice in half twice, creating a small stack of quartered cheese. Place one folded cheese stack on four of the patties. Ensure the cheese is centered, leaving a small border around the edge.
-
Carefully top each cheese-covered patty with one of the remaining four patties.
-
This is the most crucial step: Tightly crimp the edges of the patties together to form an absolutely tight seal. Press firmly along the entire circumference to prevent any cheese from escaping during cooking. Use your fingers or a fork to ensure a complete seal. A weak seal is the enemy of a good Jucy Lucy!
-
Whether using a cast-iron skillet or a grill, ensure your cooking surface is preheated to medium heat. Place the burgers onto the hot surface and cook for approximately 3 to 4 minutes on the first side. You’ll likely notice the burgers puffing up as the cheese melts and creates steam – this is perfectly normal and a sign that the magic is happening inside. Do not be alarmed!
-
Carefully flip the burgers. At this point, you can optionally use a toothpick to prick the top of each burger to allow steam to escape. This helps prevent the burger from bursting open. Allow the burgers to cook for another 3 to 4 minutes on the second side, or until they reach your desired level of doneness. Use a meat thermometer to ensure the internal temperature reaches 160°F for safe consumption.
-
Remove the patties from the pan or grill. Allow them to rest for a minute or two before serving.
-
Bun those suckers! Place each Jucy Lucy on a burger bun and top with your favorite condiments. Ketchup, mustard, pickles, and onions are classic choices, but feel free to get creative.
-
Dig in! But be careful – that molten cheese is hot!
Expert Tips & Tricks
- Chill the Beef: Starting with cold ground beef is key to preventing the cheese from melting too quickly and escaping before the patty is cooked through.
- Don’t Overwork the Meat: Overmixing the ground beef will result in a tough burger. Handle it gently and mix only until the ingredients are just combined.
- The Seal is Crucial: Spend extra time ensuring a perfect seal. A leaky burger is a sad burger.
- Cheese Choice: While American cheese is traditional, you can experiment with other cheeses that melt well, such as cheddar, pepper jack, or provolone. However, stick to a cheese that melts smoothly and isn’t too oily.
- Prevent Blowouts: The toothpick trick is your friend! Poking a small hole in the top of the burger allows steam to escape and prevents explosions.
- Resting Time: Letting the burgers rest for a minute or two after cooking allows the juices to redistribute, resulting in a more flavorful and tender burger.
- Use a Meat Thermometer: To ensure the burgers are cooked to a safe internal temperature of 160°F, use a meat thermometer. Insert it into the side of the burger to avoid puncturing the cheese pocket.
Serving & Storage Suggestions
Serve your Jucy Lucy immediately while the cheese is still molten and gooey. Pair it with classic burger sides such as french fries, onion rings, coleslaw, or a simple green salad.
Leftover Jucy Lucys can be stored in an airtight container in the refrigerator for up to 3 days. Reheat them gently in a skillet over medium-low heat, or in a microwave. Note that the cheese may not be as gooey upon reheating. Freezing is not recommended as it can alter the texture of the burger and cheese.
Nutritional Information
Note: Nutritional information is an estimate and may vary based on specific ingredients and portion sizes.
| Nutrient | Amount per Serving | % Daily Value |
|---|---|---|
| Calories | 590 kcal | 30% |
| Total Fat | 41 g | 63% |
| Saturated Fat | 18 g | 90% |
| Cholesterol | 173 mg | 58% |
| Sodium | 469 mg | 20% |
| Total Carbohydrate | 4 g | 1% |
| Dietary Fiber | 0 g | 0% |
| Sugars | 1 g | 2% |
| Protein | 48 g | 96% |
Variations & Substitutions
- Spicy Jucy Lucy: Add a pinch of cayenne pepper or a dash of hot sauce to the ground beef mixture for a spicy kick. You could also use pepper jack cheese for an extra layer of heat.
- Gourmet Jucy Lucy: Elevate your Jucy Lucy by using a blend of ground beef and ground chuck, and substituting the American cheese with a sharp cheddar or Gruyere. Top with caramelized onions and a balsamic glaze.
- Turkey Jucy Lucy: For a leaner option, substitute the ground beef with ground turkey. Be sure to add extra moisture, as ground turkey tends to be drier than ground beef.
- Lamb Jucy Lucy: For a richer, more flavorful burger, use ground lamb. Season with garlic, rosemary, and mint for a Mediterranean twist.
- Bacon Jucy Lucy: Cook up some crispy bacon and crumble it into the center with the cheese for an extra layer of smoky flavor.
FAQs (Frequently Asked Questions)
Q: What makes a Jucy Lucy different from a regular cheeseburger?
A: The defining characteristic is the cheese being inside the burger, creating a molten core that bursts out when you take a bite, rather than simply being melted on top.
Q: Can I use different types of cheese?
A: Absolutely! While American cheese is traditional, you can experiment with other cheeses that melt well, such as cheddar, provolone, or even a creamy blue cheese.
Q: How do I prevent the cheese from leaking out?
A: The key is to ensure a tight seal when crimping the edges of the patties together. Also, chilling the beef beforehand helps prevent the cheese from melting too quickly.
Q: How do I know when the burger is cooked through?
A: Use a meat thermometer to ensure the internal temperature reaches 160°F. Insert it into the side of the burger to avoid puncturing the cheese pocket.
Q: Can I cook these burgers indoors if I don’t have a grill?
A: Yes, a cast-iron skillet or heavy-bottomed pan works perfectly well for cooking Jucy Lucys indoors. Just be sure to preheat the pan properly.
Final Thoughts
The Jucy Lucy is more than just a burger; it’s an experience. It’s a messy, glorious, utterly satisfying bite of pure comfort food. Don’t be intimidated by the “tight seal” – with a little practice, you’ll be creating molten-cheese masterpieces in no time. So, fire up the grill (or the skillet!), gather your ingredients, and prepare to be amazed. I encourage you to experiment with different cheeses and toppings to create your own signature Jucy Lucy. And most importantly, don’t forget to share your culinary creations (and photos!) with friends and family. Happy cooking!