
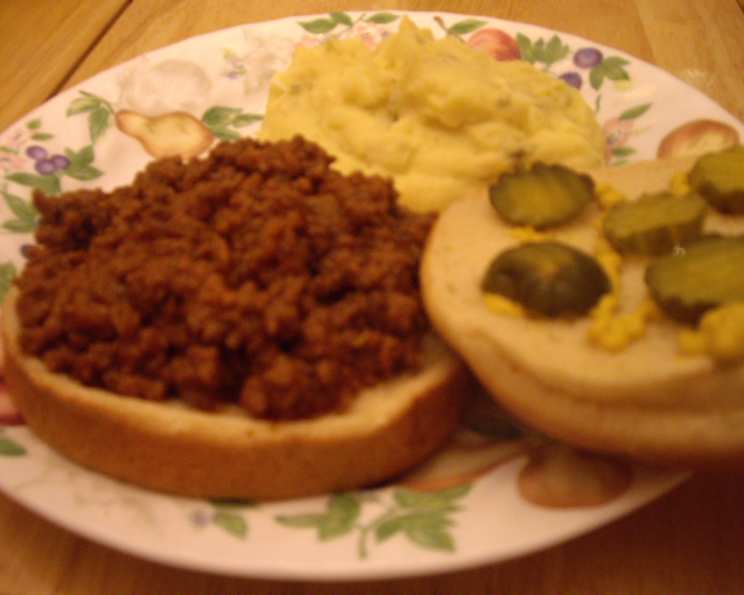
Juicyburger: A Taste of Nostalgia
The aroma of sizzling ground beef, mingling with the sweet and tangy scent of ketchup, instantly transports me back to summer evenings spent at my grandma’s house. She would always whip up a batch of these saucy, savory sandwiches, and we’d devour them on her porch swing, juice dripping down our chins, utterly content. Those Juicyburgers weren’t just a meal; they were a symbol of family, comfort, and carefree happiness. This recipe captures the essence of those cherished memories, a simple yet deeply satisfying dish that I’m thrilled to share with you.
Recipe Overview
- Prep Time: 10 minutes
- Cook Time: 40 minutes
- Total Time: 50 minutes
- Servings: 12
- Yield: 6 cups
- Dietary Type: Can be adapted to be Gluten-Free (use Gluten-Free buns)
Ingredients
- 3 lbs lean ground beef
- 1 1/2 teaspoons salt
- 1/2 teaspoon pepper
- 3 tablespoons onion flakes
- 1/3 cup water
- 18 ounces catsup
Equipment Needed
- Large skillet
- Spoon or spatula for stirring
- Measuring spoons and cups
- Crock-Pot (optional, for serving)
Instructions
-
In a large skillet, combine the ground beef, salt, pepper, onion flakes, and water.
-
Cover the skillet and steam cook the mixture over medium heat. This step is crucial as it ensures the meat stays moist and tender.
-
Stir the mixture frequently, breaking up the ground beef into small, loose pieces. Continue cooking until the meat is no longer pink. It’s important to stir frequently to prevent sticking and ensure even cooking.
-
Be careful not to overcook the ground beef. Overcooked beef will be dry and tough. You want it just cooked through, not browned and crispy.
-
Once the meat is cooked, drain off any excess grease from the skillet. This helps to keep the Juicyburgers from being too oily.
-
Return the drained meat mixture to the skillet.
-
Add the catsup to the meat mixture and stir well to combine. Make sure the catsup is evenly distributed throughout the meat.
-
Simmer the mixture on low heat until serving time. This allows the flavors to meld together and the sauce to thicken slightly.
-
For parties or picnics, you can transfer the meat mixture to a Crock-Pot to keep it warm and easily serve your guests. This method also works well if you’re making the Juicyburger filling ahead of time.
Expert Tips & Tricks
- Browning Boost: For a deeper, richer flavor, you can brown the ground beef in a separate pan before adding it to the skillet with the other ingredients. This adds an extra layer of complexity to the dish.
- Flavor Infusion: If you want to add a little extra zing, try adding a tablespoon of Worcestershire sauce or a dash of hot sauce to the meat mixture along with the catsup.
- Sweetness Adjustment: If you prefer a sweeter Juicyburger, add a tablespoon or two of brown sugar or honey to the mixture while it’s simmering. Taste and adjust to your liking.
- Spice it Up: Add a pinch of red pepper flakes for a slight kick.
- Onion Enhancement: While the recipe calls for onion flakes, you can substitute with finely diced fresh onion that has been sautéed until softened before adding to the beef. This delivers a richer onion flavor.
- Make-Ahead Magic: The Juicyburger filling can be made a day or two in advance and stored in the refrigerator. Simply reheat it on the stovetop or in a Crock-Pot before serving. This is a great time-saver for busy weeknights or parties.
Serving & Storage Suggestions
Serve the Juicyburger filling on hamburger buns, preferably toasted for added texture. You can also add toppings such as shredded cheese, pickles, lettuce, or sliced tomatoes to customize your Juicyburger. A side of coleslaw or potato salad complements the richness of the Juicyburger perfectly.
Leftover Juicyburger filling should be stored in an airtight container in the refrigerator. It will keep for 3-4 days. To reheat, simply warm it up on the stovetop or in the microwave until heated through. You can also freeze the Juicyburger filling for longer storage. It will keep in the freezer for up to 2-3 months. Thaw it in the refrigerator overnight before reheating.
Nutritional Information
| Nutrient | Amount per Serving | % Daily Value (Approximate) |
|---|---|---|
| Calories | 246 kcal | N/A |
| Calories from Fat | 104 kcal | N/A |
| Total Fat | 11.5 g | 17% |
| Saturated Fat | 4.6 g | 23% |
| Cholesterol | 73.7 mg | 24% |
| Sodium | 843.4 mg | 35% |
| Total Carbohydrate | 11.8 g | 3% |
| Dietary Fiber | 0.3 g | 1% |
| Sugars | 10.2 g | N/A |
| Protein | 23.6 g | 47% |
Nutritional information is an estimate and can vary based on specific ingredients and preparation methods.
Variations & Substitutions
- Turkey Juicyburger: Substitute the ground beef with ground turkey for a leaner option.
- Vegetarian Juicyburger: Use a plant-based ground meat substitute for a vegetarian version. You may need to adjust cooking times slightly.
- Gluten-Free: Serve the Juicyburger filling on gluten-free buns for a gluten-free meal.
- Spicy Juicyburger: Add a diced jalapeno pepper or a teaspoon of chili powder to the meat mixture for a spicy kick.
- BBQ Juicyburger: Replace half of the catsup with your favorite BBQ sauce for a smoky, tangy flavor.
- Pizza Juicyburger: Mix in some pepperoni slices and mozzarella cheese for a pizza-inspired variation.
FAQs (Frequently Asked Questions)
Q: Can I use fresh onions instead of onion flakes?
A: Yes, you can! Finely dice a medium onion and sauté it in the skillet until softened before adding the ground beef. This will add a richer onion flavor.
Q: How can I prevent the meat from drying out?
A: Be sure to steam cook the meat with water as directed in the recipe. Also, avoid overcooking the ground beef, as this can cause it to become dry and tough.
Q: Can I make this in a slow cooker?
A: Absolutely! You can brown the ground beef on the stovetop first, then transfer it to a slow cooker along with the other ingredients. Cook on low for 4-6 hours, or on high for 2-3 hours.
Q: Can I freeze the Juicyburger filling?
A: Yes, the Juicyburger filling freezes well. Allow it to cool completely, then transfer it to an airtight container or freezer bag. It will keep in the freezer for up to 2-3 months.
Q: What are some good toppings for Juicyburgers?
A: The possibilities are endless! Some popular toppings include shredded cheese, pickles, lettuce, sliced tomatoes, onions, and your favorite condiments.
Final Thoughts
I hope you’ll give this Juicyburger recipe a try and experience the simple joy of a truly delicious, nostalgic meal. It’s a crowd-pleaser that’s perfect for family dinners, potlucks, or casual gatherings. Don’t hesitate to experiment with variations and toppings to make it your own. And if you do, please let me know what you think! I’d love to hear about your culinary adventures and any creative twists you come up with. Pair these Juicyburgers with some crispy french fries and a creamy milkshake for the ultimate comfort food experience.