
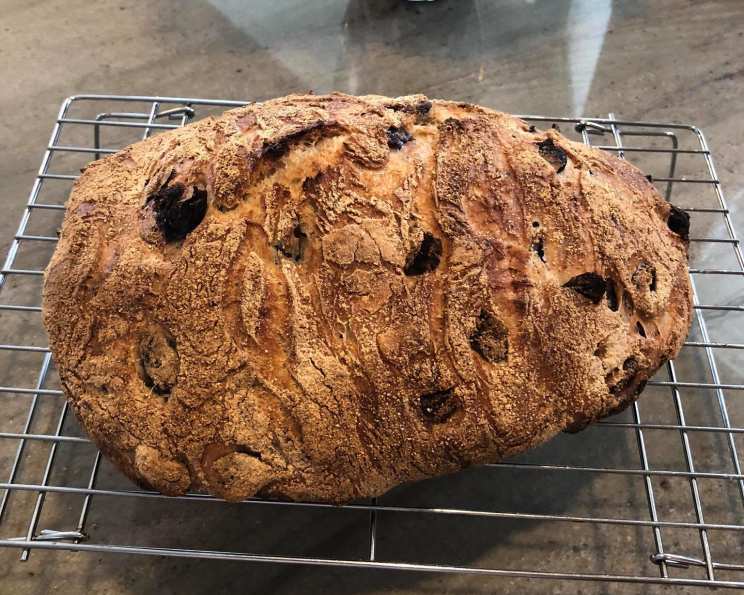
Kalamata Olive Bread: A Taste of the Mediterranean Sun
There’s something magical about the scent of baking bread, especially when it’s laced with the briny aroma of Kalamata olives. I still remember the first time I tasted olive bread fresh from a wood-fired oven during my travels in Greece. The crispy crust, the soft, chewy interior studded with those intensely flavored olives – it was a revelation. It transported me instantly to sun-drenched terraces overlooking the Aegean Sea, the taste lingering long after the last crumb was gone. This recipe captures that essence, bringing a slice of the Mediterranean to your own kitchen.
Recipe Overview
- Prep Time: 1 hour
- Cook Time: 30-40 minutes
- Total Time: 2 hours 30 minutes
- Yields: 2 loaves
- Serves: 36
- Dietary Type: Vegetarian
Ingredients
For the Bread Starter:
- 1 cup warm water (95-105°F)
- 2 teaspoons instant yeast
- 1 cup all-purpose flour
For the Bread:
- ⅔ cup warm water (95-105°F)
- 3 tablespoons honey
- 4 teaspoons instant yeast
- 2 ounces vegetable shortening (¼ cup plus 1 teaspoon)
- 4 ¾ cups all-purpose flour
- 1 tablespoon salt
- 1 ¾ cups Kalamata olives, pitted
Equipment Needed
- Medium mixing bowl
- Stand mixer
- Warm, damp cloth
- Proofing basket or counter space
- Sharp knife or lame
- Spray bottle filled with water
- Baking sheet or loaf pans
- Cooling rack
Instructions
-
Prepare the Starter: In a medium mixing bowl, combine the warm water and instant yeast. Stir until the yeast is fully dissolved. Add the all-purpose flour to the bowl and stir until all ingredients are fully incorporated, forming a shaggy dough. Cover the bowl with a cloth and let the starter ferment at room temperature for 30 minutes. This step allows the yeast to activate and develop flavor.
-
Combine the Dough Ingredients: In the bowl of a stand mixer, combine the warm water, honey, and instant yeast. Stir to dissolve the yeast completely. Add the vegetable shortening, all-purpose flour, salt, starter, and pitted Kalamata olives to the mixer bowl.
-
Mix the Dough: Using the dough hook attachment, mix on low speed until the dough is fully developed and comes together in a smooth, elastic ball. This might take 5-7 minutes. Be patient, allowing the gluten to develop properly for a good bread structure.
-
First Rise: Remove the dough from the mixing bowl. Divide the dough into 2 pieces, each weighing about 22 ounces. You can freeze any remaining dough for future use – it’s a great head start for your next baking session! Roll each piece of dough into a smooth ball. Place the dough on a lightly floured counter or in a proofing basket. Cover with a warm, damp cloth and let the dough rest at room temperature for 30 minutes. This initial rest allows the gluten to relax, making the dough easier to shape.
-
Shape the Loaves: After the first rest, gently form the dough into your desired loaf shapes. You can create classic oblong loaves, round boules, or even rustic free-form loaves. Place the shaped loaves on the counter or in a proofing basket.
-
Second Rise (Proofing): Cover the loaves with a warm, damp cloth and let them proof at room temperature for another 30 minutes. This second rise is crucial for creating a light and airy texture.
-
Preheat the Oven: While the loaves are proofing, preheat your oven to 400°F (200°C).
-
Prepare for Baking: Once the loaves have proofed, score the tops with a sharp knife or lame. This allows the bread to expand properly in the oven and prevents cracking. Immediately before placing the loaves in the oven, spray them generously with water. This creates steam, which helps to form a crispier crust.
-
Bake the Bread: Bake the loaves for 30 to 40 minutes, or until the crusts are a deep golden brown and the internal temperature of the bread reaches 190-200°F (88-93°C). You can use a digital thermometer to check the internal temperature. If the crust is browning too quickly, tent the loaves with aluminum foil during the last 10-15 minutes of baking.
-
Cool the Bread: Remove the bread from the oven and immediately place it on a cooling rack for at least 30 minutes before slicing. This allows the steam to escape, preventing a soggy interior. If the bread was baked in loaf pans, remove the bread from the pans before cooling.
Expert Tips & Tricks
- Olive Quality Matters: Use high-quality Kalamata olives for the best flavor. Look for olives that are plump, firm, and have a deep, rich color.
- Hydration Check: The amount of water needed may vary slightly depending on the humidity and the type of flour used. If the dough seems too dry, add a tablespoon of water at a time until it reaches the desired consistency. It should be slightly sticky but not overly wet.
- Freezing Dough: If you want to bake fresh bread later, you can freeze the dough after the first rise. Simply wrap each loaf tightly in plastic wrap and then in foil. Thaw the dough overnight in the refrigerator before shaping and proofing.
- Crisp Crust Hack: For an extra-crispy crust, place a pan of hot water on the bottom rack of the oven during baking. The steam will create a beautiful, crackly crust.
- Flavor Boost: For an even more intense olive flavor, consider adding a tablespoon or two of olive oil to the dough. You can also add a pinch of dried oregano or rosemary for an extra layer of complexity.
Serving & Storage Suggestions
Serve the Kalamata olive bread warm or at room temperature. It’s delicious on its own, perfect for dipping in olive oil, or as an accompaniment to soups, salads, and cheese platters. The bread is best enjoyed fresh. Store any leftovers in an airtight container at room temperature for up to 2 days. For longer storage, wrap the bread tightly in plastic wrap and freeze it for up to 2 months. To reheat, thaw the bread completely and then warm it in a 350°F (175°C) oven for 10-15 minutes.
Nutritional Information
| Nutrient | Amount per Serving | % Daily Value |
|---|---|---|
| Calories | 101.4 kcal | N/A |
| Calories from Fat | 22 g | 22% |
| Total Fat | 2.5 g | 3% |
| Saturated Fat | 0.6 g | 2% |
| Cholesterol | 0 mg | 0% |
| Sodium | 251.8 mg | 10% |
| Total Carbohydrate | 17.3 g | 5% |
| Dietary Fiber | 0.9 g | 3% |
| Sugars | 1.5 g | 5% |
| Protein | 2.4 g | 4% |
Note: Nutritional information is an estimate and may vary based on specific ingredients and portion sizes.
Variations & Substitutions
- Gluten-Free: Substitute the all-purpose flour with a gluten-free bread flour blend. You may need to adjust the amount of liquid to achieve the correct dough consistency.
- Different Olives: While Kalamata olives are traditional, you can experiment with other types of olives, such as Castelvetrano or Nicoise. Adjust the amount to your preference.
- Herbs & Spices: Enhance the flavor by adding fresh or dried herbs like rosemary, thyme, or oregano. You can also add a pinch of red pepper flakes for a touch of heat.
- Cheese Addition: For a richer flavor, incorporate grated Parmesan or Pecorino Romano cheese into the dough.
- Garlic Infusion: Sauté minced garlic in olive oil and add it to the dough for a savory twist.
FAQs (Frequently Asked Questions)
Q: Can I use active dry yeast instead of instant yeast?
A: Yes, but you’ll need to proof the active dry yeast in warm water for about 5-10 minutes before adding it to the other ingredients. Make sure it gets foamy.
Q: What if I don’t have vegetable shortening?
A: You can substitute the vegetable shortening with an equal amount of olive oil or melted butter.
Q: How do I know when the bread is done baking?
A: The bread is done when the crust is a deep golden brown and the internal temperature reaches 190-200°F (88-93°C). You can also tap the bottom of the loaf – it should sound hollow.
Q: Can I make this bread without a stand mixer?
A: Yes, you can knead the dough by hand on a lightly floured surface for about 10-12 minutes, or until it is smooth and elastic.
Q: Why is my bread dense and not airy?
A: This could be due to several factors, such as not using enough yeast, not proofing the dough for long enough, or using too much flour. Make sure to follow the recipe carefully and use fresh yeast.
Final Thoughts
I hope this Kalamata Olive Bread recipe inspires you to bring a little taste of the Mediterranean into your kitchen. The combination of the salty olives, the subtle sweetness of the honey, and the satisfying chew of the bread is simply irresistible. Don’t be afraid to experiment with different variations and find your perfect combination. And most importantly, share your freshly baked bread with friends and family – it’s always better when enjoyed together. Bon appétit!