
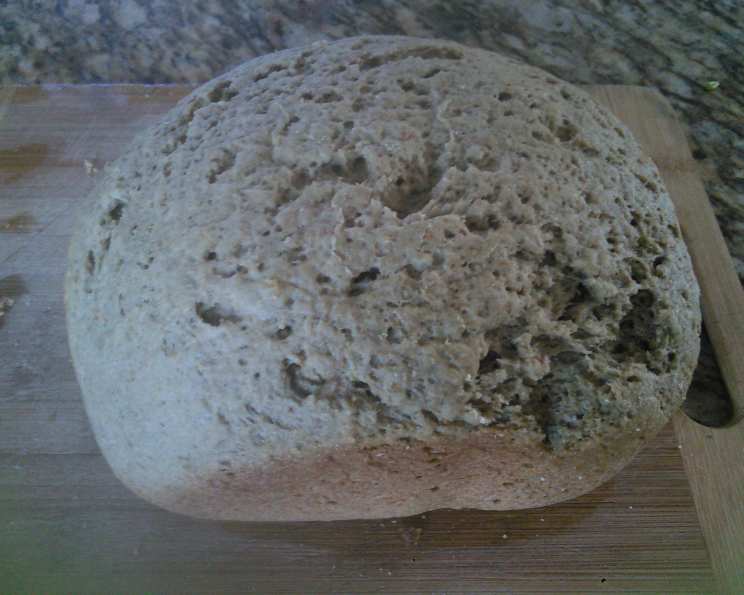
Savor the Ancient Grain: Kamut Bread, Wheat-Free and Wonderful
The smell of baking bread has always been a comforting constant in my life, a sensory thread connecting me to generations past. But when wheat sensitivities entered the picture, I thought those comforting aromas were a thing of the past. Then, I discovered kamut, an ancient grain with a delightfully nutty flavor. After countless trials, tweaks, and taste tests, I finally perfected this recipe for a soft, sliceable, and absolutely delicious kamut flour bread, all made effortlessly in a bread machine. It’s a taste of tradition, reimagined for a modern, wheat-free lifestyle.
Recipe Overview
- Prep Time: 15 minutes
- Cook Time: 3 hours 10 minutes
- Total Time: 3 hours 25 minutes
- Servings: Varies (approx. 12 slices)
- Yield: 1 loaf
- Dietary Type: Wheat-Free (potentially gluten-free, see notes)
Ingredients
- 4 cups kamut flour
- 2 teaspoons salt (can be reduced to taste)
- ½ teaspoon xanthan gum
- 3 tablespoons olive oil
- ¼ cup honey
- 1 ½ cups warm water (about 105-115°F)
- 3 teaspoons active dry yeast
Equipment Needed
- Bread machine
- Microwave-safe bowl or measuring cup
- Measuring cups and spoons
Instructions
-
In a large bowl (or directly in the bread machine pan, if your machine allows), combine the kamut flour, salt, and xanthan gum. Whisk to ensure even distribution of the xanthan gum, which is crucial for texture.
-
In a microwave-safe bowl or measuring cup, combine the olive oil, honey, and water. Microwave in 30-second increments, stirring between each, until the mixture is warm to the touch (about 105-115°F). Be careful not to overheat; hot water can kill the yeast. This is a critical step, so use a thermometer if you are unsure.
-
Add the liquid ingredients, dry ingredients, and yeast to the bread machine pan in the order specified by your bread machine manufacturer. Most machines recommend adding the liquids first, followed by the dry ingredients, and then the yeast on top. This prevents the yeast from activating prematurely.
-
Select the “basic bread” setting and a “light crust” setting on your bread machine. If your machine allows you to select the loaf size, choose the appropriate size for a standard loaf.
-
Start the bread machine. The machine will now handle the kneading, rising, and baking automatically.
-
Allow the bread to cool slightly in the bread machine pan before removing it. This prevents the bread from crumbling.
-
Transfer the bread to a wire rack to cool completely before slicing and serving. Cooling completely allows the starches to set and makes slicing easier.
Expert Tips & Tricks
- Xanthan Gum is Key: Don’t skip the xanthan gum! It acts as a gluten replacement, providing structure and preventing the bread from being crumbly.
- Kamut Flour Note: Kamut, while an ancient grain, does contain gluten. If you require a truly gluten-free loaf, this recipe will not work. Look for gluten-free flour blends specifically designed for bread machines.
- Honey Adjustments: The amount of honey can be adjusted to your preference. For a less sweet loaf, reduce the honey to 2 tablespoons.
- Salt Sensitivity: If you are sensitive to salt, reduce the amount to 1 ½ teaspoons. Kamut has a naturally nutty flavor, so you may not miss the added salt.
- Check the Dough: Keep an eye on the dough during the kneading process. If it appears too dry, add a tablespoon of water at a time until the dough forms a smooth ball. If it’s too wet, add a tablespoon of kamut flour at a time.
- Perfect Crust: For a slightly crispier crust, you can lightly brush the top of the loaf with olive oil before baking.
- Room Temperature Water: Make sure your tap water is at room temperature before putting it in the microwave. You are aiming to make it warm to the touch, but not hot.
Serving & Storage Suggestions
This kamut flour bread is delicious served warm with butter, jam, or a drizzle of olive oil. It also makes excellent toast and sandwiches.
- Storage: Store the cooled bread in an airtight container at room temperature for up to 3 days.
- Refrigeration: For longer storage, refrigerate the bread for up to a week.
- Freezing: To freeze the bread, slice it first and then wrap the slices tightly in plastic wrap or place them in a freezer-safe bag. Frozen bread will keep for up to 2 months.
- Reheating: Reheat slices of bread in a toaster, oven, or microwave. To reheat a whole loaf, wrap it in foil and bake at 350°F (175°C) for about 15-20 minutes.
Nutritional Information
Please note that nutritional information is an estimate and may vary based on specific ingredients and serving size.
| Nutrient | Amount per Serving (1 slice) | % Daily Value |
|---|---|---|
| Calories | 218 kcal | 11% |
| Total Fat | 6.5g | 8% |
| Saturated Fat | 0.9g | 4% |
| Cholesterol | 0mg | 0% |
| Sodium | 392mg | 16% |
| Total Carbohydrate | 35.4g | 12% |
| Dietary Fiber | 3.4g | 14% |
| Sugars | 5.2g | N/A |
| Protein | 5.9g | 12% |
Variations & Substitutions
- Spelt Flour: While I developed this recipe to get away from wheat, it works well with spelt flour. Keep in mind, however, that spelt is not gluten-free.
- Herbs and Spices: Add dried herbs such as rosemary, thyme, or oregano to the dry ingredients for a flavorful twist. You could also add a pinch of garlic powder or onion powder.
- Seeds: Incorporate seeds like sesame, poppy, or sunflower seeds for added texture and nutritional value.
- Sweetener: Replace the honey with maple syrup or agave nectar for a different flavor profile.
- Dairy-Free: The recipe is naturally dairy-free.
FAQs (Frequently Asked Questions)
Q: Can I make this bread without xanthan gum?
A: Xanthan gum is essential for providing structure and preventing the bread from crumbling since kamut flour lacks gluten. Skipping it will result in a dense and potentially inedible loaf.
Q: My bread machine has different settings. Which one should I use?
A: Use the “basic bread” setting with a “light crust” option. If your machine has a whole wheat setting, it might also work, but the basic setting is generally the best choice for kamut flour.
Q: The crust of my bread is too hard. What can I do?
A: Try reducing the baking time slightly or using a medium crust setting if your machine has one. You can also lightly brush the top of the loaf with olive oil immediately after baking to soften the crust.
Q: Can I use instant yeast instead of active dry yeast?
A: Yes, you can. Use the same amount (3 teaspoons) and add it directly to the dry ingredients. You don’t need to proof instant yeast beforehand.
Q: Why is my bread dense and gummy?
A: This could be due to several factors, including too much liquid, not enough yeast, or not enough kneading time. Ensure you are using the correct measurements and that your yeast is fresh.
Final Thoughts
This kamut flour bread recipe is more than just a way to enjoy a wheat-free slice; it’s an invitation to explore the rich flavors and textures of ancient grains. Don’t be afraid to experiment with variations and personalize it to your liking. I encourage you to try this recipe and discover the joy of baking your own wholesome, delicious bread. And of course, I always love to hear your feedback, so please feel free to share your experiences and any variations you try! Happy baking!