
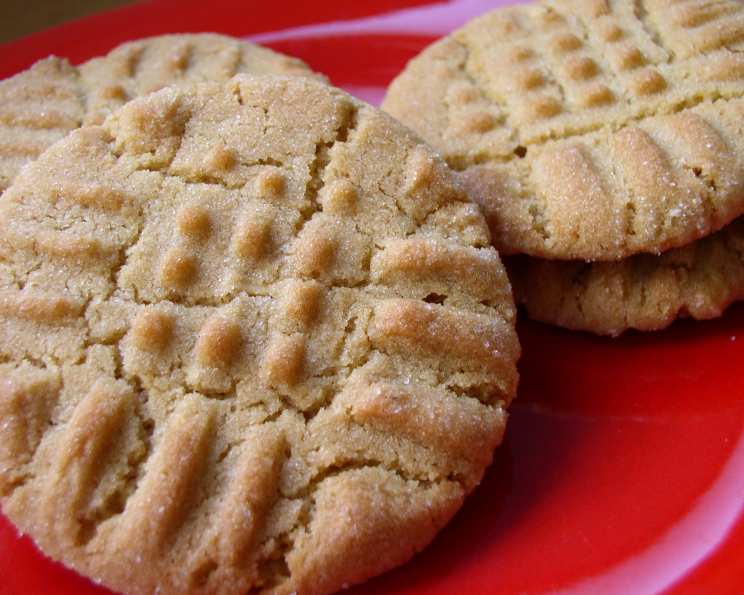
Karissa’s Soft and Yummy Peanut Butter Cookies
The scent of peanut butter cookies baking in the oven is a powerful time machine for me. One whiff, and I’m transported back to my grandmother’s kitchen, perched on a stool, watching her expertly roll dough between her palms. The warmth of the oven, the gentle hum of her humming, and the anticipation of that first, perfect bite – these are memories I cherish, and these cookies, simple as they are, carry that magic within each crumb.
Recipe Overview
- Prep Time: 15 minutes
- Cook Time: 8-10 minutes
- Total Time: 23-25 minutes
- Yields: Approximately 24 cookies
- Dietary Type: Not specified (Contains Gluten, Dairy, and Eggs)
Ingredients
- 1 ¾ cups flour
- 1 teaspoon baking soda
- ½ teaspoon salt
- ½ cup (1 stick) butter, softened
- ⅓ cup peanut butter
- ½ cup sugar
- 1 teaspoon vanilla extract
- 1 large egg
- ½ cup brown sugar, packed
- Hershey’s chocolate kisses (optional, for Peanut Butter Blossoms)
- Granulated Sugar (for rolling, optional)
Equipment Needed
- Mixing Bowls
- Measuring Cups and Spoons
- Cookie Sheets
- Fork
- Cooling Rack
Instructions
-
Preheat your oven to 350°F (175°C). Make sure your oven rack is positioned in the center.
-
In a medium-sized mixing bowl, sift together the flour, baking soda, and salt. Sifting ensures that there are no lumps and that the baking soda and salt are evenly distributed throughout the flour. Set this mixture aside.
-
In a large mixing bowl, cream together the softened butter, peanut butter, sugar, and vanilla extract. You can use a stand mixer or a hand mixer for this step. Creaming means beating the ingredients together until they are light and fluffy. This usually takes about 3-5 minutes.
-
Add the egg and brown sugar to the creamed mixture and continue to beat until well combined. The mixture should be smooth and creamy.
-
Gradually incorporate the dry ingredients (the flour mixture) into the wet ingredients (the butter and sugar mixture). Add the flour mixture a little at a time, mixing on low speed or by hand until just combined. Be careful not to overmix the dough, as this can result in tough cookies. The batter will be quite stiff, which is expected.
-
Using a teaspoon or a small cookie scoop, shape the dough into small balls. If desired, you can roll the balls in granulated sugar for an extra touch of sweetness and sparkle. This step is optional, but it does add a nice visual appeal to the cookies.
-
Place the dough balls onto ungreased cookie sheets, leaving about 2 inches between each cookie to allow for spreading.
-
If you are making plain peanut butter cookies, press down lightly on each cookie with a fork in a criss-cross pattern. This helps to flatten the cookies and create a signature peanut butter cookie look.
-
Bake for approximately 8-10 minutes, or until the edges of the cookies are lightly golden brown and the centers are set. Keep a close eye on the cookies, as baking times can vary depending on your oven.
-
If you want to make Peanut Butter Blossoms, skip the fork-pressing step before baking. Simply place the dough balls on the cookie sheet and bake for about 8 minutes.
-
Remove the cookies from the oven. If making blossoms, gently press a Hershey’s chocolate kiss onto the top of each cookie until the cookie cracks slightly. This adds a delicious chocolatey contrast to the peanut butter flavor.
-
Return the cookie sheet to the oven for another 2 minutes. This allows the chocolate kiss to soften slightly and adhere to the cookie.
-
Remove the cookies from the oven and let them cool on the cookie sheet for a few minutes before transferring them to a wire rack to cool completely. This prevents them from breaking apart while they are still warm and soft.
Expert Tips & Tricks
-
Soft Butter is Key: Using softened butter is crucial for achieving the right texture. The butter should be soft enough to press a finger into easily, but not melted.
-
Don’t Overmix: Overmixing the dough develops the gluten in the flour, resulting in tough cookies. Mix until just combined.
-
Chill the Dough (Optional): For thicker cookies, you can chill the dough for 30 minutes before baking. This will help prevent the cookies from spreading too much in the oven.
-
Baking Time Variations: Baking times may vary depending on your oven. Start checking for doneness at 8 minutes and adjust accordingly. If the bottoms are browning too quickly, you can double up on cookie sheets.
-
For Even Baking: Rotate the cookie sheets halfway through baking to ensure even browning.
Serving & Storage Suggestions
Serve these peanut butter cookies warm or at room temperature. They are delicious on their own or paired with a glass of cold milk.
Store leftover cookies in an airtight container at room temperature for up to 3-4 days. For longer storage, you can freeze the cookies in an airtight container for up to 2 months. Thaw frozen cookies at room temperature before serving.
To refresh slightly stale cookies, you can microwave them for a few seconds or warm them in a low oven for a few minutes.
Nutritional Information
Please note that these values are estimates and may vary based on specific ingredients and portion sizes.
| Nutrient | Amount per Serving | % Daily Value |
|---|---|---|
| Calories | 125 kcal | 6% |
| Total Fat | 5.9g | 9% |
| Saturated Fat | 2.9g | 14% |
| Cholesterol | 19mg | 6% |
| Sodium | 149.5mg | 6% |
| Total Carbohydrate | 16.3g | 5% |
| Dietary Fiber | 0.5g | 1% |
| Sugars | 9g | N/A |
| Protein | 2.1g | 4% |
Variations & Substitutions
-
Gluten-Free: Substitute the all-purpose flour with a gluten-free blend, ensuring it contains xanthan gum for binding.
-
Dairy-Free: Use a dairy-free butter alternative such as coconut oil or a vegan butter stick.
-
Different Nut Butters: Experiment with almond butter, cashew butter, or sunflower seed butter for a different flavor profile.
-
Add-ins: Stir in chocolate chips, chopped nuts, or dried cranberries for added texture and flavor.
-
Spiced Peanut Butter Cookies: Add a pinch of cinnamon, nutmeg, or ginger to the dough for a warm, spiced flavor.
FAQs (Frequently Asked Questions)
Q: Why are my peanut butter cookies dry and crumbly?
A: This is likely due to overbaking or using too much flour. Be sure to measure the flour accurately and avoid overbaking the cookies.
Q: Can I use natural peanut butter for this recipe?
A: Yes, but natural peanut butter can result in a slightly drier cookie. You may need to add a tablespoon or two of oil to the dough to compensate for the lack of added oils in natural peanut butter.
Q: My cookies spread out too much. What did I do wrong?
A: This could be due to using melted butter instead of softened butter, or not chilling the dough. Try chilling the dough for 30 minutes before baking to prevent excessive spreading.
Q: Can I freeze the cookie dough?
A: Yes, you can freeze the dough for up to 2 months. Shape the dough into balls, place them on a cookie sheet, and freeze until solid. Then, transfer the frozen dough balls to a freezer bag. Bake from frozen, adding a few minutes to the baking time.
Q: What’s the best way to store these cookies to keep them soft?
A: Store the cookies in an airtight container with a slice of bread. The bread will help absorb moisture and keep the cookies soft.
Final Thoughts
I hope these peanut butter cookies bring you as much joy as they have brought me over the years. This recipe is incredibly versatile, so feel free to experiment with different variations and substitutions to create your own signature peanut butter cookie. Whether you’re baking them for a special occasion or simply craving a sweet treat, these cookies are sure to be a hit. Don’t hesitate to share your feedback and any creative twists you come up with! Happy baking!