
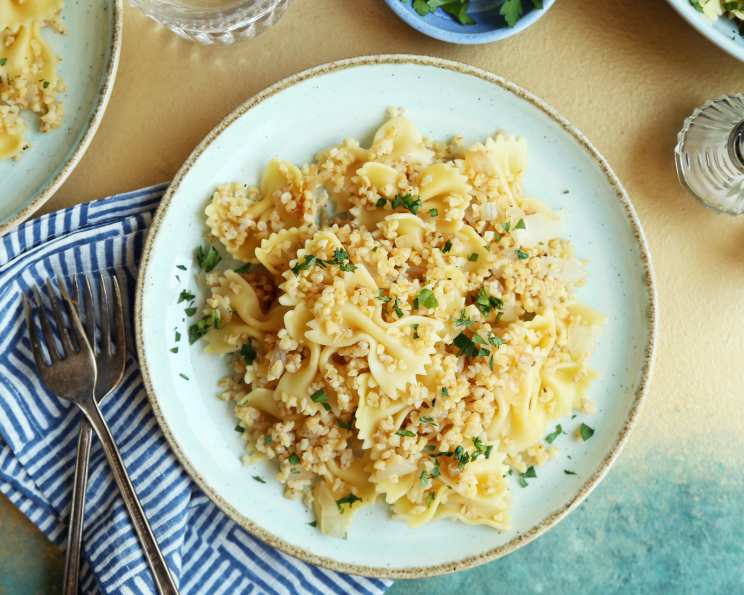
Kasha Varnishkes: A Taste of Home
The smell of caramelized onions always takes me back to my grandmother’s kitchen. Bubbe Rose would stand over her ancient gas stove, patiently coaxing sweetness from humble onions while the aroma mingled with the nutty scent of toasted buckwheat. This dish, Kasha Varnishkes, was more than just food; it was a symbol of family, tradition, and the simple pleasures of life. Every bite was a warm hug, a taste of love passed down through generations.
Recipe Overview
- Prep Time: 20 minutes
- Cook Time: 25 minutes
- Total Time: 45 minutes
- Servings: 6
- Dietary Type: Vegetarian (easily adapted to vegan with oil instead of chicken fat and vegetable stock instead of chicken stock)
Ingredients
- 1 cup buckwheat groats
- 1 egg
- 1 cup uncooked bow tie pasta (or other short, flat noodle) or 1 cup uncooked gluten-free egg noodles (or other short, flat noodle)
- 2 cups chicken stock, brought to a boil
- 1 teaspoon salt
- 1 quart water
- ½ teaspoon ground black pepper
- 3 tablespoons corn oil or 3 tablespoons chicken fat (schmaltz)
- 1 ½ large onions, chopped coarsely
Equipment Needed
- Small bowl
- Medium saucepan
- Wooden spoon
- Pot for pasta
- Skillet
Instructions
- In a small bowl, beat the egg until lightly frothy. Add the buckwheat groats to the bowl and stir until every grain is well coated with egg. This step is crucial as the egg helps to separate the grains and prevent them from clumping together during cooking.
- Place the egg-coated kasha in a medium saucepan over medium heat. Using a wooden spoon, stir constantly until the egg begins to dry and the groats separate. Some of the groats may stick together and/or brown slightly; this is perfectly normal and contributes to the overall flavor. The stirring ensures even toasting and prevents scorching.
- Carefully pour the boiling chicken stock over the kasha in the saucepan. Be cautious as it may splatter. Mix in the salt and pepper and stir thoroughly to combine all ingredients.
- Cover the saucepan tightly with a lid. Reduce the heat to low and cook for 10 to 15 minutes, or until the kasha has absorbed all of the liquid. The timing may vary slightly depending on the size of your pot and the heat of your burner, so check for doneness after 10 minutes. The kasha is ready when it’s tender and all the liquid has been absorbed. Remove from heat.
- While the kasha is cooking, prepare the noodles. In a separate pot, bring the water to a rolling boil. Add the bow tie pasta (or gluten-free alternative) and cook until al dente, following the package directions.
- Once the pasta is cooked, drain it thoroughly in a colander. Set aside.
- In a large skillet, heat the corn oil (or schmaltz) over a medium flame. Add the chopped onions and sauté, stirring frequently, until they are thoroughly browned and caramelized. This step is vital for developing the rich, savory flavor of the dish. Don’t rush the caramelization process; allow the onions to cook slowly and evenly until they achieve a deep golden-brown color. If using schmaltz, be careful not to burn it.
- Add the caramelized onions and the cooked noodles to the pot of kasha. Stir gently to combine all of the ingredients. Taste and adjust the salt and pepper to your liking.
Expert Tips & Tricks
- Toasting the Kasha: Don’t skip the step of toasting the kasha with the egg. This enhances the nutty flavor and prevents it from becoming mushy during cooking.
- Caramelizing Onions: The secret to deeply flavorful Kasha Varnishkes lies in properly caramelized onions. Be patient and allow them to cook slowly over medium heat until they are a rich, golden brown.
- Using Schmaltz: If you are not vegetarian or vegan, using schmaltz (rendered chicken fat) adds a wonderful depth of flavor.
- Stock Choice: For a richer flavor, use homemade chicken stock. Vegetable stock works beautifully for a vegetarian version.
- Make-Ahead Tip: The caramelized onions can be made ahead of time and stored in the refrigerator for up to 3 days.
Serving & Storage Suggestions
Kasha Varnishkes is best served warm. It makes a delicious side dish alongside roasted chicken, brisket, or vegetarian mains like mushroom stroganoff. It can also be served as a main course, especially for a comforting and hearty lunch. Garnish with fresh parsley or dill for added freshness.
- Storage: Leftovers can be stored in an airtight container in the refrigerator for up to 3 days.
- Reheating: Reheat gently in a skillet over low heat, adding a splash of broth or water if necessary to prevent sticking. You can also microwave it in short intervals, stirring in between, until heated through.
- Freezing: Kasha Varnishkes can be frozen for up to 2 months. Thaw overnight in the refrigerator before reheating.
Nutritional Information
| Nutrient | Amount per Serving | % Daily Value |
|---|---|---|
| Calories | 250 kcal | 13% |
| Total Fat | 8g | 10% |
| Saturated Fat | 1g | 5% |
| Cholesterol | 35mg | 12% |
| Sodium | 600mg | 26% |
| Total Carbohydrate | 35g | 13% |
| Dietary Fiber | 3g | 11% |
| Sugars | 5g | |
| Protein | 8g | 16% |
Note: Nutritional information is an estimate and may vary based on specific ingredients and cooking methods.
Variations & Substitutions
- Gluten-Free: Use gluten-free bow tie pasta or other short, flat gluten-free noodles. Make sure your stock is also gluten-free.
- Vegan: Substitute corn oil (or another vegetable oil) for the chicken fat and use vegetable stock instead of chicken stock. Omit the egg and proceed directly to toasting the kasha.
- Add Mushrooms: Sauté sliced mushrooms along with the onions for an earthier flavor.
- Spice it Up: Add a pinch of red pepper flakes to the onions for a touch of heat.
- Herbs: Stir in fresh dill or parsley at the end for added freshness.
- Different Grains: While traditionally made with buckwheat groats, you could experiment with other grains like quinoa or barley, adjusting the cooking time as needed.
FAQs (Frequently Asked Questions)
Q: Why is it important to toast the kasha with the egg?
A: Toasting the kasha with the egg helps to dry out the grains, preventing them from becoming mushy during cooking and enhancing their nutty flavor. It also helps the grains separate properly.
Q: Can I use a different type of noodle?
A: Absolutely! While bow tie pasta is traditional, you can use any short, flat noodle like farfalle, rotini, or even small shells.
Q: How do I know when the onions are properly caramelized?
A: The onions should be a deep golden-brown color and very soft and sweet. It takes time, so be patient and stir them frequently to prevent burning.
Q: Can I make this dish ahead of time?
A: Yes, you can make the Kasha Varnishkes ahead of time and reheat it when needed. Store it in the refrigerator for up to 3 days. You may need to add a splash of broth or water when reheating to prevent it from drying out.
Q: Is buckwheat groats gluten-free?
A: Yes, buckwheat groats are naturally gluten-free, despite their name. However, it’s always a good idea to check the packaging to ensure it hasn’t been processed in a facility that also handles wheat.
Final Thoughts
Kasha Varnishkes is more than just a simple side dish; it’s a connection to our past, a celebration of simple ingredients, and a reminder of the warmth of home. I encourage you to try this recipe and experience the comforting flavors for yourself. Feel free to experiment with different variations and substitutions to make it your own. And most importantly, share it with loved ones and create your own memories around this classic dish. Let me know how it turns out!