
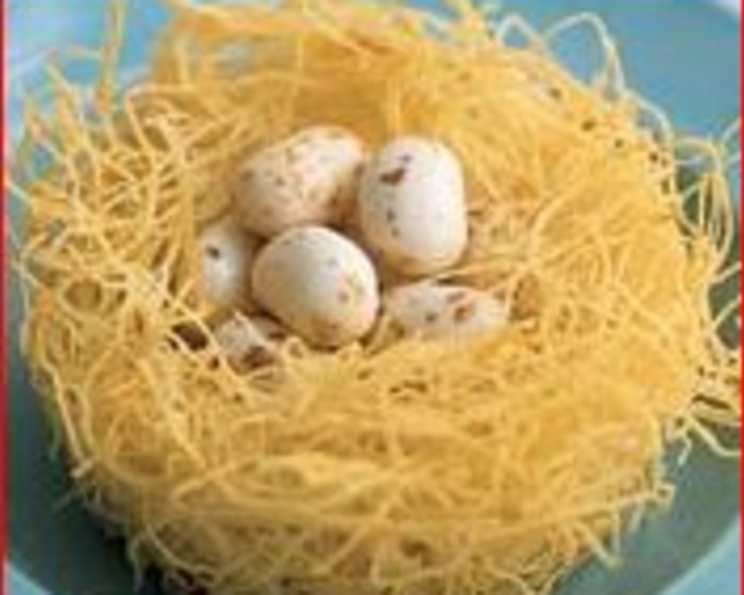
Kataifi Nests: A Sweet Springtime Treat
The memory is still so vivid. As a young apprentice, I remember Easter mornings spent shaping delicate strands of kataifi dough into tiny nests, each one a promise of the sweet treats to come. The aroma of warm butter and cinnamon filled the bakery, a symphony of spring, as we carefully arranged these edible nests, anticipating the smiles they would bring. Even now, the sight of golden kataifi nests evokes those cherished moments, a reminder of the simple joys found in creating something beautiful and delicious.
Recipe Overview
- Prep Time: 15 minutes
- Cook Time: 15-20 minutes
- Total Time: 30-35 minutes
- Servings: 12 Nests
- Yields: 12 Nests
- Dietary Type: Vegetarian
Ingredients
- 3 tablespoons unsalted butter, melted, plus more for greasing the tin
- 4 ounces shredded phyllo dough, thawed (known as kataifi)
- 4 teaspoons sugar
- 1 teaspoon ground cinnamon (optional)
Equipment Needed
- 12-cup muffin tin (standard or silicone)
- Mixing bowl
Instructions
-
Preheat your oven to 375 degrees Fahrenheit (190 degrees Celsius). This temperature ensures the kataifi becomes golden brown and crisp without burning.
-
Prepare the muffin tin: Generously brush a 12-cup muffin tin with melted butter. Alternatively, you can use silicone muffin pans, which require little to no greasing. This step prevents the nests from sticking and ensures easy removal.
-
Prepare the kataifi: Gently pull the thawed kataifi dough apart into smaller, manageable bundles, about 1-inch thick. Then, cut these bundles into approximately 2-inch lengths. This makes it easier to work with the delicate strands.
-
Combine ingredients: Place the cut kataifi strands in a mixing bowl. Using your fingers, gently separate the strands into a loose pile, ensuring they don’t clump together.
-
Season the kataifi: Pour the melted butter over the kataifi. Sprinkle the sugar evenly over the dough, and add the ground cinnamon if desired.
-
Toss to coat: Gently toss the kataifi mixture with your fingers, ensuring that the butter, sugar, and cinnamon are evenly distributed throughout. Be careful not to tear the delicate strands.
-
Shape the nests: Divide the kataifi mixture evenly among the 12 muffin cups. Press the mixture firmly into the bottom and up the sides of each cup, creating a nest-like shape. Ensure the base is relatively compact to hold the filling later.
-
Bake the nests: Place the muffin tin in the preheated oven and bake for 15 to 20 minutes, or until the kataifi is golden brown and crisp around the edges. Keep a close eye on the nests during the last few minutes of baking to prevent burning. The edges should be a rich golden color.
-
Cool completely: Remove the muffin tin from the oven and let the kataifi nests cool completely in the tin. This allows them to firm up and makes them easier to remove. If using a metal tin, you can gently loosen the edges with a thin knife or spatula before inverting.
-
Fill the nests: Once the kataifi nests are completely cool, carefully remove them from the muffin tin. Fill each nest with your choice of treats, such as jelly beans, speckled eggs, or other candy eggs.
Expert Tips & Tricks
- Thawing Kataifi: Ensure the kataifi dough is fully thawed before using it. Partially thawed dough will be difficult to work with and may break easily. Thaw it in the refrigerator overnight for best results.
- Preventing Sticking: If you’re using a metal muffin tin, generously buttering each cup is crucial. For extra insurance, you can dust the buttered cups with a light coating of flour.
- Even Baking: To ensure even baking, rotate the muffin tin halfway through the baking time. This helps the kataifi nests brown uniformly.
- Crispy Texture: For an extra crispy texture, you can brush the baked nests with a light coating of simple syrup immediately after removing them from the oven. This will also add a touch of sweetness.
- Flavor Variations: Experiment with different flavorings by adding a pinch of cardamom, nutmeg, or orange zest to the kataifi mixture. You can also use different types of sugar, such as brown sugar or coconut sugar, for a richer flavor.
- Working with Kataifi: Kataifi dough dries out quickly, so keep the unused portion covered with a damp cloth while you work.
- Oven Calibration: Ovens vary, so adjust baking time accordingly. If your nests are browning too quickly, lower the oven temperature slightly.
Serving & Storage Suggestions
Serve the Kataifi nests immediately after filling them for the best taste and texture. The kataifi is most crisp when freshly baked.
- Serving: Arrange the filled nests on a decorative platter or in individual dessert cups. Consider adding a dusting of powdered sugar or a drizzle of melted chocolate for an extra touch of elegance.
- Storage: Store unfilled baked nests in an airtight container at room temperature for up to 3 days. Filled nests are best consumed immediately, but can be stored in an airtight container in the refrigerator for up to 24 hours. The kataifi may soften slightly during refrigeration.
- Freezing: Baked, unfilled nests can be frozen for up to 1 month. Thaw completely at room temperature before filling.
- Reheating: If desired, you can reheat the nests in a low oven (300 degrees Fahrenheit/150 degrees Celsius) for a few minutes to crisp them up before filling.
Nutritional Information
(Estimated values per nest, without fillings)
| Nutrient | Amount per Serving | % Daily Value |
|---|---|---|
| Calories | 60 kcal | 3% |
| Total Fat | 3.5g | 5% |
| Saturated Fat | 2g | 9% |
| Cholesterol | 7.6mg | 2% |
| Sodium | 46.1mg | 1% |
| Total Carbohydrate | 6.4g | 2% |
| Dietary Fiber | 0.2g | 0% |
| Sugars | 1.4g | 5% |
| Protein | 0.7g | 1% |
Variations & Substitutions
- Gluten-Free: While traditional kataifi is made with wheat-based phyllo dough, you may be able to find gluten-free alternatives in some specialty stores or online. Look for kataifi made from rice flour or other gluten-free flours.
- Vegan: Substitute the butter with a vegan butter alternative or melted coconut oil. Ensure your chosen filling is also vegan-friendly.
- Flavor Enhancements: Infuse the melted butter with citrus zest (lemon, orange) or spices (cardamom, nutmeg) for a unique flavor profile.
- Nut Filling: Instead of candy, fill the nests with a mixture of chopped nuts, honey, and spices for a more sophisticated treat. Try walnuts, pistachios, or almonds.
- Savory Nests: For a savory twist, omit the sugar and cinnamon. Fill the nests with cooked vegetables, cheeses, or meats for a delicious appetizer.
FAQs (Frequently Asked Questions)
Q: Can I make these nests ahead of time?
A: Yes, you can bake the nests ahead of time and store them in an airtight container at room temperature for up to 3 days. Fill them just before serving to maintain their crispness.
Q: My kataifi dough is dry and brittle. What can I do?
A: Lightly spritz the kataifi dough with water before working with it to help rehydrate it. Also, be sure to keep the unused portion covered with a damp cloth to prevent it from drying out further.
Q: Can I use a different type of muffin tin?
A: Yes, you can use a mini muffin tin for smaller nests or a jumbo muffin tin for larger nests. Adjust the baking time accordingly.
Q: What if I don’t have muffin tins?
A: You can create individual nests on a baking sheet lined with parchment paper. Shape the kataifi into nests using your hands and bake as directed.
Q: Can I add nuts to the kataifi mixture?
A: Absolutely! Chopped nuts like pistachios, almonds, or walnuts can be added to the kataifi mixture for extra flavor and texture.
Final Thoughts
These Kataifi Nests are more than just a dessert; they’re a celebration of spring, a delightful expression of culinary creativity, and a sweet reminder of cherished traditions. Don’t hesitate to embrace the joy of creating these delicate treats. Feel free to experiment with different fillings and flavors to make them your own. Whether you’re preparing them for an Easter gathering or simply seeking a delicious and unique treat, these Kataifi Nests are sure to impress. Share your creations and feedback – I’d love to hear about your personal touch on this delightful recipe. Pair these nests with a light, floral tea for a perfectly balanced experience.