
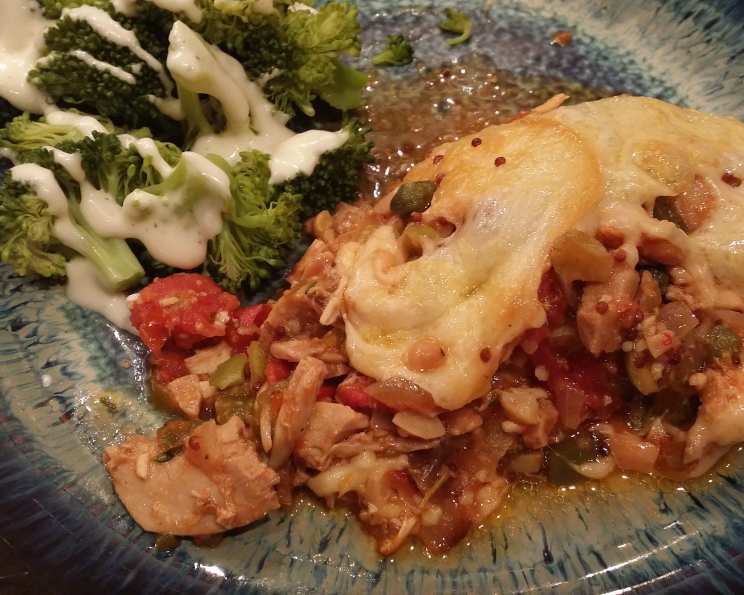
Keshi Yena: A Taste of Aruban Sunshine
The first time I tasted Keshi Yena, it wasn’t in a fancy restaurant or a sun-drenched Aruban villa, but at a potluck hosted by a friend who’d just returned from a Caribbean cruise. The savory aroma wafting from the baking dish – a tantalizing blend of cheese, spices, and something distinctly island – immediately captivated me. One bite of the warm, cheesy concoction, brimming with flavorful chicken and briny olives, and I was transported. It was like sunshine on a plate, a culinary postcard from a place I instantly longed to visit. That first bite sparked a fascination with Aruban cuisine, and Keshi Yena became my personal quest: to recreate that unforgettable flavor and share it with everyone I know.
Recipe Overview
- Prep Time: 20 minutes
- Cook Time: 30 minutes
- Total Time: 50 minutes
- Servings: 4-6
- Yield: 1 casserole
- Dietary Type: Not Gluten-Free
Ingredients
- 1 large onion, chopped
- 4 tablespoons butter
- 2 cups diced cooked chicken
- 1 large tomato, peeled and chopped
- 2 dill pickles, minced
- 1 large green pepper, seeded and finely chopped
- 8 large stuffed green olives, sliced
- 1 1/2 tablespoons garlic, minced
- 1 tablespoon capers, rinsed
- 1/4 cup golden raisins
- 1 tablespoon prepared mustard
- 1/2 cup ketchup
- 1/2 teaspoon Worcestershire sauce
- 1 cup chopped cashews
- 1 teaspoon fresh thyme, minced
- 1 lb gouda cheese, sliced
Equipment Needed
- Baking pan (casserole dish or pie dish)
- Large skillet
- Cutting board
- Knife
- Measuring cups and spoons
Instructions
-
Preheat your oven to 350°F (175°C). This ensures even cooking and allows the cheese to melt beautifully without burning the filling.
-
In a large skillet, melt the butter over medium heat. Be careful not to burn the butter; a gentle melt is all you need.
-
Add the chopped onion to the melted butter and sauté until it turns a golden brown color. This step is crucial for developing a rich, sweet flavor base for the entire dish. Don’t rush it!
-
Stir in the remaining ingredients, except for the gouda cheese. This includes the diced cooked chicken, peeled and chopped tomato, minced dill pickles, finely chopped green pepper, sliced stuffed green olives, minced garlic, rinsed capers, golden raisins, prepared mustard, ketchup, Worcestershire sauce, chopped cashews, and minced fresh thyme. Ensure everything is well combined.
-
Simmer the chicken mixture for about 5-7 minutes, stirring occasionally, allowing the flavors to meld together harmoniously. This step adds depth and complexity to the overall taste.
-
Lightly butter a baking pan. This prevents the Keshi Yena from sticking and makes serving easier. A casserole dish or a pie dish works perfectly.
-
Line the bottom and sides of the buttered baking pan with slices of gouda cheese, overlapping them slightly to create a cheesy “crust.” This cheese layer is the hallmark of Keshi Yena, providing a salty, creamy counterpoint to the savory filling.
-
Carefully pour the prepared chicken mixture evenly over the layer of gouda cheese in the baking pan.
-
Top the chicken mixture with the remaining slices of gouda cheese, ensuring the entire surface is covered. This creates a protective layer that will melt beautifully and add a rich, cheesy flavor to the top of the dish.
-
Bake in the preheated oven at 350°F (175°C) for approximately 30 minutes. The cheese should be melted and bubbly, and the filling heated through.
-
After baking for 30 minutes, switch your oven to the broiler setting and broil for a few minutes, just long enough to start browning the cheese. Watch it very carefully to prevent burning! The goal is a golden-brown, slightly bubbly crust.
-
Remove from the oven and let it cool slightly before serving. This allows the cheese to set a bit and prevents burning your mouth.
Expert Tips & Tricks
-
Cheese Matters: While the recipe calls for Gouda, you can experiment with other semi-hard cheeses like Edam or even a mild cheddar for a different flavor profile.
-
Chicken Prep: Use leftover roasted chicken or rotisserie chicken to save time. Dicing the chicken into even pieces ensures uniform cooking.
-
Spice It Up: For a spicier kick, add a pinch of Scotch bonnet pepper or a dash of hot sauce to the chicken mixture. Remember, a little goes a long way!
-
Make Ahead: You can prepare the chicken mixture a day in advance and store it in the refrigerator. This allows the flavors to meld even further and saves time on the day of serving.
-
Broiler Beware: Broiling is a quick way to brown the cheese, but it can also lead to burning if you’re not careful. Keep a close eye on the dish and remove it from the oven as soon as the cheese is golden brown.
Serving & Storage Suggestions
Keshi Yena is best served warm. Cut it into wedges and serve as a main course, accompanied by a fresh salad or some Aruban-style rice and beans (often called arroz moro). Garnish with a sprig of fresh thyme or parsley for an elegant presentation.
Leftovers can be stored in an airtight container in the refrigerator for up to 3 days. To reheat, simply microwave individual portions or warm the entire dish in a low oven until heated through. Be careful not to overheat, as the cheese can become rubbery.
Freezing is not recommended, as the texture of the cheese may change upon thawing.
Nutritional Information
| Nutrient | Amount per Serving | % Daily Value |
|---|---|---|
| Calories | 750 kcal | 38% |
| Total Fat | 55g | 85% |
| Saturated Fat | 28g | 140% |
| Cholesterol | 180mg | 60% |
| Sodium | 1800mg | 75% |
| Total Carbohydrate | 30g | 10% |
| Dietary Fiber | 3g | 12% |
| Sugars | 18g | – |
| Protein | 45g | 90% |
Note: Nutritional information is an estimate and may vary based on specific ingredients and portion sizes.
Variations & Substitutions
-
Vegetarian Keshi Yena: Substitute the chicken with cooked lentils or black beans for a vegetarian version.
-
Gluten-Free Option: While traditional Keshi Yena isn’t gluten-free, you can adapt it by using gluten-free crackers or breadcrumbs in the chicken mixture. Also, double-check that your Worcestershire sauce is gluten-free.
-
Seafood Keshi Yena: Replace the chicken with cooked shrimp or crabmeat for a seafood variation.
-
Spicy Variation: Add a finely chopped habanero pepper (use with caution!) or a dash of your favorite hot sauce to the chicken mixture for a spicier kick.
-
Coconut Milk: Instead of buttering the pan you could also lightly coat it with coconut milk to add a subtle sweetness to this dish.
FAQs (Frequently Asked Questions)
Q: Can I use a different type of cheese instead of Gouda?
A: Yes, you can experiment with other semi-hard cheeses like Edam, Gruyere, or even a mild cheddar. The flavor will be slightly different, but still delicious.
Q: Is it necessary to peel the tomato?
A: Peeling the tomato is recommended to avoid any tough skin in the final dish. However, if you’re short on time, you can skip this step.
Q: Can I make this ahead of time?
A: Absolutely! You can prepare the chicken mixture a day in advance and store it in the refrigerator. Assemble and bake just before serving.
Q: What can I serve with Keshi Yena?
A: Keshi Yena pairs well with a fresh green salad, rice and beans, or plantains.
Q: Can I freeze Keshi Yena?
A: Freezing is not recommended, as the texture of the cheese may change upon thawing. It’s best enjoyed fresh or within a few days of making.
Final Thoughts
Keshi Yena is more than just a recipe; it’s a culinary journey to the vibrant island of Aruba. The combination of savory chicken, briny olives, and creamy cheese creates a symphony of flavors that is both comforting and exotic. I encourage you to try this recipe and experience the taste of Aruban sunshine in your own kitchen. Don’t be afraid to experiment with different cheeses or spices to create your own unique version. And most importantly, share it with friends and family and spread the joy of this delightful Caribbean dish! Enjoy!